Husqvarna HU700L Owners Manual - Page 14
Service And Adjustments, Storage - problems
 |
View all Husqvarna HU700L manuals
Add to My Manuals
Save this manual to your list of manuals |
Page 14 highlights
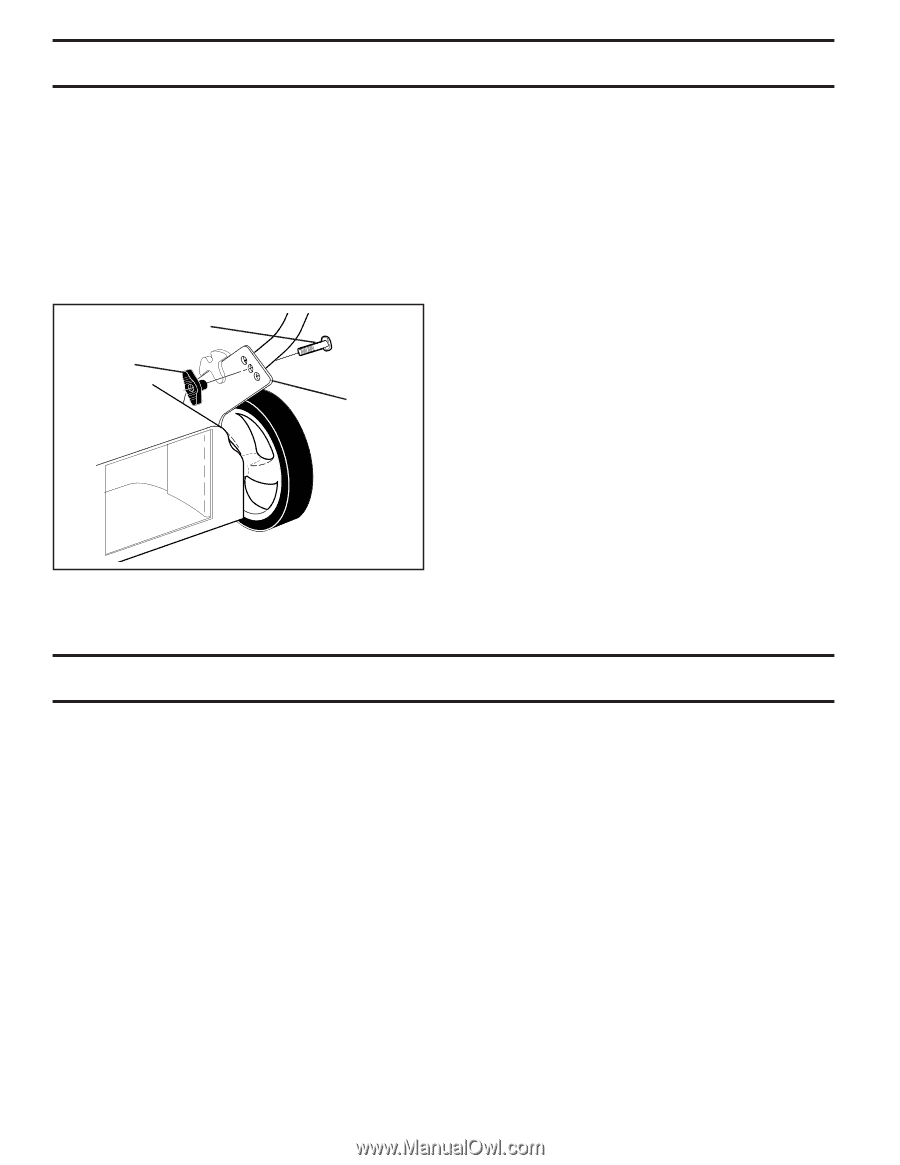
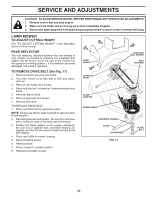
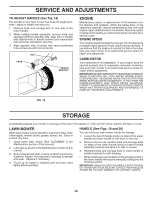
SERVICE AND ADJUSTMENTS TO ADJUST HANDLE (See Fig. 18) The handle on your lawn mower has three (3) height positions - adjust to height that suits you. 1. Remove knob and carriage bolt on one side of the lower handle. 2. While holding handle assembly, remove knob and carriage bolt from opposite side, align hole in handle with desired hole in handle bracket and reassemble bolt and knob and tighten securely. 3. Align opposite side of handle with same positioning hole and secure with bolt and knob. BOLT KNOB HANDLE BRACKET ENGINE Maintenance, repair, or replacement of the emission control devices and systems, which are being done at the customers expense, may be performed by any non-road engine repair establishment or individual. Warranty repairs must be performed by an authorized engine manufacturer's service outlet. ENGINE SPEED Your engine speed has been factory set. Do not attempt to increase engine speed or it may result in personal injury. If you believe that the engine is running too fast or too slow, take your lawn mower to an authorized service center for repair and adjustment. CARBURETOR Your carburetor is not adjustable. If your engine does not operate properly due to suspected carburetor problems, take your lawn mower to an authorized service center for repair and/or adjustment. IMPORTANT: NEVERTAMPERWITHTHEENGINEGOVERNOR, WHICH IS FACTORY SET FOR PROPER ENGINE SPEED. OVERSPEEDING THE ENGINE ABOVE THE FACTORY HIGH SPEED SETTING CAN BE DANGEROUS. IF YOU THINK THE ENGINE-GOVERNED HIGH SPEED NEEDS ADJUSTING, CONTACT YOUR NEARESTAUTHORIZED SERVICE CENTER, WHICH HAS PROPER EQUIPMENT AND EXPERIENCE TO MAKE ANY NECESSARY ADJUSTMENTS. FIG. 18 STORAGE Immediately prepare your mower for storage at the end of the season or if the unit will not be used for 30 days or more. LAWN MOWER When lawn mower is to be stored for a period of time, clean it thoroughly, remove all dirt, grease, leaves, etc. Store in a clean, dry area. 1. Clean entire lawn mower (See "CLEANING" in the Maintenance section of this manual). 2. Lubricate as shown in the Maintenance section of this manual. 3. Be sure that all nuts, bolts, screws, and pins are securely fastened. Inspect moving parts for damage, breakage and wear. Replace if necessary. 4. Touch up all rusted or chipped paint surfaces; sand lightly before painting. HANDLE (See Figs. 19 and 20) You can fold your lawn mower handle for storage. 1. Loosen the two (2) handle knobs on sides of the upper handle and allow handle to fold down to the rear. 2. Remove the two (2) handle knobs and carriage bolts on sides of the lower handle and pivot entire handle assembly forward and allow it to rest on mower. 3. Reinstall knobs and carriage bolts to lower handle or handle brackets for safe keeping. • When setting up your handle from the storage position, the lower handle will require manually locking into the mowing position. IMPORTANT: WHEN FOLDING THE HANDLE FOR STORAGE OR TRANSPORTATION, BE SURE TO FOLD THE HANDLE AS SHOWN OR YOU MAY DAMAGE THE CONTROL CABLES. 14
-
 1
1 -
2
-
3
-
4
-
5
-
6
-
7
-
8
-
 9
9 -
 10
10 -
 11
11 -
 12
12 -
 13
13 -
 14
14 -
 15
15 -
 16
16 -
 17
17 -
 18
18 -
 19
19 -
20
 |
 |