Husqvarna YTH22V46 Instruction Manual - Page 20
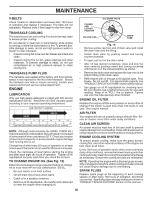
TO LEVEL MOWER, IMPORTANT, CAUTION: Blades are sharp. Protect, your hands with gloves and/or wrap - deck
 |
View all Husqvarna YTH22V46 manuals
Add to My Manuals
Save this manual to your list of manuals |
Page 20 highlights
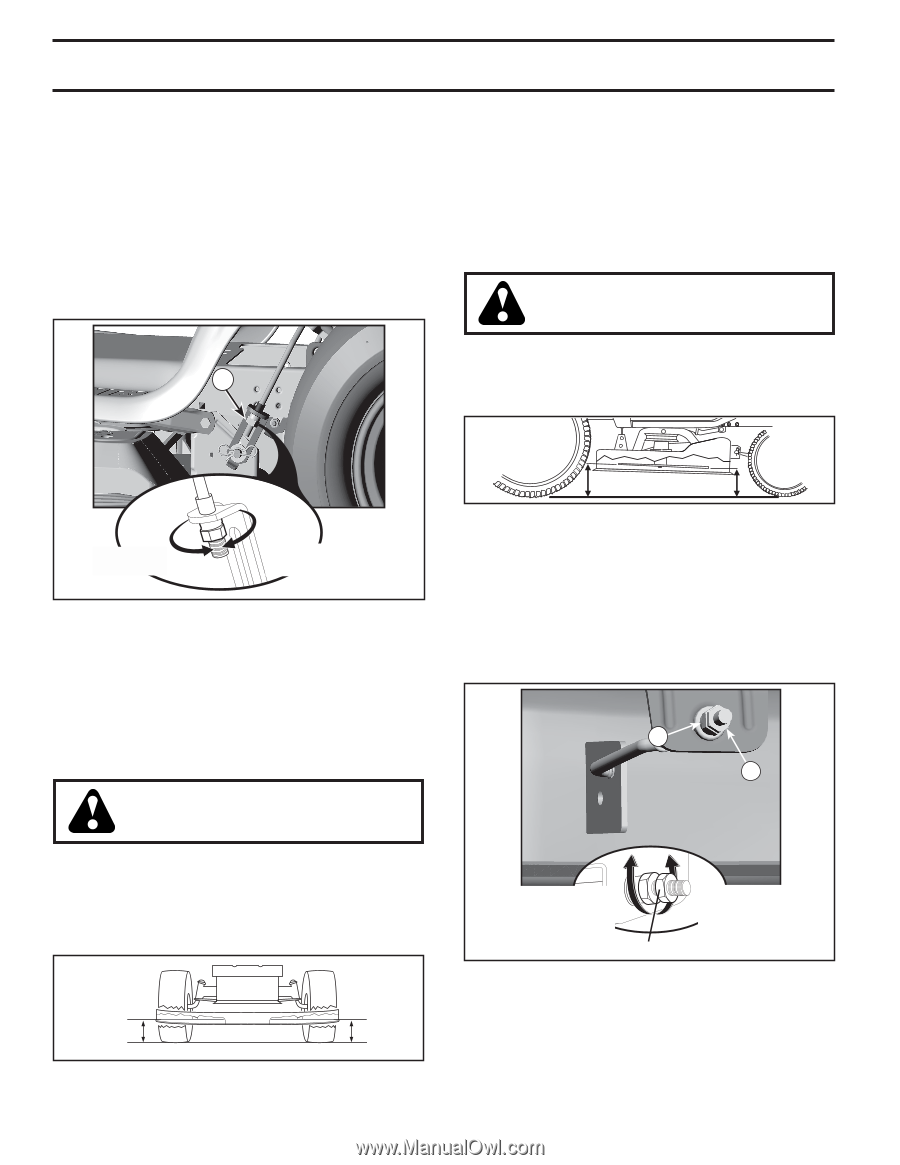
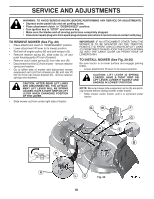
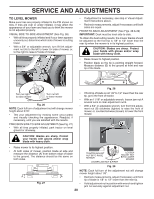
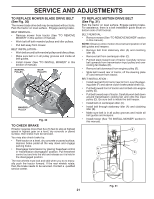
SERVICE AND ADJUSTMENTS TO LEVEL MOWER Make sure tires are properly inflated to the PSI shown on tires. If tires are over or under inflated, it may affect the appearance of your lawn and lead you to think the mower is not adjusted properly. VISUAL SIDE-TO-SIDE ADJUSTMENT (See Fig. 26) • With all tires properly inflated and if your lawn appears unevenly cut, determine which side of mower is cutting lower. • With a 3/4" or adjustable wrench, turn lift link adjustment nut (A) to the left to lower LH side of mower, or, to the right to raise LH side of mower. A • If adjustment is necessary, see step in Visual Adjustment instructions above. • Recheck measurements, adjust if necessary until both sides are equal. FRONT-TO-BACK ADJUSTMENT (See Figs. 28 & 29) IMPORTANT: Deck must be level side-to-side. To obtain the best cutting results, the mower blades should be adjusted so the front tip is 1/8" to 1/2" lower than the rear tip when the mower is in its highest position. CAUTION: Blades are sharp. Protect your hands with gloves and/or wrap blade with heavy cloth. • Raise mower to highest position. • Position blade so the tip is pointing straight forward. Measure distance (B) to the ground at front and rear tip of the blade. B B Turn nut right to raise mower Turn nut left to lower mower 02948 Fig. 26 NOTE: Each full turn of adjustment nut will change mower height about 3/16". • Test your adjustment by mowing some uncut grass and visually checking the appearance. Readjust, if necessary, until you are satisfied with the results. PRECISION SIDE-TO-SIDE ADJUSTMENT (See Fig. 27) • With all tires properly inflated, park tractor on level ground or driveway. CAUTION: Blades are sharp. Protect your hands with gloves and/or wrap blade with heavy cloth. Fig. 28 • If front tip of blade is not 1/8" to 1/2" lower than the rear tip, go to the front of tractor. • With an 11/16" or adjustable wrench, loosen jam nut A several turns to clear adjustment nut B. • With a 3/4" or adjustable wrench, turn front link adjust- ment nut (B) clockwise (tighten) to raise the front of mower, or, counterclockwise (loosen) to lower the front mower. B A • Raise mower to its highest position. • At both sides of mower, position blade at side and measure the distance (A) from bottom edge of blade to the ground. The distance should be the same on both sides. TIGHTEN ADJUST NUT B TO RAISE MOWER 02950 LOOSEN JAM NUT A FIRST LOOSEN ADJUST NUT B TO LOWER MOWER 02966 Fig. 29 A Fig. 27 NOTE: Each full turn of the adjustment nut will change mower height about 1/8". A • Recheck measurements, adjust if necessary until front tip of blade is 1/8" to 1/2" lower than the rear tip. • Hold adjustment nut in position with wrench and tighten jam nut securely against adjustment nut. 20
-
 1
1 -
2
-
3
-
4
-
5
-
6
-
7
-
8
-
9
-
10
-
11
-
12
-
13
-
14
-
 15
15 -
 16
16 -
 17
17 -
 18
18 -
 19
19 -
 20
20 -
 21
21 -
 22
22 -
 23
23 -
 24
24 -
 25
25 -
26
-
27
-
28
-
29
-
30
-
31
-
32
-
33
-
34
-
35
-
36
-
37
-
38
-
39
-
40
-
41
-
42
-
43
-
44
 |
 |