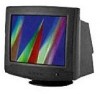
IBM 24P4555 User Guide - Page 10
Unpacking Procedure, Repacking, Setup
 |
UPC - 087944539261
View all IBM 24P4555 manuals
Add to My Manuals
Save this manual to your list of manuals |
Page 10 highlights
US-3 UNPACKING PROCEDURE SETUP This monitor works with platforms running at horizontal frequencies between 30 and 69 kHz. Step 1: Install the monitor • To connect the tilt/swivel base to the monitor, align hooks with the sockets on bottom side of the monitor, and gently push the base towards the front of the monitor. • Put monitor on a flat and stable working bench. REPACKING Save the original box and all packing material for future shipping needs. Step 2: Connect your monitor to your computer • Turn off the monitor and computer and unplug the computer power cord before connecting. Connect the video signal cable to the video output of your computer • The 15-pin D-shell signal connector on the signal cable will connect easily to the video adapter output on your personal computer. Tighten both screws on the connector to ensure a firm connection. Note • Do not touch the pins of the video signal cable connector as this might bend the pins. • When connecting the video signal cable, check the alignment of the video input connector. Do not force the video input connector in the wrong way or the pins might bend.
-
 1
1 -
2
-
3
-
4
-
 5
5 -
 6
6 -
 7
7 -
 8
8 -
 9
9 -
 10
10 -
 11
11 -
 12
12 -
 13
13 -
 14
14 -
 15
15 -
16
-
17
-
18
 |
 |
