IBM 326m Installation Guide
IBM 326m - eServer - 7969 Manual
 |
UPC - 000435835093
View all IBM 326m manuals
Add to My Manuals
Save this manual to your list of manuals |
IBM 326m manual content summary:
- IBM 326m | Installation Guide - Page 1
326m Type 7969 Start the server. Installation Guide Welcome. This server Installation Guide contains information for setting up and configuring your server. Did the server No start correctly? Yes Turn off the server and install options. Go to the Server Support flow chart on the reverse side of - IBM 326m | Installation Guide - Page 2
ibm.com/servers/eserver/ serverproven/compat/us/. Is the problem Yes solved? No See the troubleshooting information that comes with the server to determine the cause of the problem and the action to take. Register the server. Go to http://www.ibm.com/pc/register/. View information about IBM Support - IBM 326m | Installation Guide - Page 3
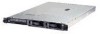
eServer 326m Type 7969 Installation Guide - IBM 326m | Installation Guide - Page 4
, read the general information in Appendix B, "Notices," on page 55., and the Warranty and Support Information document on the IBM Documentation CD. Eserver Second Edition (November 2005) © Copyright International Business Machines Corporation 2005. All rights reserved. US Government Users - IBM 326m | Installation Guide - Page 5
1. Introduction 1 The IBM Documentation CD 2 Eserver Hardware and software requirements 2 Using the Documentation Browser 2 Notices and statements used in this document 3 Features and specifications 4 Major components of the 326m Type 7969 server 6 Eserver Chapter 2. Installing - IBM 326m | Installation Guide - Page 6
Union EMC Directive conformance statement 59 Taiwanese Class A warning statement 60 Chinese Class A warning statement 60 Japanese Voluntary Control Council for Interference (VCCI) statement . . . 60 Power cords 60 Index 63 iv eServer 326m Type 7969: Installation Guide - IBM 326m | Installation Guide - Page 7
, leggere le Informazioni sulla Sicurezza. Les sikkerhetsinformasjonen (Safety Information) før du installerer dette produktet. Antes de instalar este produto, leia as Informações sobre Segurança. © Copyright IBM Corp. 2005 v - IBM 326m | Installation Guide - Page 8
Antes de instalar este producto, lea la información de seguridad. Läs säkerhetsinformationen innan du installerar den här produkten. vi eServer 326m Type 7969: Installation Guide - IBM 326m | Installation Guide - Page 9
versions of the caution or danger statement in the IBM Safety Information book. For example, if a caution statement instructions. Read any additional safety information that comes with your server or optional device before you install the device. Statement 1: DANGER Electrical current from power - IBM 326m | Installation Guide - Page 10
The battery contains lithium and can explode if not properly used, handled, or disposed of. Do not: v Throw or immerse into water v Heat to more than 100°C (212°F) v Repair or disassemble Dispose of the battery as required by local ordinances or regulations. viii eServer 326m Type 7969: Installation - IBM 326m | Installation Guide - Page 11
not remove the covers. Removing the covers of the laser product could result in exposure to hazardous laser radiation. There are no serviceable parts inside the device. v Use of controls or adjustments or performance of procedures other than those specified herein might result in hazardous radiation - IBM 326m | Installation Guide - Page 12
the power supply do not turn off the electrical current supplied to the device. The device also might have more than one power cord. To remove all electrical current from the device, ensure that all power cords are disconnected from the power source. 2 1 x eServer 326m Type 7969: Installation Guide - IBM 326m | Installation Guide - Page 13
Never remove the cover on a power supply or any part that has the following label attached. Hazardous voltage, current, and energy levels are present inside any component that has this label attached. There are no serviceable parts inside these components. If you suspect a problem with one of these - IBM 326m | Installation Guide - Page 14
xii eServer 326m Type 7969: Installation Guide - IBM 326m | Installation Guide - Page 15
1. Introduction This Installation Guide contains instructions for setting up your IBM® ™ Eserver 326m Type 7969 server and basic instructions for installing some options. More detailed instructions for installing options are in the Option Installation Guide on the IBM Documentation CD, which - IBM 326m | Installation Guide - Page 16
server. A Serial ATA (SATA) non-hot-swap hard disk drive model is also available. This illustration might differ slightly from your hardware. ID label See the Rack Installation Instructions document for complete rack installation and removal instructions. The IBM Documentation CD Eserver The - IBM 326m | Installation Guide - Page 17
server from the Product menu. The Available Topics list displays all the documents for your server is on the IBM Eserver Documentation CD. problem situations. v Attention: These notices indicate potential damage to programs, devices, or data. An attention notice is placed just before the instruction - IBM 326m | Installation Guide - Page 18
. Depending on the server model, some features might not be available, or some specifications might not apply. Racks are marked in vertical increments of 1.75 inches. Each increment is referred to as a unit, or "U." A 1-U-high device is 1.75 inches tall. 4 eServer 326m Type 7969: Installation Guide - IBM 326m | Installation Guide - Page 19
) with Wake on LAN® support v Four Universal Serial Bus (USB) ports v One serial port v One video port Note: The baseboard management controller is also known as the service processor. Acoustical noise emissions: v Declared sound power, idling: 6.5 bels v Declared sound power, operating: 6.5 bels - IBM 326m | Installation Guide - Page 20
the server is running. (Orange can also indicate touch points on hot-swap components.) See the instructions for removing or installing a specific hot-swap component for any additional procedures that you might have to perform before you remove or install the component. 6 eServer 326m Type 7969 - IBM 326m | Installation Guide - Page 21
disk drive model server. A SATA non-hot-swap hard disk drive model is also available. Note: The illustrations in this document might differ slightly from your hardware. Microprocessor heat sink Dual inline memory module (DIMM) Microprocessor Riser card System board Air baffle Power-cord module - IBM 326m | Installation Guide - Page 22
8 eServer 326m Type 7969: Installation Guide - IBM 326m | Installation Guide - Page 23
are intended for users who are experienced with setting up IBM server hardware. If you need more detailed instructions, see the Option Installation Guide on the IBM Documentation CD. Eserver Installation guidelines Before you install, read the following information: v Read the safety - IBM 326m | Installation Guide - Page 24
supported options for the server, go to http://www.ibm.com/servers/eserver/ server is otherwise working correctly. If the server is not working correctly, see the Hardware Maintenance Manual and Troubleshooting Guide for diagnostic information. 10 eServer 326m Type 7969: Installation Guide - IBM 326m | Installation Guide - Page 25
notes describe the types of adapters that the server supports and other information that you must consider when installing an adapter: v Locate the documentation that comes with the adapter and follow those instructions in addition to the instructions in this section. If you must change the - IBM 326m | Installation Guide - Page 26
and external configurations. For the most current list of supported RAID adapters, see http://www.ibm.com/servers/eserver/serverproven/compat/us/. For details about installing a RAID adapter, see the documentation that comes with the adapter. 12 eServer 326m Type 7969: Installation Guide - IBM 326m | Installation Guide - Page 27
if you are installing the RAID adapter in PCI-X slot 1. See the documentation that comes with the RAID adapter for any additional cabling instructions. That documentation also provides information about installing the RAID software and configuring the RAID adapter. Chapter 2. Installing options 13 - IBM 326m | Installation Guide - Page 28
v The optional IBM Remote Supervisor Adapter II can be installed only in PCI-X slot 1. Use the 20-pin planar cable with USB signals that comes with the Remote Supervisor Adapter Supervisor Adapter II connector (JMGT1) 20-pin planar cable with USB signals 14 eServer 326m Type 7969: Installation Guide - IBM 326m | Installation Guide - Page 29
the safety information that begins on page v, and "Installation guidelines" on page 9. 2. Turn off the server and peripheral devices, and disconnect the power cords and all external cables. 3. Remove the server cover (see "Removing the cover and bezel" on page 10). 4. Determine which PCI slot you - IBM 326m | Installation Guide - Page 30
illustration. It remains loosely attached to the server. Adapter retention bracket Alignment tab Expansionslot clip (adapter slot 1) Power-cord module Expansionslot clip (adapter slot 2) PCI riser card from its connector. Riser card System board 16 eServer 326m Type 7969: Installation Guide - IBM 326m | Installation Guide - Page 31
server. b. Lift and place the power-cord module out of the server as far as the power server until it snaps into place to secure the adapter in the adapter slot. 11. Connect any internal cables to the adapter. See the instructions the Remote Supervisor Adapter II firmware and configuring the adapter. - IBM 326m | Installation Guide - Page 32
the drive in bay 1 is the primary startup device. For SATA drives, the drive in bay 2 is the primary startup device. server has an optional RAID adapter, see the documentation that comes with the adapter for instructions for installing a hard disk drive. 18 eServer 326m Type 7969: Installation Guide - IBM 326m | Installation Guide - Page 33
"Installation guidelines" on page 9. 2. Remove the filler panel from the applicable drive bay. Note: To ensure adequate system cooling, do not operate the server for more than 2 minutes without either a hard disk drive or a filler panel installed in each bay. 3. Install the new hard disk drive in - IBM 326m | Installation Guide - Page 34
the signal and power cables to the rear of the drive. Keep the cables clear of the airflow path of the fan behind the drive bays. 6. If you have other options to install, install them now. Otherwise, go to "Completing the installation" on page 26. 20 eServer 326m Type 7969: Installation Guide - IBM 326m | Installation Guide - Page 35
ServerProven® list at http://www.ibm.com/servers/eserver/serverproven/compat/us/ for a list of memory modules that the server supports. Important: The amount of memory installed must be the same the total amount of memory for each microprocessor equals 3 GB of RAM. Chapter 2. Installing options 21 - IBM 326m | Installation Guide - Page 36
The following illustration shows the memory slots on the system board. DIMM 4 (DDR4) DIMM 3 (DDR3) DIMM 2 ( 9. 2. Turn off the server and peripheral devices, and disconnect the power cords and all external cables. 3. Remove the server cover (see "Removing the eServer 326m Type 7969: Installation Guide - IBM 326m | Installation Guide - Page 37
restart the server three times to force the basic input/output system (BIOS) to reset the configuration to the default configuration (the memory connectors of microprocessors that the server supports, see http://www.ibm.com/servers/eserver/serverproven/compat/us/. v The server comes with one - IBM 326m | Installation Guide - Page 38
4 to memory slots 7 and 8. v Read the documentation that comes with the microprocessor to determine whether you need to update the BIOS code in the server. To download the most current level of BIOS code for your server go to http://www.ibm.com/support/ and click Downloads and drivers. v (Optional - IBM 326m | Installation Guide - Page 39
microprocessor: a. Touch the static-protective package containing the new microprocessor to any unpainted metal surface on the outside of the server; then, remove the microprocessor from the package. b. Position the microprocessor over the microprocessor socket as shown in the following illustration - IBM 326m | Installation Guide - Page 40
directly in front of the server and press it into place so that the retention tabs snap into the holes on the top, right side, and bottom of the server. 4. If you removed the USB option tray, insert it fully into the slot below hard disk drive bay 1. 26 eServer 326m Type 7969: Installation Guide - IBM 326m | Installation Guide - Page 41
need to run the Configuration/Setup Utility program to update the server configuration. For more information, see "Updating the server configuration" on page 28 and the User's Guide on the IBM Documentation CD. Eserver To attach non-USB devices to the server, use the cables that come with the - IBM 326m | Installation Guide - Page 42
, see "Using the baseboard management controller firmware update program" on page 37. For information about updating the BIOS code, see the User's Guide on the IBM Documentation CD. Eserver Updating the server configuration When you start the server for the first time after you add or remove an - IBM 326m | Installation Guide - Page 43
outlet. Power-control button: Press this button to turn the server on and off manually. Reset button: Press this button to reset the server and run the power-on self-test (POST). You might have to use a pen or the end of a straightened paper clip to press the button. © Copyright IBM Corp - IBM 326m | Installation Guide - Page 44
locate the server if it is in a location with numerous other servers. If your server supports IBM Director, you can use IBM Director to is installed in the server, the USB 1 connector is disabled. Hard disk drive status LEDs: On some server models, each hot- eServer 326m Type 7969: Installation Guide - IBM 326m | Installation Guide - Page 45
Rear view The following illustration shows the connectors and LEDs on the rear of the server. Activity LEDs Link LEDs System-error LED Power-cord connector Serial connector Video USB connectors connector Power-on LED Gigabit Ethernet 1 connector (LAN1) Gigabit Ethernet 2 connector (LAN2) - IBM 326m | Installation Guide - Page 46
all power from the server, you must disconnect it from the power source. Some operating systems require an orderly shutdown before you turn off the server. See your operating-system documentation for information about shutting down the operating system. 32 eServer 326m Type 7969: Installation Guide - IBM 326m | Installation Guide - Page 47
can be turned off from the Remote Supervisor Adapter II user interface. v The service processor can turn off the server as an automatic response to a critical system failure. v You can turn off the server through a request from the service processor. Chapter 3. Server controls, LEDs, and power 33 - IBM 326m | Installation Guide - Page 48
34 eServer 326m Type 7969: Installation Guide - IBM 326m | Installation Guide - Page 49
the User's Guide on the IBM Documentation CD. Eserver Using the ServerGuide Setup and Installation CD The ServerGuide Setup and Installation CD provides state-of-the-art programs to detect the server model and installed hardware options, configure the server hardware, provide device drivers, and - IBM 326m | Installation Guide - Page 50
35.) 1. Go to http://www.ibm.com/support/. 2. Under Search technical support, type 7969, and click Search. 3. Select the installation instructions for your operating system. Using the Configuration/Setup Utility program The Configuration/Setup Utility program is part of the BIOS. You can use it to - IBM 326m | Installation Guide - Page 51
only and does not affect any device drivers. Important: For correct server operation, be sure to update the baseboard management controller firmware before updating the BIOS code. To download the program, go to http://www.ibm.com/support/, and click Downloads and drivers; then, copy the EXE file to - IBM 326m | Installation Guide - Page 52
pair. v To update the firmware and BIOS codes for an optional ServeRAID controller, you must use the IBM ServeRAID Support CD that comes Utility program, complete the following steps: 1. Turn on the server. 2. When the message - IBM 326m | Installation Guide - Page 53
server, use the configuration method described in the instructions that come with that adapter to view or change SCSI settings for attached devices. See the ServeRAID documentation on the IBM ServeRAID Support Configuration summary" window opens. 4. Review the information in the "Configuration - IBM 326m | Installation Guide - Page 54
Review Guide on the IBM Documentation CD. If your Eserver server comes with an operating system installed, such as Microsoft Windows 2000 Datacenter Server, see the software documentation that comes with the server for configuration information. 40 eServer 326m Type 7969: Installation Guide - IBM 326m | Installation Guide - Page 55
," on page 53, the Hardware Maintenance Manual and Troubleshooting Guide, and the "Server Support" flowchart in the front of this book. Diagnostic tools overview The following tools are available to help you diagnose and solve hardware-related problems: v POST beep codes The power-on self-test beep - IBM 326m | Installation Guide - Page 56
. 1-2-4 1-3-1 1-3-2 Random-access memory (RAM) refresh verification has failed. First 64 Kb RAM test has failed. First 64 Kb RAM parity test has failed. Reseat the memory modules or install a memory module. If the problem remains, call for service. 42 eServer 326m Type 7969: Installation Guide - IBM 326m | Installation Guide - Page 57
the memory modules or install a memory module. If the problem remains, call for service. 3-3-2 I2C bus has failed. Turn off the server, disconnect all power cords, and reconnect all power cords; then, restart the server. If the problem remains, call for service. Chapter 5. Solving problems 43 - IBM 326m | Installation Guide - Page 58
on the Start Options menu of the Configuration/Setup Utility program is enabled (its default setting), you must restart the server three times to force the BIOS to reset the configuration to the default configuration (the memory connectors enabled). 44 eServer 326m Type 7969: Installation Guide - IBM 326m | Installation Guide - Page 59
the Hardware Maintenance Manual and Troubleshooting Guide for more information about the POST error messages. Table 3. Abbreviated list of POST error messages POST message Failing device or problem found Suggested action 161 The real-time clock battery Replace the battery or call for service - IBM 326m | Installation Guide - Page 60
the operating system is supported on your server. If the operating installed; the option is not system is supported, there is no logical drive defined (SCSI RAID systems). Run available. the ServerGuide program and make sure that setup is complete. 46 eServer 326m Type 7969: Installation Guide - IBM 326m | Installation Guide - Page 61
charts The following tables list problem symptoms and suggested solutions. See the Hardware Maintenance Manual and Troubleshooting Guide for more detailed troubleshooting charts. If you cannot find the problem in the troubleshooting charts, run the diagnostic programs. If you have run - IBM 326m | Installation Guide - Page 62
the server and that the keyboard and mouse cables are not reversed. v Make sure that the mouse device drivers are installed correctly. v Make sure that the operating system supports USB devices. v Try using another mouse or pointing device. If the problem remains, call for service. 48 eServer 326m - IBM 326m | Installation Guide - Page 63
to force the BIOS to reset the configuration to the default configuration (the memory connectors enabled). Only the cursor appears. The monitor works when you turn on the server, but the screen goes blank when you start some application programs. If the problem remains, call for service. Call for - IBM 326m | Installation Guide - Page 64
Whenever memory or an option is changed, you must update the configuration. If the problem remains, call for service. An IBM option that used to work v Make sure that all of the option hardware and cable connections are secure. does not work now. v If the option comes with test instructions, use - IBM 326m | Installation Guide - Page 65
the power-control button for 5 seconds to force the server to turn off. If the problem remains or if you are using an ACPI operating system, call for service. Serial port problems For more information about the serial port, see the Option Installation Guide on the IBM Documentation CD. Eserver - IBM 326m | Installation Guide - Page 66
Universal Serial Bus device problems Symptom A USB device does not work. Suggested action Make sure that: v The correct USB device driver is installed. v Your operating system supports USB devices. If the problem remains, call for service. 52 eServer 326m Type 7969: Installation Guide - IBM 326m | Installation Guide - Page 67
in the Hardware Maintenance Manual and Troubleshooting Guide or Problem Determination and Service Guide on the IBM Documentation CD that comes with your system. Note: For some IntelliStation models, the Hardware Maintenance Manual and Troubleshooting Guide is available only from the IBM support Web - IBM 326m | Installation Guide - Page 68
, or in the U.S. and Canada, call 1-800-IBM-SERV (1-800-426-7378). In the U.S. and Canada, hardware service and support is available 24 hours a day, 7 days a week. In the U.K., these services are available Monday through Friday, from 9 a.m. to 6 p.m. 54 eServer 326m Type 7969: Installation Guide - IBM 326m | Installation Guide - Page 69
to evaluate and verify the operation of any non-IBM product, program, or service. IBM may have patents or pending patent applications covering subject Web sites are not part of the materials for this IBM product, and use of those Web sites is at your own risk. IBM may use or distribute any - IBM 326m | Installation Guide - Page 70
and other countries. Other company, product, or service names may be trademarks or service marks of others. Important notes Processor speeds indicate the internal clock speed of the microprocessor; other factors also affect application performance. 56 eServer 326m Type 7969: Installation Guide - IBM 326m | Installation Guide - Page 71
possible. When referring to processor storage, real and virtual storage, or channel supported drives available from IBM. Maximum memory may require replacement of the standard memory with an optional memory module. IBM makes no representation or warranties regarding non-IBM products and services - IBM 326m | Installation Guide - Page 72
equipment. For information on proper disposal of these batteries, contact IBM at 1-800-426-4333. Have the IBM part number listed on the battery available prior to your call. In the Netherlands, the following applies. For Taiwan: Please recycle batteries. 58 eServer 326m Type 7969: Installation Guide - IBM 326m | Installation Guide - Page 73
for a Class A digital device, pursuant to Part 15 of the FCC Rules. These limits are designed installed and used in accordance with the instruction manual, may cause harmful interference to radio used in order to meet FCC emission limits. IBM is not responsible for any radio or television - IBM 326m | Installation Guide - Page 74
To avoid electrical shock, always use the power cord and plug with a properly grounded outlet. IBM power cords used in the United States and Canada are listed by Underwriter's Laboratories (UL) and certified by the Canadian Standards Association (CSA). 60 eServer 326m Type 7969: Installation Guide - IBM 326m | Installation Guide - Page 75
safety approvals for the country in which the equipment will be installed. IBM power cords for a specific country or region are usually available only in that country or region. IBM power cord part number 02K0546 13F9940 13F9979 13F9997 14F0015 14F0033 14F0051 14F0069 Used in these countries - IBM 326m | Installation Guide - Page 76
IBM power cord part number 14F0087 1838574 24P6858 34G0232 36L8880 49P2078 49P2110 6952300 Used in these countries and regions Antilles, Nicaragua, Panama, Peru, Philippines, Saudi Arabia, Thailand, Taiwan, United States of America, Venezuela 62 eServer 326m Type 7969: Installation Guide - IBM 326m | Installation Guide - Page 77
LED 29 problems 47 specifications 5 Class A electronic emission notice 59 components adapter 15 hot-swap drive 19 major, locations 7 memory module 22 microprocessor 25 non-hot-swap drive 20 configuration, updating server 28 Configuration/Setup Utility program 36 configuring hardware 35 connector - IBM 326m | Installation Guide - Page 78
21 problems 49 specifications 5 type supported 21 microprocessor installing 23 problems 49 specifications 5 monitor problems 49 mouse problems 48 N network operating system (NOS) installation 36 notes, important 3, 56 notices electronic emission 59 64 eServer 326m Type 7969: Installation Guide - IBM 326m | Installation Guide - Page 79
FCC Class A notice 59 Universal Serial Bus (USB) problems 52 updating the firmware 37 USB connectors 30, 31 requirements 27 utility program baseboard management controller firmware update 37 V video connector 31 controller specifications 5 W Web site IBM server products 1 IBM support 24 Index 65 - IBM 326m | Installation Guide - Page 80
66 eServer 326m Type 7969: Installation Guide - IBM 326m | Installation Guide - Page 81
- IBM 326m | Installation Guide - Page 82
Part Number: 40K0994 Printed in USA (1P) P/N: 40K0994
-
 1
1 -
 2
2 -
 3
3 -
 4
4 -
 5
5 -
 6
6 -
 7
7 -
8
-
9
-
10
-
11
-
12
-
13
-
14
-
15
-
16
-
17
-
18
-
19
-
20
-
21
-
22
-
23
-
24
-
25
-
26
-
27
-
28
-
29
-
30
-
31
-
32
-
33
-
34
-
35
-
36
-
37
-
38
-
39
-
40
-
41
-
42
-
43
-
44
-
45
-
46
-
47
-
48
-
49
-
50
-
51
-
52
-
53
-
54
-
55
-
56
-
57
-
58
-
59
-
60
-
61
-
62
-
63
-
64
-
65
-
66
-
67
-
68
-
69
-
70
-
71
-
72
-
73
-
74
-
75
-
76
-
77
-
78
-
79
-
80
-
81
-
82
 |
 |

Welcome.
This server
contains information for setting
up and configuring your server.
For detailed information about
your server, view the publications
on the
You can also find the most
current information about your
server at http://www.ibm.com/support/.
Installation Guide
Documentation CD.
Installation Guide
326m Type 7969
Turn off the server
and install options.
Did the server
start correctly?
Yes
No
Go to the Server Support
flow chart on the reverse
side of this page.
Start the server.
Did the server
start correctly?
Yes
No
Install the server in the rack cabinet
and cable the server and options;
then, restart the server.
Was the
server setup
completed?
Use
ServerGuide to
install the operating
system?
The server is ready to use.
Go to
to register the server.
Go to the Web for instructions:
No
Yes
Yes
No
Use the IBM
ServerGuide
program
to set up and
configure hardware.
Go to the Server Support
flow chart on the reverse
side of this page.
Install applications,
such as IBM systems
management software
and IBM ServeRAID
programs