IBM x3655 Installation Guide - Page 33
Installing, additional, microprocessor
 |
UPC - 883436014533
View all IBM x3655 manuals
Add to My Manuals
Save this manual to your list of manuals |
Page 33 highlights
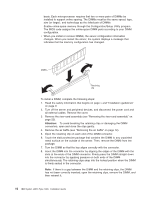
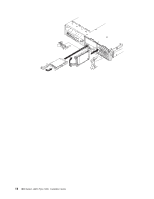
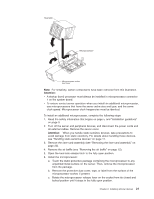
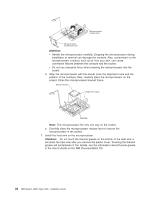
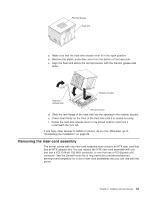
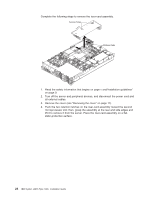
Complete the following steps to install a drive in a hot-swap bay. Attention: To maintain proper system cooling, do not operate the server for more than 10 minutes without either a drive or a filler panel installed in each bay. 1. Read the safety information that begin on page v, and "Installation guidelines" on page 9. 2. Remove the filler panel from one of the empty hot-swap bays. 3. Install the hard disk drive in the hot-swap bay: a. Make sure that the tray handle is open (that is, perpendicular to the drive). b. Align the drive assembly with the guide rails in the bay. c. Gently push the drive assembly into the bay until the drive stops. d. Push the tray handle to the closed (locked) position. e. Check the hard disk drive status LED to verify that the hard disk drive is operating properly. If the amber hard disk drive status LED for a drive is lit continuously, that drive is faulty and must be replaced. If the green hard disk drive activity LED is flashing, the drive is being accessed. Note: You might have to reconfigure the disk arrays after installing hard disk drives. See the RAID documentation on the IBM ServeRAID Support CD for more information. If you have other devices to install, do so now. Otherwise, go to"Completing the installation" on page 29. Installing an additional microprocessor The following notes describe the type of microprocessor that the server supports and other information that you must consider when installing a microprocessor: v The server supports up to two AMD Opteron microprocessors. If the server comes with one microprocessor, you can install a second microprocessor but it must be the same type and speed. v You might have to update the BIOS code. Be sure to read the documentation that comes with the microprocessor so that you can determine whether you have to update the BIOS code. You can download the latest level of BIOS code and many other code updates for your server at http://www.ibm.com/servers/eserver/ support/xseries/index.html. v (Optional) Obtain an SMP-capable operating system. For a list of supported operating systems and other optional devices, go to http://www.ibm.com/servers/ esever/serverproven/compat/us/. v To order an additional microprocessor, contact your IBM marketing representative or authorized reseller. v The microprocessor speeds are automatically set for this server; therefore, you do not have to set any microprocessor frequency-selection jumpers or switches. v If you have to replace a microprocessor, call for service. v If the thermal-grease protective cover (for example, a plastic cap or tape liner) is removed from the heat sink, do not touch the thermal grease on the bottom of the heat sink or set down the heat sink. v Do not remove the first microprocessor from the system board to install the second microprocessor. Chapter 2. Installing optional devices 19
-
 1
1 -
2
-
3
-
4
-
5
-
6
-
7
-
8
-
9
-
10
-
11
-
12
-
13
-
14
-
15
-
16
-
17
-
18
-
19
-
20
-
21
-
22
-
23
-
24
-
25
-
26
-
27
-
 28
28 -
 29
29 -
 30
30 -
 31
31 -
 32
32 -
 33
33 -
 34
34 -
 35
35 -
 36
36 -
 37
37 -
 38
38 -
39
-
40
-
41
-
42
-
43
-
44
-
45
-
46
-
47
-
48
-
49
-
50
-
51
-
52
-
53
-
54
-
55
-
56
-
57
-
58
-
59
-
60
-
61
-
62
-
63
-
64
-
65
-
66
-
67
-
68
-
69
-
70
-
71
-
72
-
73
-
74
-
75
-
76
-
77
-
78
-
79
-
80
-
81
-
82
-
83
-
84
-
85
-
86
-
87
-
88
-
89
-
90
-
91
-
92
-
93
-
94
-
95
-
96
-
97
-
98
-
99
-
100
-
101
-
102
-
103
-
104
 |
 |
