Icom IC-V3500 Basic Manual - Page 2
Set modes, Resetting, Specification, Options, Basic operation
 |
View all Icom IC-V3500 manuals
Add to My Manuals
Save this manual to your list of manuals |
Page 2 highlights
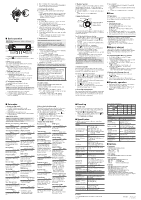
I Microphone D HM-154 3 1 UP/DN ON 2 OFF 1 PTT SWITCH Hold down to transmit, release to receive. 2 UP/DOWN LOCK SWITCH Slide to lock or unlock the UP/DOWN keys. 3 UP/DOWN KEYS [UP]/[DN] Push to change the operating frequency, Memory channel, Set mode setting, and so on. Hold down either key for 1 second to start scanning. The scanning direction follows the name of the key ([UP]: Channel up, [DN]: Channel down). I Basic operation IMPORTANT: Transmission is inhibited in the Marine Channel mode. [ ] [VOL] [S.MW MW] [SQL] [SET LOCK] [MONI ANM PA] [LOW DUP] [DIAL] [BANK OPT] [V/MHz SCAN] [M/CALL PRIO] [TONE T-SCAN] D Turning the transceiver ON/OFF Hold down [ ] for 1 second to turn the transceiver ON or OFF. D VFO mode selection The IC-V3500 has two basic operating modes, the VFO mode and the Memory mode. Push [V/MHz SCAN] to select the VFO mode. Push [M/CALL PRIO] several times to select the Memory, Call, Marine, or Weather Channel mode. D Setting a frequency 1. Push [V/MHz SCAN] to select the VFO mode. 2. Rotate [DIAL] to set the frequency. • The frequency changes according to the selected tuning step. Push [V/MHz SCAN] several times to change the frequency step between 10 MHz and 1 MHz. D Tuning step selection The selected tuning step is applied to the scan. Option (kHz): 5.0, 6.25, 10.0, 12.5, 15.0, 20.0, 25.0, 30.0, 50.0 NOTE: For convenience, select the tuning step that matches the frequency intervals of the repeaters in your area. 1. Push [V/MHz SCAN] to select the VFO mode. 2. Push [SET LOCK] to enter the Set mode. 3. Push [SET LOCK] or [MONI ANM PA] several times, until "TS" is displayed. 4. Rotate [DIAL] to select the tuning step. 5. Push any key other than [SET LOCK] or [MONI ANM PA] to save the entry and exit the Set mode. D Call channel selection Push [M/CALL PRIO] several times to select the Call channel. • A "C" is displayed instead of a Memory channel number. Push [M/CALL PRIO] more to select the Memory, Call, Marine, or Weather Channel mode, or push [V/MHz SCAN] to select the VFO mode. D Receiving 1. Hold down [ ] for 1 second to turn ON the transceiver. 2. Rotate [VOL] to adjust the audio level. Push [MONI ANM PA] to open the squelch, and then rotate [VOL] to adjust the audio level. 3. Adjust the squelch level, as described below. First, rotate [SQL] fully counterclockwise, and then rotate [SQL] clockwise until the noise just disappears. 4. Set the operating frequency. 5. When receiving a signal, the squelch opens, and audio can be heard. "BUSY" is displayed, and the S/RF indicator shows the relative strength of the received signal. D Transmitting CAUTION: DO NOT transmit without an antenna. NOTE: To prevent interference, listen to the channel before transmitting by opening the squelch. To open the squelch, rotate [DIAL] counterclockwise or push [SQL▼] on the microphone. 1. Set the operating frequency. • Adjust the output power if desired. See the Selecting output power section of this sheet. 2. Hold down [PTT] to transmit. • " " is displayed while transmitting. The S/RF indicator shows the output power level. The One-Touch PTT function can be used. 3. Speak into the microphone at your normal voice level. DO NOT hold the microphone too close to your mouth, or speak too loudly. This may distort the signal. 4. Release [PTT] to receive. NOTE: When the TX Inhibit is set to "Inhibit," you cannot transmit. (Set in the CS-V3500 PROGRAMMING SOFTWARE.) IMPORTANT for 65 W transmission: The IC-V3500 has a built-in current detector circuit that protects the power amplifier from excessive current flow. When excessive current flow is detected, the circuit automatically reduces the transmit output power to approximately 25 Watts. The IC-V3500 has a thermal detector circuit too, which protects the power amplifier from excessive heat. The circuit automatically reduces the transmit output power to approximately 10 to 20 Watts as the temperature increases. D Lock function Activate to prevent accidental channel changes and unnecessary function access. Hold down [SET LOCK] for 1 second to turn the Lock function ON or OFF. When the function is ON, " " is displayed. [PTT], [MONI ANM PA], [VOL], and [SQL] can be used, even when the function is ON. 1750 Hz tone, DTMF, Tones or DTMF Memory contents can be transmitted from the HM-133V. I Set modes D Using the Set mode 1. Push [SET LOCK] to enter the Set mode. 2. Push [SET LOCK] or [MONI ANM PA] to select a desired item. 3. Rotate [DIAL] to set an option or value. 4. Push any key other than [SET LOCK] or [MONI ANM PA] to exit the Set mode. D Set mode items NOTE: The Set mode items contained in the transceiver may differ, depending on the transceiver's version or presetting. Ask your dealer for details. Repeater Tone frequency Auto dimmer " " " " Select the subaudible tone Set the Auto Dimmer needed to access the repeater. brightness level. Tone Squelch frequency Display contrast " " " " Select the CTCSS tone frequency for the tone squelch function. DTCS code " " Set the DTCS code for DTCS squelch and DTCS encoder. DTCS polarity " " Set the Transmit and Receive DTCS polarity. Frequency offset " " Set the duplex frequency offset. Reverse mode " " Turn the Reversed Duplex function ON or OFF. Tuning step " " Set the VFO tuning step. Scan Stop timer " " Select the scan pause timer option. Scan Resume timer " " Select the resume options of a scan pause. Display dimmer " " Set the backlight brightness level. Adjust the LCD display contrast. Transmit permission " " Turn the TX inhibit function ON or OFF. (Select "OFF" to inhibit transmitting.) Channel Skip setting* " " Turn the Skip function ON or OFF. Bank setting* " " Assign the memory and Scan edge channels. Bank Link function* " " Assign the banks for a Continuous Banks scan. Wide/Narrow " " Set both the transmit and receive passband. Weather alert (for only the USA version) " " Turn the Weather Alert function ON or OFF. MIC gain " " Set the microphone sensitivity. * Displayed only when accessing the Set mode from the Memory mode. D Using the Initial Set mode The initial Set mode can be accessed when the transceiver is turned ON, and allows you to set seldom-changed settings. In this way, you can "customize" the transceiver to suit your preference and operating style. 1. While holding down [SET LOCK], hold down [ ] for 1 second to enter the Initial Set mode. 2. Push [SET LOCK] or [MONI ANM PA] to select a desired item. 3. Rotate [DIAL] to select an option or value. 4. Push [ ] to save and exit the Initial Set mode. D Initial Set mode items Key-touch beep DTMF speed " " " " Turn the key-touch beep ON Set the DTMF sending rate or OFF. to 1 to 3 or 5. Time-out timer " " Inhibits continuous transmissions longer than the selected time period. Auto Repeater (for only the USA version) " " Select the Auto Repeater function setting from "OF" (The function is OFF), "R1" (Activates the duplex setting only), or "R2" (Activates the duplex settings and the Tone Encoder function). Auto Power OFF " " Automatically turns OFF the transceiver. Repeater Lockout " " Set the transmission lockout capability. Squelch delay " " Set the squelch delay to "S" (Short) or "L" (Long). Display type " " Set the display type for Memory mode operation. Voltage display " " Select whether or not to display the battery voltage when turning ON the transceiver. [BANK OPT] key " " Assign the function to [BANK OPT] from "BAK" (Bank/Option), "EMR" (Emergency), or "TVo" (Temporary Volume/Option). Emergency channel " " Select a channel used for an emergency purpose from "VFO" (VFO frequency), "MR 0 to 199*" (Memory channels), "MR 1A to 3B*" (Scan edge channels), or "CAL" (Call channels). * Only the programmed channels are displayed. Emergency Alert volume " " Squelch type " " Set the squelch type from "OFF" (Noise squelch), "SS" (S-meter Squelch), or "AT" (Squelch Attenuator). Tone burst " " Turn the Tone Burst function ON or OFF. Selects whether or not to sound the beeps, the alert, and the received signal when using the Emergency Call function. Temporary volume " " Set the volume level when the Temporary Volume function is turned ON. (Set "0" to use it as the OneTouch Mute function) D Monitor function This function is used to listen to weak signals, or to manually open the squelch. You can use it without disturbing the squelch setting, even when the Mute functions such as the Tone squelch are in use. Push [MONI ANM PA] to turn the Monitor function ON or OFF. When the function is ON, "BUSY" blinks. D Squelch attenuator Noise squelch Squelch threshold Squelch is open Shallow Squelch attenuator or S-meter squelch adjustable range Deep The transceiver has an RF attenuator related to the squelch level setting. Approximately 20 dB of attenuation is obtained at the maximum setting. Turn ON the Squelch Attenuator function: 1. Hold down [ ] for 1 second to turn OFF the transceiver. 2. While holding down [SET LOCK], hold down [ ] for 1 second to turn ON the transceiver and enter the Initial Set mode. 3. Push [SET LOCK] or [MONI ANM PA] several times to select the "SQL" item. 4. Rotate [DIAL] to select "AT" (Attenuator). 5. Push [ ] to save and exit the Initial Set mode. 6. Rotate [SQL] clockwise past the 12 o'clock position to turn ON the Squelch Attenuator function. The attenuation level can be adjusted to approximately 20 dB between the 12 o'clock and fully clockwise positions. When setting the squelch from the microphone, a level greater than '17' activates the attenuator. NOTE: When using the Monitor function The Squelch Attenuator function works even when the Monitor function is ON. It is recommended to set [SQL] between 10 and 12 o'clock (7 to 17 level when set using the HM-133V). D S-meter Squelch The S-meter Squelch function disables the audio output from the speaker or headphones when the received signal is weaker than the specified S-meter squelch level. Turn ON the S-meter Squelch function: 1. Hold down [ ] for 1 second to turn OFF the transceiver. 2. While holding down [SET LOCK], hold down [ ] for 1 second to turn ON the transceiver and enter the Initial Set mode. 3. Push [SET LOCK] or [MONI ANM PA] several times to select the "SQL" item. 4. Rotate [DIAL] to select "SS" (S-meter squelch). 5. Push [ ] to exit the Initial Set mode. 6. Rotate [SQL] clockwise past the 12 o'clock position to turn ON the S-meter Squelch function. D Selecting output power Set the output power level to suit your operating requirements. Lower output power during short-distance communications may reduce the possibility of interference to other stations and reduce the current consumption. Push [LOW DUP]. • The output power level is changed and the selected level is displayed. If no output power icon is displayed, the level is set to "High." The level can be changed even while transmitting. I Scan D Preparation Set the scan resume option, enter the scan edges, enter 2 or more Memory channels, set the Skip channels. D Operation 1. Select the mode or bank. For Full/Programmed scan: Push [V/MHz SCAN] to select the VFO mode. For Memory scan: Push [M/CALL PRIO] to select the Memory mode. For Bank scan: Push [BANK], and then rotate [DIAL] to select the bank. 2. Set the squelch to the point where the noise disappears. 3. Hold down [V/MHz SCAN] for 1 second to start scanning. Information • Rotate [DIAL] to change the scanning direction. • The scan type blinks in the Memory channel readout. • Push [SET LOCK] to switch between a full scan and a Programmed scan (P1, P2, and P3). • Push [V/MHz SCAN] to cancel the scan. • You can also use the full scan in the Marine Channel mode. I Memory channel The IC-V3500 has a total of 207 Memory channels for saving often used operating frequencies, repeater settings, and so on. Memories include 6 scan edges and 1 Call channel. D Programming the Memory channel 1. Push [V/MHz SCAN] to select the VFO mode. 2. Set the desired frequency. • If desired, set other data (Example: frequency offset, duplex direction, tone squelch, and so on). 3. Push [S.MW MW], and then rotate [DIAL] to select the Memory channel. • " " and the Memory channel number blink. 4. Hold down [S.MW MW] for 1 second to write. • 3 beeps sound. • The Memory channel number automatically increases when holding down [S.MW MW] after writing. D Selecting the Memory channel 1. Push [M/CALL PRIO] several times to select the Memory mode. • " " is displayed. 2. Rotate [DIAL] to select a desired Memory channel. Only programmed Memory channels can be selected. I Repeater operation 1. Hold down [LOW DUP] for 1 second once or twice to select the minus or plus Duplex mode. 2. If accessing the repeater requires a subaudible tone, push [TONE T-SCAN] several times, until " " is displayed. I Resetting D Partial reset If you want to reset the VFO frequency, VFO settings and Set mode items to their default values, without clearing the memory contents, you can do a partial reset. 1. Hold down [ ] for 1 second to turn OFF the transceiver. 2. While holding down [V/MHz SCAN], hold down [ ] for 1 second to turn ON the transceiver. • The partial reset is completed. I Specification All stated specifications are subject to change without notice or obligation. General USA RX: 136 ~ 174* TX: 144 ~ 148 Frequency coverage EXP: RX/TX 136 ~ 174* * Guaranteed: 144 ~ 148 KOR, TPE: RX/TX 144 ~ 146 MHz range only. SAU: RX/TX 137.0625, 137.2000, 137.6375, 137.6625, 137.7375 Type of emission FM USA, EXP, KOR, TPE: Number of Memory channels 207 (including 6 scan edges and 1 Call channel) SAU: 5 USA, EXP, KOR, TPE: Scan types Full, Program, Priority, Memory channel, Bank, Skip, Tone scans SAU: Memory channel Frequency resolution 5, 6.25, 10, 12.5, 15, 20, 25, 30, (Except for the SAU 50 kHz version) Operating temperature -10°C to +60°C (+14˚F to +140˚F) range Frequency stability ±3 ppm Power supply 13.8 V DC ±15% requirement TX: 11 A at 65 W Current drain (at 13.8 V DC: approximate) (11 A at 50 W for the KOR version, 9 A at 24 W for the TPE version, and 9 A at 23 W for the SAU version) RX: Standby 0.4 A Maximum audio 1.5 A Antenna connector SO-239 (50 Ω) Dimensions (projections not included) 140.0 (W) × 40.0 mm 5.5 (W) × 1.6 (H) (H) × × 4.6 118.0 (D) in (D) Weight (approximate) 1.1 kg, 2.4 lb Transmitter Modulation system Output power Maximum frequency deviation * Except for the SAU version Spurious emissions Microphone connector Variable reactance frequency modulation See the table on the right. ±5.0 kHz (Wide)*/ ±2.5 kHz (Narrow) USA, EXP, KOR, TPE: Less than -60 dBc SAU: Less than -50 dBc 8-pin modular (600 Ω) Output power (approximate) Indicator USA, EXP High: 65 W KOR 50 W Mid: 25 W 25 W Mid-Low: 10 W 10 W Low: 5 W 5 W TPE 24 W 10 W - 5 W SAU 23 W 10 W - 5 W Receiver Receive system Double-conversion superheterodyne Intermediate frequencies 1st: 46.35 MHz, 2nd: 450 kHz Sensitivity (at 12 dB SINAD) USA, EXP, KOR, TPE: Less than 0.18 μV SAU: Less than 0.25 μV USA, EXP, KOR, TPE: Squelch sensitivity Less than 0.13 μV (threshold) SAU: Less than 0.18 μV (threshold) Selectivity * Except for the SAU version Wide*: More than ±6 kHz/6 dB Less than ±14 kHz/60 dB Narrow: More than ±3 kHz/6 dB Less than ±9 kHz/55 dB Spurious and image More than 60 dB rejection AF output power More than 3.5 W (4.5 W typical) (at 13.8 V DC) (at 10% distortion with a 4 Ω load) External speaker 3-conductor 3.5 (d) mm (1/8 inch) connector /4 Ω I Options D Speakers • SP-35/SP-35L EXTERNAL SPEAKER Input impedance: 4 Ω Rated input: 5 W Maximum input: 7 W D DC cables • OPC-345/OPC-347/OPC-1132 DC POWER CABLE D Microphone • HM-133V/HM-154/HM-209 MICROPHONE HM-133V: Ten-key type HM-154: Non Ten-key type HM-209: Active noise canceling type D Others • OPC-440 MICROPHONE EXTENSION CABLE • OPC-589 MICROPHONE ADAPTER CABLE • OPC-474 PROGRAMMING CABLE For transceiver-to-transceiver programming. • CS-V3500 PROGRAMMING SOFTWARE +OPC-478UC/OPC-478UC-1 PROGRAMMING CABLE Provides quick and easy programming of such settings as Memory channels and Set modes contents. Icom and the Icom logo are registered trademarks of Icom Incorporated (Japan) in Japan, the United States, the United Kingdom, Germany, France, Spain, Russia, Australia, New Zealand, and/or other countries. All other products or brands are registered trademarks or trademarks of their respective holders. 1-1-32 Kamiminami, Hirano-ku, Osaka 547-0003, Japan Aug. 2022 A7677D-1EX-1 Printed in Japan © 2022 Icom Inc.
-
 1
1 -
 2
2
 |
 |
