Image Fitness 977 Treadmill English Manual - Page 5
Operation, Adjustment
 |
View all Image Fitness 977 Treadmill manuals
Add to My Manuals
Save this manual to your list of manuals |
Page 5 highlights
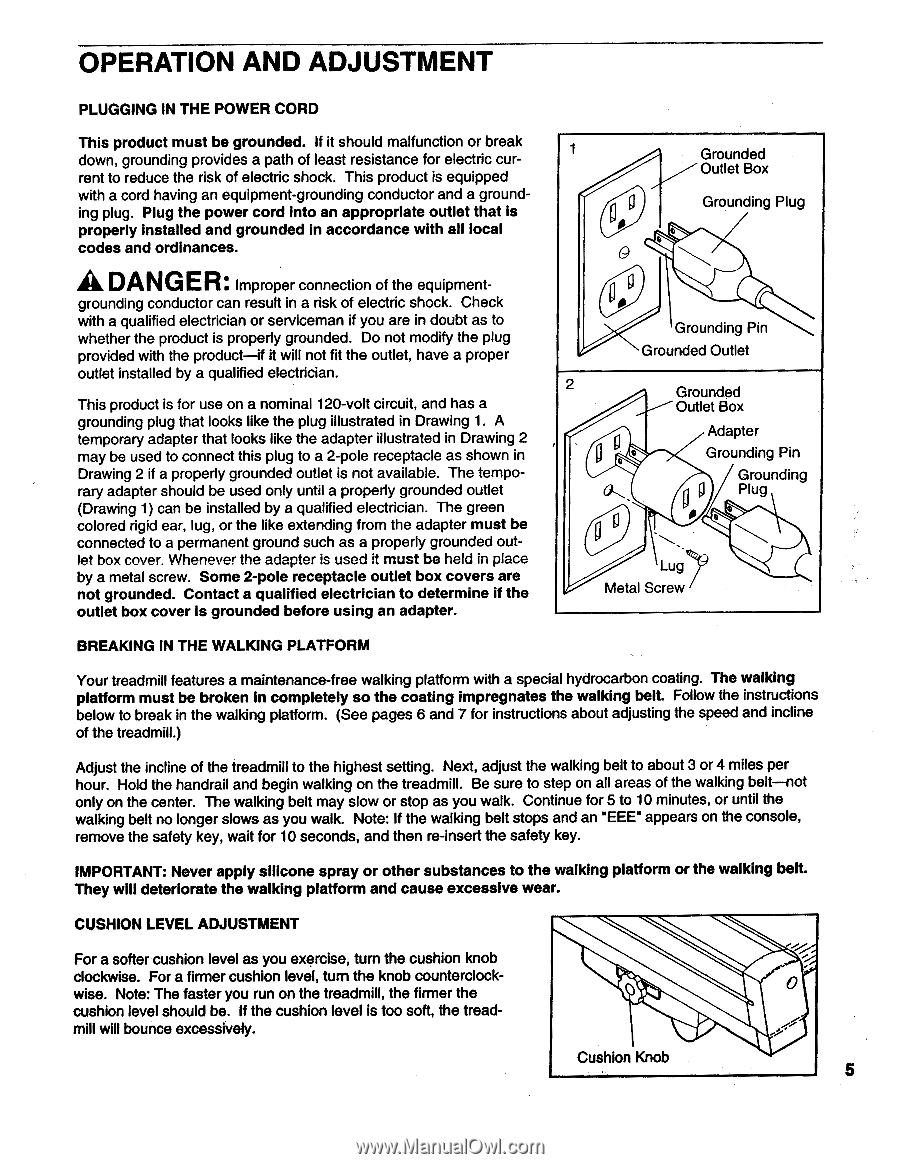
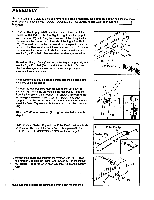
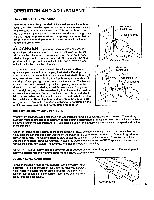
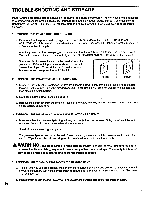
OPERATION AND ADJUSTMENT PLUGGING IN THE POWER CORD This product must be grounded. If it should malfunction or break down, grounding provides a path of least resistance for electric current to reduce the risk of electric shock. This product is equipped with a cord having an equipment-grounding conductor and a grounding plug. Plug the power cord into an appropriate outlet that is properly installed and grounded in accordance with all local codes and ordinances. A DANGER: Improper connection of the equipment- grounding conductor can result in a risk of electric shock. Check with a qualified electrician or serviceman if you are in doubt as to whether the product is properly grounded. Do not modify the plug provided with the product-if it will not fit the outlet, have a proper outlet installed by a qualified electrician. This product is for use on a nominal 120-volt circuit, and has a grounding plug that looks like the plug illustrated in Drawing 1. A temporary adapter that looks like the adapter illustrated in Drawing 2 may be used to connect this plug to a 2-pole receptacle as shown in Drawing 2 if a properly grounded outlet is not available. The temporary adapter should be used only until a properly grounded outlet (Drawing 1) can be installed by a qualified electrician. The green colored rigid ear, lug, or the like extending from the adapter must be connected to a permanent ground such as a properly grounded outlet box cover. Whenever the adapter is used it must be held in place by a metal screw. Some 2-pole receptacle outlet box covers are not grounded. Contact a qualified electrician to determine if the outlet box cover is grounded before using an adapter. 1 0,° 0 Grounded Outlet Box Grounding Plug Grounding Pin Grounded Outlet 2 99 Grounded Outlet Box Adapter Grounding Pin Grounding Plug Ii 0 Lug Metal Screw BREAKING IN THE WALKING PLATFORM Your treadmill features a maintenance-free walking platform with a special hydrocarbon coating. The walking platform must be broken in completely so the coating impregnates the walking belt. Follow the instructions below to break in the walking platform. (See pages 6 and 7 for instructions about adjusting the speed and incline of the treadmill.) Adjust the incline of the treadmill to the highest setting. Next, adjust the walking belt to about 3 or 4 miles per hour. Hold the handrail and begin walking on the treadmill. Be sure to step on all areas of the walking belt-not only on the center. The walking belt may slow or stop as you walk. Continue for 5 to 10 minutes, or until the walking belt no longer slows as you walk. Note: If the walking belt stops and an TEE" appears on the console, remove the safety key, wait for 10 seconds, and then re-insert the safety key. IMPORTANT: Never apply silicone spray or other substances to the walking platform or the walking belt. They will deteriorate the walking platform and cause excessive wear. CUSHION LEVEL ADJUSTMENT For a softer cushion level as you exercise, turn the cushion knob clockwise. For a firmer cushion level, turn the knob counterclockwise. Note: The faster you run on the treadmill, the firmer the cushion level should be. If the cushion level is too soft, the treadmill will bounce excessively. Cushion Knob 5
-
 1
1 -
 2
2 -
 3
3 -
 4
4 -
 5
5 -
 6
6 -
 7
7 -
 8
8 -
 9
9 -
 10
10 -
 11
11 -
12
-
13
-
14
-
15
-
16
 |
 |