Insignia IN-CD101 User Manual (English) - Page 9
Remote Sensor Optional
 |
View all Insignia IN-CD101 manuals
Add to My Manuals
Save this manual to your list of manuals |
Page 9 highlights
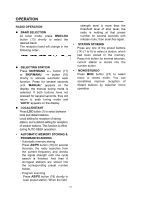
OPERATION z LOUDNESS Press BND/LOU button (13) for several seconds to reinforce the bass output and display will show "LOUD". Press it for several seconds again to release this function. z SET THE CLOCK Press and hold down the DISP button (15) until the clock is shown on the display and flashes. Then press the MANU/SKIP button (16) to change minutes or MANU/SKIP button (17) to change hours. z SELECT MODE Press MODE button (6) to choose desired listening mode. (e.g. radio mode to cassette mode to CDC mode to AUX IN mode.) CD source can be input from the CDC socket (back of the unit). z MUTE Press MUT button (3) to mute down the sound instantly. If any button (except OPEN button (7) and EJECT button (4)) is pressed in mute state, the mute mode is released. z LIQUID CRYSTAL DISPLAY Exhibit current frequency and activated functions on the display (8). z EQUALIZATION Press EQ button (19) to turn on equalization function and to select desired audio mode. There are five kinds of mode as below: →DSP OFF→FLAT→CLASSICS→POP M→ROCK M z REMOTE SENSOR (OPTIONAL) Point the remote control handset to the remote sensor IR (26). Press the function keys on the handset to control the system. z AUXILIARY INPUT The unit can be connected to a portable audio player through the AUX IN jack (2) z FLASHING LED If the front panel does not install in the main unit, the LED (11) will be flashing. z RESET Reset button (12) must be activated with either a ballpoint pen or thin metal object. The reset button is to be activated for the following reasons: - Initial installation of the unit when all wiring is completed. - All the function buttons do not operate. - Error symbol on the display. Note: If press reset button (12), the unit can't work yet, please use a cotton swab soaked in isopropyl alcohol to clean the socket on the front panel. 9
-
 1
1 -
2
-
3
-
 4
4 -
 5
5 -
 6
6 -
 7
7 -
 8
8 -
 9
9 -
 10
10 -
 11
11 -
 12
12 -
 13
13 -
 14
14 -
15
 |
 |
