Insignia NS-40L240A13 User Manual (English) - Page 8
Insignia 40 1080p LCD TV, Introduction, Installing the stand or, wall-mount bracket - wall mount
 |
View all Insignia NS-40L240A13 manuals
Add to My Manuals
Save this manual to your list of manuals |
Page 8 highlights
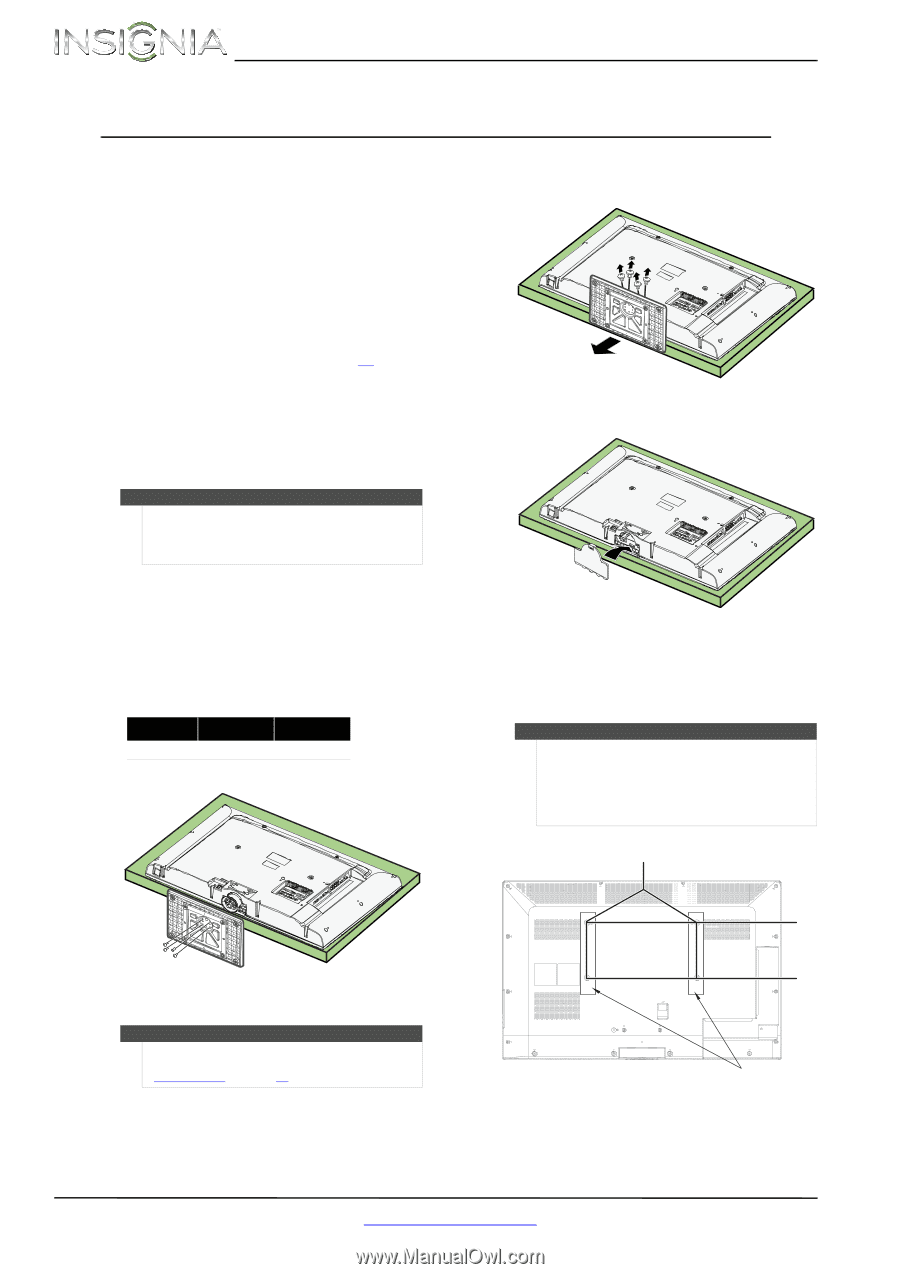
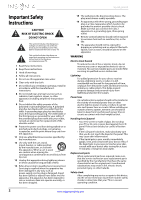
NS-40L240A13 Insignia 40" 1080p LCD TV Insignia 40" 1080p LCD TV Introduction Congratulations on your purchase of a high-quality Insignia product. Your NS-40L240A13 represents the state of the art in LCD TV design and is designed for reliable and trouble-free performance. INlink Enjoy the benefit of having HDMI CEC compatible products plug and play! No setup is needed! CEC technology lets different components discover and communicate with each other. (See page 39 for instructions on how to use INlink.) Installing the stand or wall-mount bracket Notes • • If you plan to wall-mount your TV, do not install the stand. Store the stand and stand screws in case you decide to use the stand in the future. Installing the stand To install the stand: 1 Carefully place your TV screen face-down on a cushioned, clean surface to protect the screen from damages and scratches. 2 Secure the stand to the stand column with the four provided screws. Screw type Screw length # of screws M6 12 mm 4 2 Remove the four screws that secure the stand column to the screen, then remove the column. 3 Install the stand cover. 4 Attach the wall-mount bracket to your TV using the mounting holes on the back of your TV. See the instructions that came with the wall-mount bracket for information about how to correctly hang your TV. Note • • The length of the wall-mount screws vary depending on the wall-mount bracket you purchased. See the instructions that came with the wall-mount bracket for screw lengths. The mounting holes on the back of your TV take type M6 screws. 15.75 in. (400 mm) 7.84 in. (200 mm) Installing a wall-mount bracket Warning This TV is intended to be supported by a UL Listed wall mount bracket with suitable weight/load. (See "Miscellaneous" on page 47.) To attach your TV to a wall-mount bracket: 1 Carefully place your TV screen face-down on a cushioned, clean surface to protect the screen from damages and scratches. 4 www.insigniaproducts.com Wall-mount brackets
-
 1
1 -
2
-
 3
3 -
 4
4 -
 5
5 -
 6
6 -
 7
7 -
 8
8 -
 9
9 -
 10
10 -
 11
11 -
 12
12 -
 13
13 -
14
-
15
-
16
-
17
-
18
-
19
-
20
-
21
-
22
-
23
-
24
-
25
-
26
-
27
-
28
-
29
-
30
-
31
-
32
-
33
-
34
-
35
-
36
-
37
-
38
-
39
-
40
-
41
-
42
-
43
-
44
-
45
-
46
-
47
-
48
-
49
-
50
-
51
-
52
-
53
-
54
-
55
 |
 |