Insignia NS-BC2ZSS1 User Guide - Page 10
Installing the handles, Place the handle on the mounting studs. The set screws are
 |
View all Insignia NS-BC2ZSS1 manuals
Add to My Manuals
Save this manual to your list of manuals |
Page 10 highlights
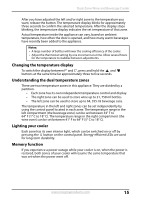
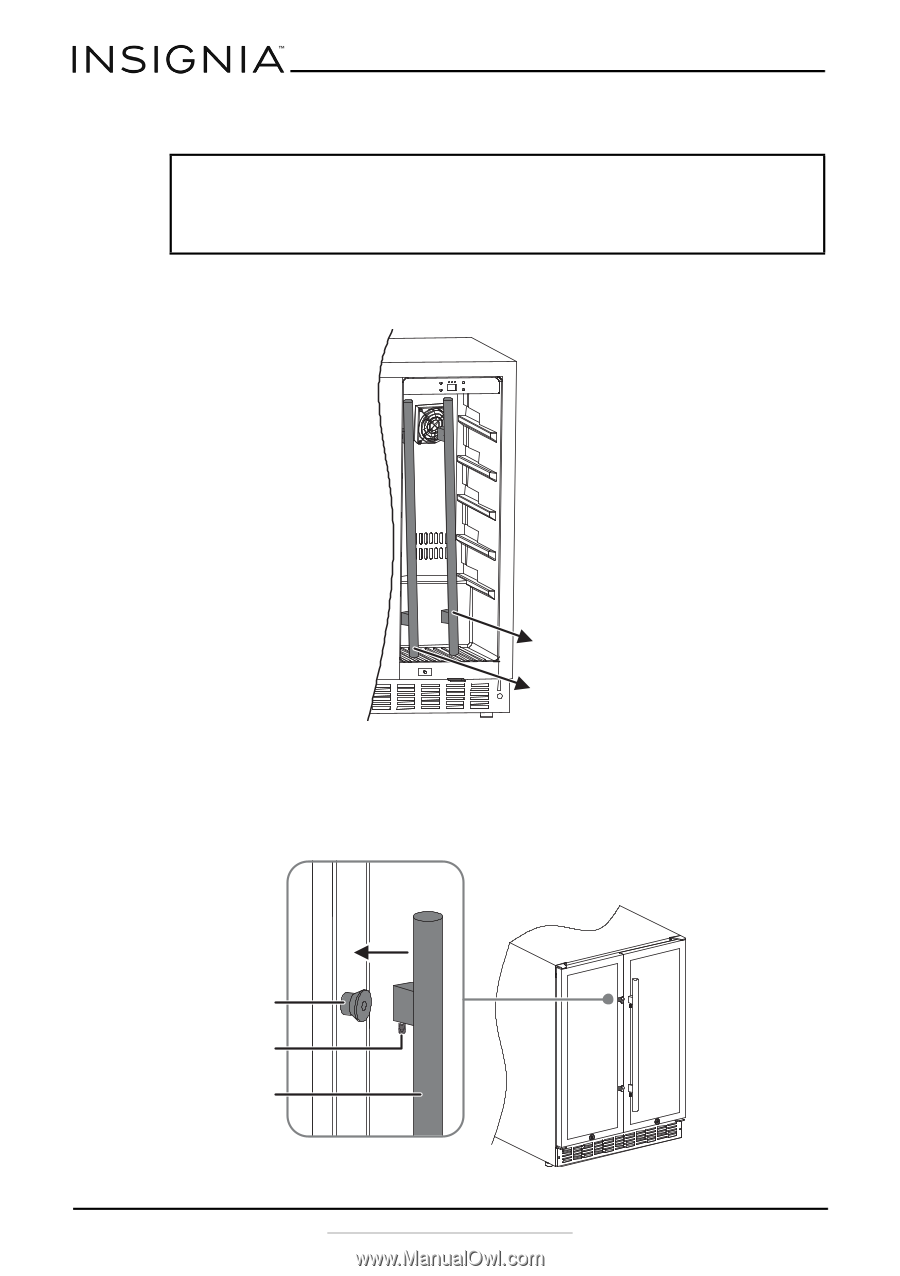
Installing the handles Notes: • We recommend having two people complete the installation. • To avoid scratching the front panel, place a soft cloth or towel against the panel while installing the door handle. 1 Remove the door handles and hardware bag from the from the cooler. The hardware bag contains a hex key and four extra screws. 2 Place the beverage cooler carefully on its back. 3 Place the handle on the mounting studs. The set screws are pre-installed in the handles and should face down when installed correctly. Mounting stud Set screw Handle 10 www.insigniaproducts.com
-
 1
1 -
2
-
3
-
4
-
 5
5 -
 6
6 -
 7
7 -
 8
8 -
 9
9 -
 10
10 -
 11
11 -
 12
12 -
 13
13 -
 14
14 -
 15
15 -
16
-
17
-
18
-
19
-
20
-
21
-
22
-
23
-
24
-
25
-
26
 |
 |
10
www.insigniaproducts.com
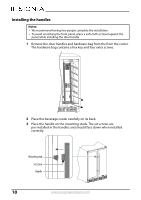
Installing the handles
1
Remove the door handles and hardware bag from the from the cooler.
The hardware bag contains a hex key and four extra screws.
2
Place the beverage cooler carefully on its back.
3
Place the handle on the mounting studs. The set screws are
pre-installed in the handles and should face down when installed
correctly.
Notes:
•
We recommend having two people complete the installation.
•
To avoid scratching the front panel, place a soft cloth or towel against the
panel while installing the door handle.
Mounting stud
Set screw
Handle