Insignia NS-CNV43 Quick Setup Guide (English) - Page 1
Insignia NS-CNV43 Manual
 |
View all Insignia NS-CNV43 manuals
Add to My Manuals
Save this manual to your list of manuals |
Page 1 highlights
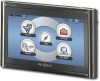
Congratulations on your purchase of a high-quality Insignia product. Your GPS is designed for reliable and trouble-free performance. Use this guide for initial setup. See your User Guide for more information. Package contents • 4.3" GPS • Car DC power adapter • USB cable • Mounting bracket • Mounting cradle • Micro SD memory card • SIM card • User Guide • Quick Setup Guide Features Front and side panels Charge indicator LCD screen Power button Setting up your GPS Charging the battery Your GPS comes with a built-in rechargeable battery. Fully charge the battery before using the GPS for the first time. Charging time is normally about three hours. A fully charged battery delivers about two hours of use. See "Connecting power to your GPS" below. Back panel Micro SD and SIM card cover Mounting Microphone slots Speaker Connecting power to your GPS Connecting to a cigarette lighter socket CAUTION: Disconnect the GPS from the DC power adapter when starting the vehicle. • Plug the USB connector on the DC power adapter into the USB port on the side of the GPS, then plug the DC plug into the vehicle's 12-24V DC accessory socket (cigarette lighter socket). cigarette lighter socket Quick Setup Guide NS-CNV43 GPS Actual product may vary from image shown. Volume control USB port Reset button Fig. 1 Fig. 2 Mounting your GPS in a vehicle WARNING: The assembly must not be mounted so that it impairs the driver's view of the road. Make sure that your car's airbags are not obstructed by the GPS. Use the supplied mounting bracket and cradle to mount your GPS in a vehicle. 1 Slide the mounting cradle onto the end of the mounting bracket to secure it. 2 Set the bottom edge of the GPS onto the mounting cradle. Then push the retaining bracket at the top of the mounting cradle (1) toward the GPS unit. To remove the unit, push the retaining bracket at the top of the mount cradle toward the back of the GPS. 3 Lift the suction cup lever, then press the suction cup to the windshield. Press down on the suction cup lever (2) to secure the bracket to the windshield. 4 Rotate the mounted GPS (3) to a comfortable viewing position.
-
 1
1 -
 2
2
 |
 |
