Insignia NS-DD10PDVD19 Quick Setup Guide - Page 2
Installing Your Player In A Vehicle, Connecting To A Tv Or Monitor, Specifications, Troubleshooting - power cord
 |
View all Insignia NS-DD10PDVD19 manuals
Add to My Manuals
Save this manual to your list of manuals |
Page 2 highlights
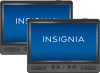
INSTALLING YOUR PLAYER IN A VEHICLE 1 Slide the support strap through the slots on the back of your DVD player. 2 Place the strap around the headrest of one of the vehicle's front seats. 3 Center your DVD player in the middle of the headrest, then buckle the strap securely. LOOSEN STRAPS FRONT A B BACK E1 F1 F2 E2 PULL CONNECTING TO A TV OR MONITOR You can connect your DVD player to a TV or monitor so you can watch DVDs on the TV or monitor. 1 Plug the (included) AV adapter cable into the AV OUT jack on your DVD player. 2 Plug an AV cable (not included) into the other end of the AV adapter cable. Make sure that the colors on the connectors match. 3 Plug the other end of the AV cable into the AV jacks on the TV or monitor, making sure to match the colors on the connectors with the jacks. 4 Turn your TV or monitor on. Note: You may have to select the correct input on your TV or monitor. TV or monitor White = left audio Red = right audio Yellow = video ON OFF AV OUT AV IN DC IN 9-12V AV adapter cable AUDIO In VIDEO In RCA cable (not included) SPECIFICATIONS • Dimensions (H × W × D): Each player: 7.24 × 9.8 × 1.5 in. (184 × 248.9 × 38.1 mm) • Weight: Each player: 1.8 lbs. (.8 kg) • Compatible discs: DVDs (Region 1 for U.S.) and CDs • Signal system: PAL or NTSC • LCD: 10 inches • Frequency response: 20 Hz to 20 kHz • Audio S/N: >60 dB • Dynamic range: >80 dB • Laser: Semiconductor • Wave length: 650 nm/795 nm • Power requirements: AC 100-240 V, 50/60 Hz • Operating temperature: 32° to 104° F (0° to 40° C) TROUBLESHOOTING No power • Make sure that the AC power adapter is plugged in and connected. • Make sure that your player is turned on. No sound or distorted sound. • Adjust the volume. • Make sure that all cables are inserted correctly into the appropriate jacks. • Make sure that your player is not paused. • Make sure that your player is not in fast forward or fast reverse mode. • Make sure that your player is not too hot. Let it cool for 30 minutes, then try it again. • Make sure that the headphones are not plugged in. Cannot fast-forward or fast-reverse through a movie. • You cannot fast-forward through opening credits and warning information at the beginning of a movie. • Some DVDs do not allow rapid scanning or skipping of titles or chapters. • These functions do not work in AV IN mode. The icon appears on the screen. The action you tried cannot be done because: • The DVD software does not allow it. • The DVD does not support the feature (for example the Subtitle feature). • The feature is not available at the current point on the DVD. • You entered a title or chapter number that is out of range. Picture is distorted. • During fast-forwarding or fast-reversing, distortion is normal. • The DVD may be damaged. Try another DVD. Disc does not play. • Make sure that the disc is inserted with the label side up. • Make sure that the disc is compatible with your player. Your player can play DVDs and audio CDs. The display has a blue screen. • Press SOURCE to switch the input to DVD. The remote control is not working. • Make sure that you are using the correct remote control. Remote control A must be used with DVD player A, and remote control B must be used with DVD player B. • Make sure that you are aiming the remote control correctly. See "Aiming your remote control". • Replace the remote control battery. See "Replacing the remote control battery". LEGAL NOTICES FCC Statement This device complies with Part 15 of the FCC Rules. Operation of this product is subject to the following two conditions: (1) this device may not cause harmful interference, and (2) this device must accept any interference received, including interference that may cause undesired operation. This equipment has been tested and found to comply within the limits for a class B digital device, pursuant to Part 15 of the FCC Rules. These limits are designed to provide reasonable protection against harmful interference in a residential installation. This equipment generates, uses, and can radiate radio frequency energy and, if not installed and used in accordance with the instructions, may cause harmful interference to radio communications. However, there is no guarantee that interference will not occur in a particular installation. If this equipment does cause harmful interference to radio or television reception, which can be determined by turning the equipment off and on, the user is encouraged to try to correct the interference by one or more of the following measures: • Reorient or relocate the receiving antenna. • Increase the separation between the equipment and receiver. • Connect the equipment into an outlet on a circuit different from that to which the receiver is connected. • Consult the dealer or an experienced radio/TV technician for help. FCC warning Changes or modifications not expressly approved by the party responsible for compliance with the FCC Rules could void the user's authority to operate this equipment. IMPORTANT SAFEGUARDS 1 Read these instructions. 2 Keep these instructions. 3 Heed all warnings. 4 Follow all instructions. 5 Do not use this apparatus near water. 6 Clean only with a dry cloth. 7 Do not block any ventilation openings. Install in accordance with the manufacturer's instructions. 8 Do not install near any heat sources such as radiators, heat registers, stoves, or other apparatus (including amplifiers) that produce heat. 9 Do not defeat the safety purpose of the polarized or grounding-type plug. The wide blade is provided for your safety. If the provided plug does not fit into your outlet, consult an electrician for replacement of the obsolete outlet. 10 Protect the power cord from being walked on or pinched particularly at plugs, convenience receptacles, and the point where they exit from the apparatus. 11 Only use attachments/accessories specified by the manufacturer. 12 Unplug this apparatus during lightning storms or when unused for long periods of time. 13 Refer all servicing to qualified service personnel. Servicing is required when the apparatus has been damaged in any way, such as power-supply cord or plug is damaged, liquid has been spilled or objects have fallen into the apparatus, the apparatus has been exposed to rain or moisture, does not operate normally, or has been dropped. 14 To reduce the risk of fire or electric shock, do not expose this device to rain, moisture, dripping, or splashing, and no objects filled with liquids, such as vases, shall be placed on it. 15 The wall plug is the disconnecting device. The plug must remain readily operable. ONE-YEAR LIMITED WARRANTY Visit www.insigniaproducts.com for details. CONTACT INSIGNIA: For customer service, call 1-877-467-4289 (U.S. and Canada) or 01-800-926-3000 (Mexico) www.insigniaproducts.com INSIGNIA is a trademark of Best Buy and its affiliated companies. Registered in some countries. Distributed by Best Buy Purchasing, LLC. 7601 Penn Ave South, Richfield, MN 55423 U.S.A. ©2019 Best Buy. All rights reserved. V3 ENGLISH 19-0605
-
 1
1 -
 2
2
 |
 |
