Insignia NS-DPF8PR Quick Setup Guide (English) - Page 1
Insignia NS-DPF8PR Manual
 |
View all Insignia NS-DPF8PR manuals
Add to My Manuals
Save this manual to your list of manuals |
Page 1 highlights
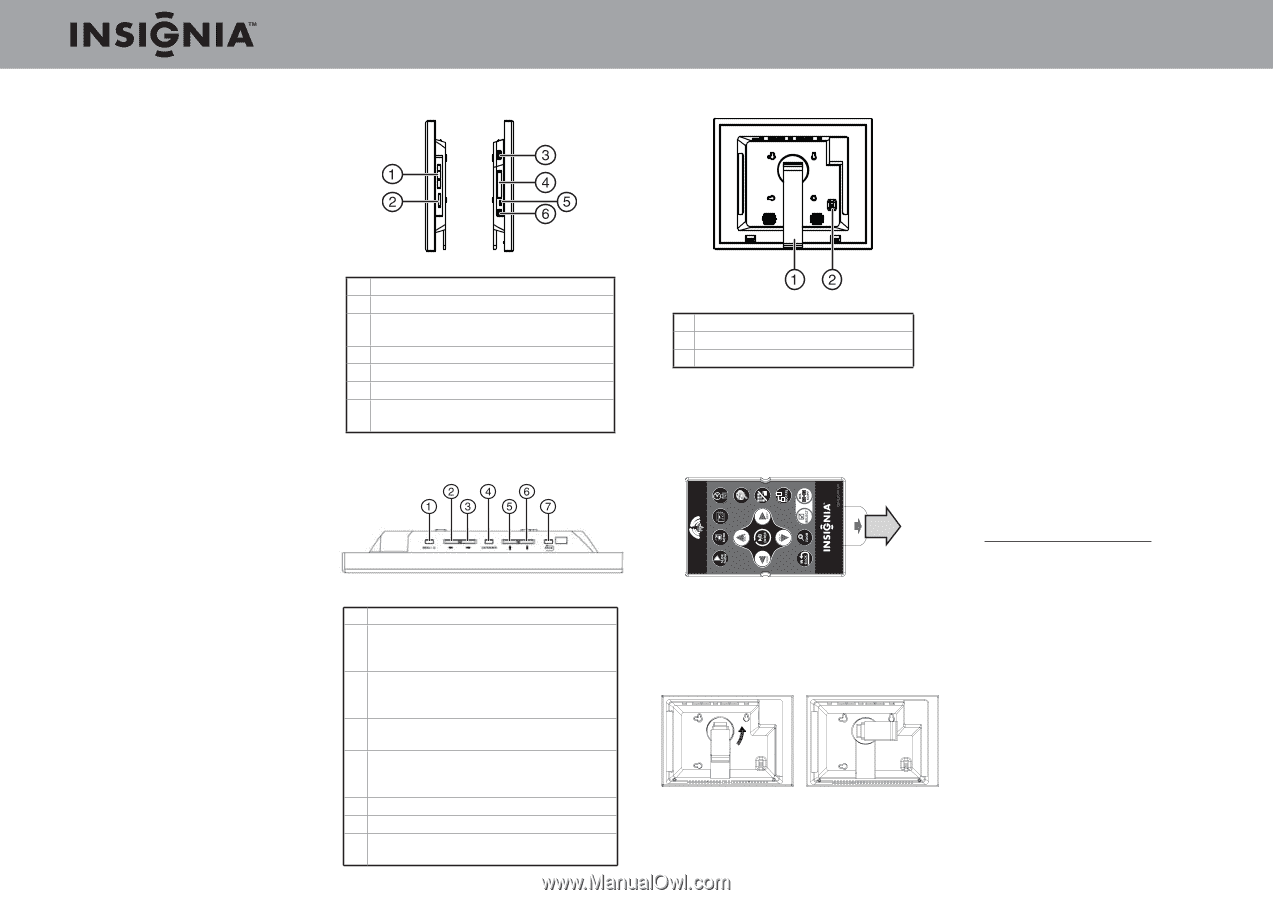
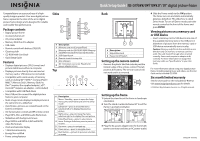
Quick Setup Guide l NS-DPF8PR/DPF10PR 8"/10" digital picture frame Congratulations on your purchase of a highquality Insignia product. Your new digital picture frame represents the state of the art in digital picture frame design and is designed for reliable and trouble-free performance. Package contents • Digital picture frame • Accessory frames (2) • AC power adapter • Memory Stick Duo Pro adapter • USB cable • Remote control with battery (CR2025) • Cleaning cloth • CD-ROM with User Guide • Quick Setup Guide Features • Displays digital pictures (JPEG format) and picture slideshows without a computer • Displays pictures directly from an inserted memory card or USB device (not included) • Compatible with a wide variety of memory cards, including SD™, SDHC™, CompactFlash®, MMC™, Memory Stick®, Memory Stick Pro Duo™ (requires the supplied adapter), xD™, microSD™ (requires an adapter - not included) • Compatible with USB flash drives • Mini-USB port to connect the digital picture frame to your computer • Multi-image mode displays multiple pictures at the same time in a slideshow • Auto Rotate-pictures are rotated based on the frame's orientation • On-frame button controls and RF remote control • Plays MP3, AAC, and WMA audio file formats • Slideshow with background music. • Plays MJPEG and MPEG 4 (AVI and MOV) video file formats • Clock and calendar display • 1 GB internal memory • Energy Star certified • Power saving features Sides # Description 1 Memory card slot (CompactFlash) 2 Memory card slot (SD/SDHC/MMC/Memory Stick/Memory Stick Pro Duo/xD/microSD) 3 USB (type A) port 4 Remote control storage slot 5 Mini USB port 6 DC 12 V power connector. Plug the AC power adapter in here. Top # Description Menu / Standby-press to open the Setup 1 menu; press and hold to put unit into sleep mode. Left arrow-press to move the menu 2 selection left or to display the previous picture 3 Right arrow-press to move the menu selection right or to display the next picture Enter/Play/Pause-press to select menu 4 items. During a slideshow, press to pause or resume. 5 Up arrow-press to navigate up 6 Down arrow-press to navigate down 7 Back button-go back to previous selection or screen Back # Description 1 Adjustable stand 2 Power On/Off switch Setting up the remote control • Remove the plastic tab that extends past the bottom edge of the remote control. This tab protects the battery. The remote control will not work until it is removed. 4 Slide the Power switch to the ON position. The frame turns on and starts automatically playing a slideshow. This slideshow is called Demo mode. To turn off Demo mode, point the remote control at the front of the frame and press ENTER. Viewing pictures on a memory card or USB device • Insert a memory card or USB device into one of the available memory slots or the USB port. A slideshow of pictures from the memory card or USB device automatically starts to play. Caution: Memory cards fit into the card slots in one direction only. Do not force a memory card into a slot. The card should fit snugly when inserted correctly. Some cards require an adapter to fit correctly. For more information on supported memory cards, see"Specifications"in your User Guide. For more information about using your digital picture frame, including playing music and videos, see the User Guide on the included CD-ROM. Six-month limited warranty See the User Guide on the included CD-ROM or visit www.insigniaproducts.com for details. © 2009 Best Buy Enterprise Services, Inc. All rights reserved. Setting up the frame 1 Extend the stand to set the frame in landscape orientation. 2 Turn the stand counterclockwise 90° to set the frame in portrait orientation. 3 Plug the AC power adapter into the frame's DC power connector and into an AC power outlet. ENGLISH 09-0562
-
 1
1
 |
 |