Insignia NS-HWG1865 User Guide - Page 12
Step 7: Align and attach the side panels to the top panel, You'll need
 |
View all Insignia NS-HWG1865 manuals
Add to My Manuals
Save this manual to your list of manuals |
Page 12 highlights
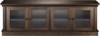
NS-HWG1865 Step 7: Align and attach the side panels to the top panel 1 Glue two wood dowels (N) into the holes on the top edge of the left side panel (B). 2 Attach the left side panel to the top panel (A) by inserting two cam locks (Q) and tightening with a screwdriver. Make sure that the door hinge mounts are on the same side as the door stoppers. 3 Repeat this process to attach the right side panel (C) on the opposite end. Door stopper Door hinge mounts point towards the front of the unit You'll need: N (4) Q (4) CC (1) Phillips screwdriver 12 www.insigniaproducts.com
-
 1
1 -
2
-
3
-
4
-
5
-
6
-
 7
7 -
 8
8 -
 9
9 -
 10
10 -
 11
11 -
 12
12 -
 13
13 -
 14
14 -
 15
15 -
 16
16 -
 17
17 -
18
-
19
-
20
-
21
-
22
-
23
 |
 |

12
NS-HWG1865
www.insigniaproducts.com
Step 7: Align and attach the side panels to the top panel
1
Glue two wood dowels (N) into the holes on the top edge of the left side panel (B).
2
Attach the left side panel to the top panel (A) by inserting two cam locks (Q) and tightening with a screwdriver.
Make sure that the door hinge mounts are on the same side as the door stoppers.
3
Repeat this process to attach the right side panel (C) on the opposite end.
You’ll need:
Door stopper
Door hinge mounts
point towards the
front of the unit
Phillips screwdriver
N
(4)
Q
(4)
CC
(1)