Insignia NS-S6CCBK2 Quick Setup Guide - Page 1
Insignia NS-S6CCBK2 Manual
 |
View all Insignia NS-S6CCBK2 manuals
Add to My Manuals
Save this manual to your list of manuals |
Page 1 highlights
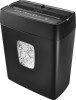
QUICK SETUP GUIDE 6-Sheet Cross Cut Shredder NS-S6CCBK2 / NS-S6CCBK2-C PACKAGE CONTENTS • Cross cut shredder with wastebasket • Quick Setup Guide FEATURES • Shreds up to six sheets of paper at one time • Destroys credit cards, small staples, and small paper clips • Cross-cut size .2 × 1.3 in. (5 × 34 mm) protects sensitive data • 3.2 gal. (12 l) capacity wastebasket holds shredded waste and is easy to empty Switch AUTO OFF FWD REV Power Overheat LED indicators # ITEM 1 Handle DESCRIPTION Lets you easily lift up the shredder head to empty the paper inside the wastebasket . Make sure that your shredder is turned off before you move it. 2 Shredding Insert up to six sheets of paper at a time slot or one credit card at a time. 3 LED indicators Overheat: Lights when your shredder has overheated. When overheated, the shredder stops shredding. After 30 minutes, the indicator turns off and the shredder can shred again. Power: Lights when your shredder is in use. 4 Switch FWD: Sends an item through your shredder. The Power indicator lights green. Note: When you slide the power switch to FWD, the cutters run forward continuously. To stop the cutters, you have to move the switch to a different position. Only use FWD to make sure that the remaining paper in the slot gets shredded or that you want to clear the slot. AUTO: Automatically shreds an item when inserted into the shredding slot. The Power indicator lights green. After shredding, the shredding stops automatically. OFF: Turns off your shredder. REV: Reverses the paper in the slot to clear a jam or remove unshredded paper. The power indicator light turns green when REV is being used, similar to FWD. 5 Window Let you see how much shredded material is in the wastebasket. 6 Wastebasket Holds the paper and credit cards that you have shredded. Empty the basket when it is 2/3 full. SETTING UP YOUR SHREDDER 1 Place the wastebasket upright on a level surface. 2 Attach the shredder head to the basket. Make sure that it fits correctly. Note: Do not use plastic bags to line the wastebasket. 3 Connect the power cord to a power outlet. Do not use an extension cord. USING YOUR SHREDDER 1 Slide the power switch to AUTO. AUTO 2 Insert paper (up to six pages) or one credit card into the shredding slot. Your shredder automatically shreds what you insert. Note: Don't put envelopes, adhesive material, newsprint, transparencies, laminated documents, continuous forms, cardboard, or hard and plastic materials (except credit cards) through the shredder. You can shred small staples and small paper clips, if they are attached to the paper you are shredding. 3 If the shredder jams, slide the switch to REV to return the paper, then slide the switch to AUTO. The shredder can be used again when the jam is cleared. REV 4 When the wastebasket is 2/3 full, slide the switch to OFF, unplug the cord from the power outlet, then lift off the shredder head and empty the wastebasket. Before using your new product, please read these instructions to prevent any damage.
-
 1
1 -
 2
2
 |
 |
