Intel D975XBX2KR Product Guide - Page 64
Loading the Intel Matrix Storage Technology RAID Drivers and Software, Setting Up a “RAID Ready” System, Configuring for RAID using Marvell Storage Technology, Configuring the BIOS - driver download
 |
UPC - 735858186162
View all Intel D975XBX2KR manuals
Add to My Manuals
Save this manual to your list of manuals |
Page 64 highlights
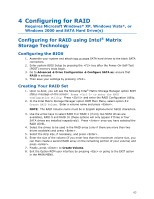
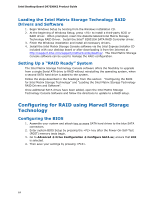
Intel Desktop Board D975XBX2 Product Guide Loading the Intel Matrix Storage Technology RAID Drivers and Software 1. Begin Windows Setup by booting from the Windows installation CD. 2. At the beginning of Windows Setup, press to install a third-party SCSI or RAID driver. When prompted, insert the diskette labeled Intel Matrix Storage Technology RAID Driver. Install the Intel® 82801GH SATA RAID Controller driver. 3. Finish the Windows installation and install all necessary drivers. 4. Install the Intel Matrix Storage Console software via the Intel Express Installer CD included with your desktop board or after downloading it from the Internet at http://support.intel.com/support/motherboards/desktop/. The Intel Matrix Storage Console software can be used to manage the RAID configuration. Setting Up a "RAID Ready" System The Intel Matrix Storage Technology Console software offers the flexibility to upgrade from a single Serial ATA drive to RAID without reinstalling the operating system, when a second SATA hard drive is added to the system. Follow the steps described in the headings from this section: "Configuring the BIOS for Intel Matrix Storage Technology" and "Loading the Intel Matrix Storage Technology RAID Drivers and Software". Once additional SATA drives have been added, open the Intel Matrix Storage Technology Console Software and follow the directions to update to a RAID setup. Configuring for RAID using Marvell Storage Technology Configuring the BIOS 1. Assemble your system and attach two or more SATA hard drives to the blue SATA connectors. 2. Enter system BIOS Setup by pressing the key after the Power-On-Self-Test (POST) memory tests begin. 3. Go to Advanced Drive Configuration Configure SATA as; ensure that IDE is selected. 4. Then save your settings by pressing . 64
-
 1
1 -
2
-
3
-
4
-
5
-
6
-
7
-
8
-
9
-
10
-
11
-
12
-
13
-
14
-
15
-
16
-
17
-
18
-
19
-
20
-
21
-
22
-
23
-
24
-
25
-
26
-
27
-
28
-
29
-
30
-
31
-
32
-
33
-
34
-
35
-
36
-
37
-
38
-
39
-
40
-
41
-
42
-
43
-
44
-
45
-
46
-
47
-
48
-
49
-
50
-
51
-
52
-
53
-
54
-
55
-
56
-
57
-
58
-
 59
59 -
 60
60 -
 61
61 -
 62
62 -
 63
63 -
 64
64 -
 65
65 -
 66
66 -
 67
67 -
 68
68 -
 69
69 -
70
-
71
-
72
-
73
-
74
-
75
-
76
-
77
-
78
 |
 |
