Intel SE7520AF User Guide - Page 32
Installing the Heat Sinks
 |
View all Intel SE7520AF manuals
Add to My Manuals
Save this manual to your list of manuals |
Page 32 highlights
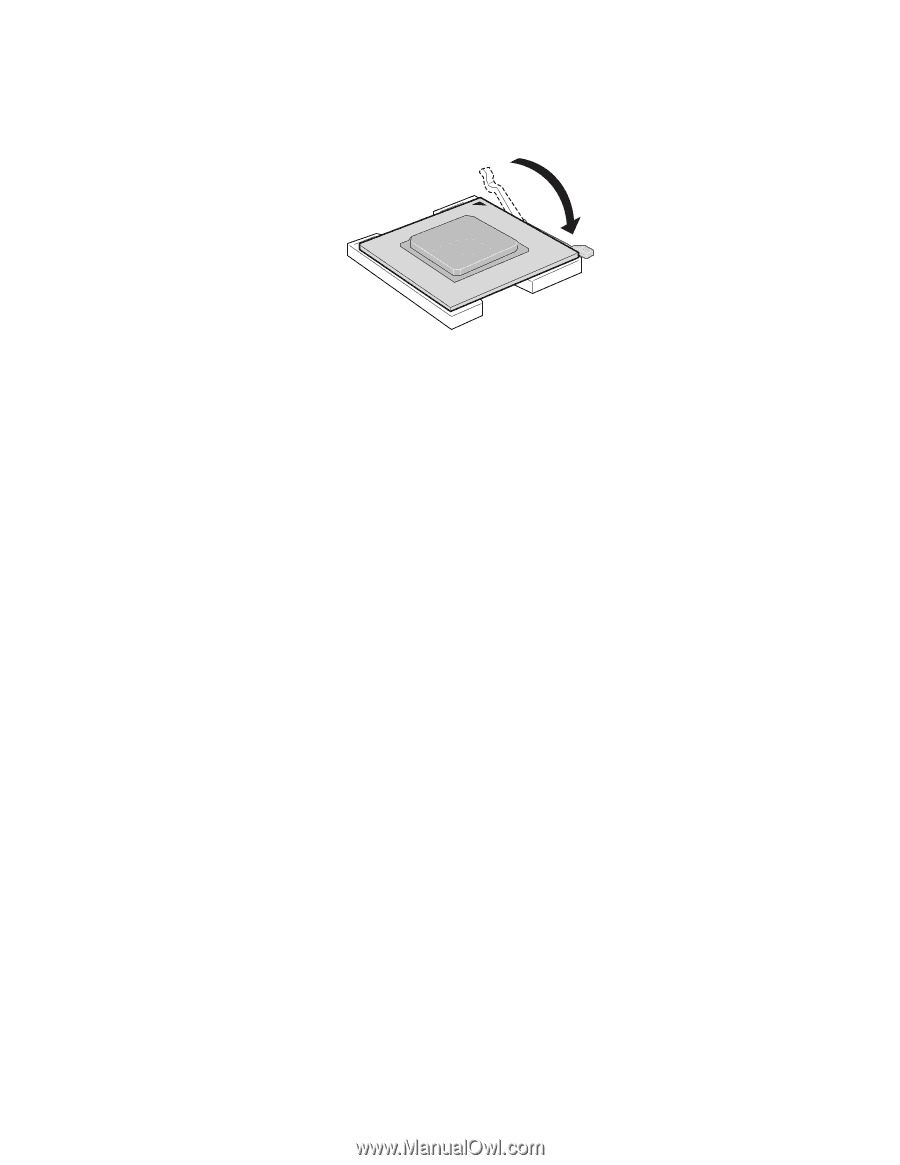
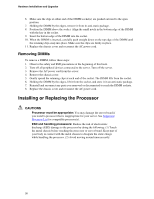
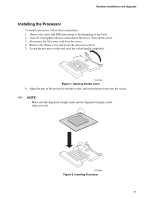
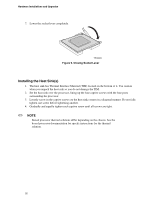
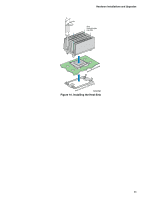
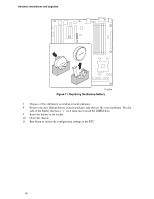
Hardware Installations and Upgrades 7. Lower the socket lever completely. TP00865 Figure 9. Closing Socket Lever Installing the Heat Sink(s) 1. The heat sink has Thermal Interface Material (TIM) located on the bottom of it. Use caution when you unpack the heat sink so you do not damage the TIM. 2. Set the heat sink over the processor, lining up the four captive screws with the four posts surrounding the processor. 3. Loosely screw in the captive screws on the heat sink corners in a diagonal manner. Do not fully tighten one screw before tightening another. 4. Gradually and equally tighten each captive screw until all screws are tight. ✏ NOTE Boxed processor thermal solutions differ depending on the chassis. See the boxed processor documentation for specifc instructions for the thermal solution. 32
-
 1
1 -
2
-
3
-
4
-
5
-
6
-
7
-
8
-
9
-
10
-
11
-
12
-
13
-
14
-
15
-
16
-
17
-
18
-
19
-
20
-
21
-
22
-
23
-
24
-
25
-
26
-
 27
27 -
 28
28 -
 29
29 -
 30
30 -
 31
31 -
 32
32 -
 33
33 -
 34
34 -
 35
35 -
 36
36 -
 37
37 -
38
-
39
-
40
-
41
-
42
-
43
-
44
-
45
-
46
-
47
-
48
-
49
-
50
-
51
-
52
-
53
-
54
-
55
-
56
-
57
-
58
-
59
-
60
-
61
-
62
-
63
-
64
 |
 |