Intermec PB32 AC18 4-Bay Battery Charger Instructions - Page 4
Understanding the Charging Status LEDs, Input voltage - battery charger
 |
View all Intermec PB32 manuals
Add to My Manuals
Save this manual to your list of manuals |
Page 4 highlights
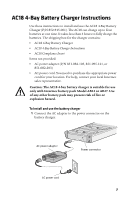
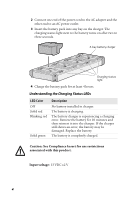
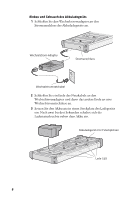
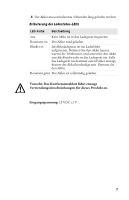
2 Connect one end of the power cord to the AC adapter and the other end to an AC power outlet. 3 Insert the battery pack into any bay on the charger. The charging status light next to the battery turns on after two to three seconds. 4-bay battery charger Charging status light 4 Charge the battery pack for at least 4 hours. Understanding the Charging Status LEDs LED Color Off Solid red Blinking red Solid green Description No battery installed in charger. The battery is charging. The battery charger is experiencing a charging error. Remove the battery for 10 minutes and then reinsert it into the charger. If the charger still shows an error, the battery may be damaged. Replace the battery. The battery is completely charged. Caution: See Compliance Insert for use restrictions associated with this product. Input voltage: 13 VDC ±2 V 4
-
 1
1 -
 2
2 -
 3
3 -
 4
4 -
 5
5 -
 6
6 -
 7
7 -
 8
8 -
 9
9 -
 10
10 -
11
-
12
-
13
-
14
-
15
-
16
-
17
-
18
-
19
-
20
-
21
-
22
-
23
-
24
 |
 |
