Invacare GHS350 Owners Manual - Page 23
using the patient Lift as a Standing aid, Standing Procedure, DO NOT lift the patient.
 |
View all Invacare GHS350 manuals
Add to My Manuals
Save this manual to your list of manuals |
Page 23 highlights
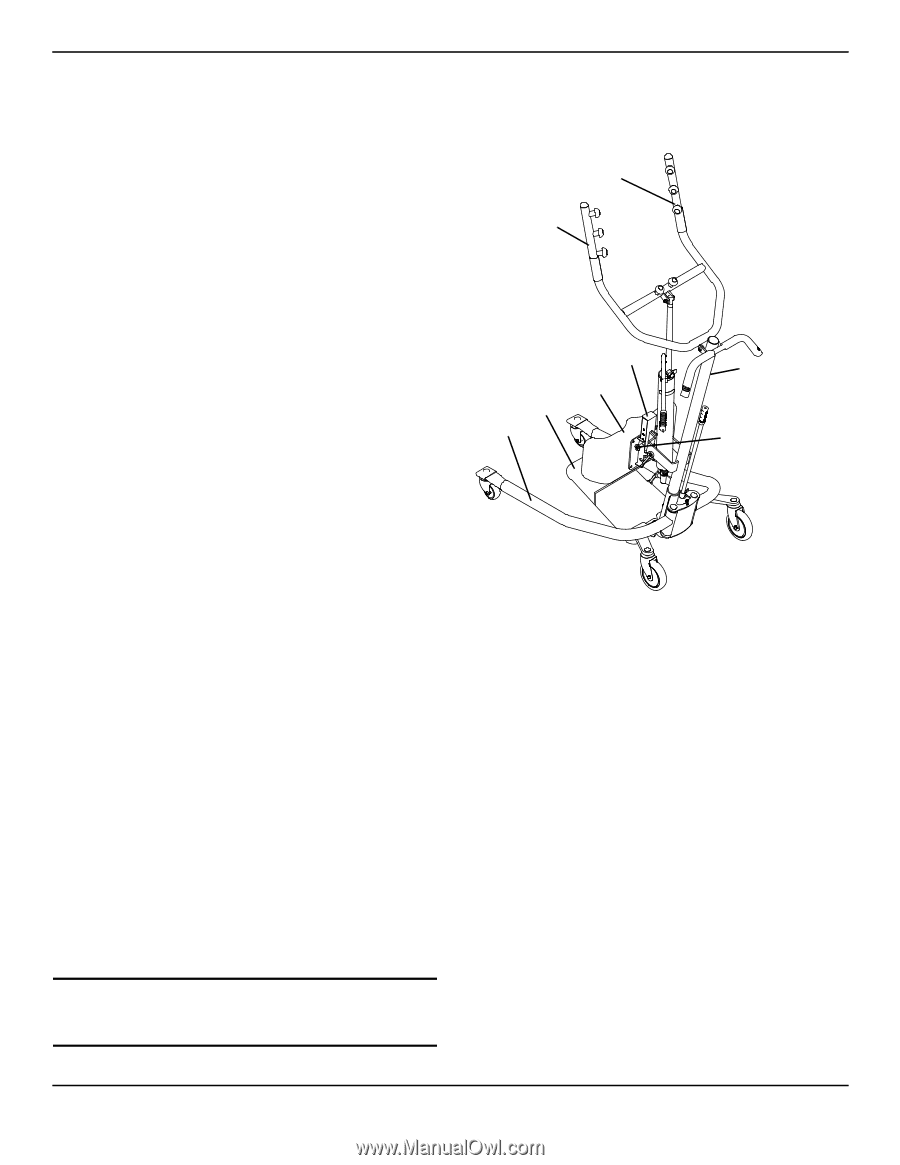
SECTION 6-USING THE PATIENT LIFT AS A STANDING AID SECTION 6-USING THE PATIENT LIFT AS A STANDING AID NOTE: For this procedure, refer to FIGURE 6.1. NOTE: The Get‐U‐Up lift can be used as an aid to lift a person from a seated to a standing position. A minimum of two caregivers is required for this procedure. NOTE: Invacare recommends that two assistants be used for all lifting preparation and transferring to/from procedures; however, our equipment will permit proper operation by one assistant. The use of one assistant is based on the evaluation of the health care professional for each individual case. Standing Procedure 1. Ensure that the patient is capable of walking. 2. Fold the footplate toward the mast. 3. Use the adjustment pins to move the kneepad to a comfortable position. 4. Ensure that the patient is in a sitting position to begin the procedure. A. If the patient is in bed and requires assistance to come to a sitting position, raise the back of the bed. B. Place the lift over the bed with the lift arms angled toward the patient. C. Instruct the patient to grasp the lift arms. D. As the lift arms are raised, the patient should move legs to the side of the bed until a sitting position on the side of the bed is assumed. NOTE: The caregivers should assist as needed. E. Pull the lift away as needed to accommodate the patient's feet and legs over the side of the bed. 5. With one caregiver on each side of the patient, place a gait belt on the patient. 6. Ensure that the patient is wearing shoes with skid‐proof soles. 7. If the patient is on the bed, raise the bed (if possible) while ensuring that the patient's feet remain on the floor. 8. If a walker is to be used, place the walker in front of the patient. 9. Advance the lift toward the patient so that the patient can easily reach the lift arms. 10. Instruct the patient to grasp the lift arms. 11. Ensure that the patient's feet are directly under them. 12. Begin raising the lift arms. 13. On a count of three, instruct the patient to pull and stand‐up while the caregivers support with the gait belt. Lift Arm Lift Arm Footplate Base Post Kneepad Mast Adjustment Pin Note: The upper adjustment pins are typically used for shorter individuals. The lower adjustment pins are typically used for taller individuals. FIGURE 6.1 Standing Procedure ƽ WARNING DO NOT lift the patient. 14. Remove the lift to allow the patient to walk. Part No 1148115 23 Get-U-Up™ Lift
-
 1
1 -
2
-
3
-
4
-
5
-
6
-
7
-
8
-
9
-
10
-
11
-
12
-
13
-
14
-
15
-
16
-
17
-
 18
18 -
 19
19 -
 20
20 -
 21
21 -
 22
22 -
 23
23 -
 24
24 -
 25
25 -
 26
26 -
 27
27 -
 28
28
 |
 |