Invacare P9000XDT1818 Owners Manual - Page 48
Replacing the Batteries
 |
View all Invacare P9000XDT1818 manuals
Add to My Manuals
Save this manual to your list of manuals |
Page 48 highlights
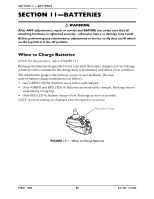
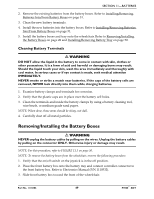
SECTION 11-BATTERIES Connecting the Battery Charger NOTE: For this procedure, refer to FIGURE 11.2. 1. Attach the battery charger connector to the charger port on the joystick. 2. Plug the charger's AC power cord, or extension, into the grounded 120 VAC wall outlet. 3. Wait until charging is complete. NOTE: If the batteries need to be charged more often or take longer to charge than normal, they may need to be replaced. Contact an Invacare dealer for service. Charger Port FIGURE 11.2 Connecting the Battery Charger Replacing the Batteries ƽ WARNING Most batteries are not sold with instructions. However, warnings are frequently noted on the cell caps. Read them carefully, otherwise injury or damage can occur. The use of rubber gloves and chemical goggles or face shields is recommended when working with batteries. NOTE: Invacare recommends that both batteries be replaced if one battery is defective. Recommended Battery Types ƽ WARNING The warranty and performance specifications contained in this manual are based on the use of deep cycle gel cell or sealed lead acid batteries. Invacare strongly recommends their use as the power source for this unit. CAUTION Failure to use the correct battery size and/or voltage may cause damage to your wheelchair and give you unsatisfactory performance. CHAIR SEAT WIDTH 18- inches 2 18-inches 2 QTY VOLTS 12 12 BATTERY SIZE U1 Group 22NF REMARKS Deep Cycle Deep Cycle 1. Remove the battery boxes and tray from the wheelchair. Refer to Removing/Installing the Battery Boxes on page 49 and Installing/Removing Battery Tray on page 50. P9000™ XDT 48 Part No. 1118386
-
 1
1 -
2
-
3
-
4
-
5
-
6
-
7
-
8
-
9
-
10
-
11
-
12
-
13
-
14
-
15
-
16
-
17
-
18
-
19
-
20
-
21
-
22
-
23
-
24
-
25
-
26
-
27
-
28
-
29
-
30
-
31
-
32
-
33
-
34
-
35
-
36
-
37
-
38
-
39
-
40
-
41
-
42
-
 43
43 -
 44
44 -
 45
45 -
 46
46 -
 47
47 -
 48
48 -
 49
49 -
 50
50 -
 51
51 -
 52
52 -
 53
53 -
54
-
55
-
56
-
57
-
58
-
59
-
60
-
61
-
62
-
63
-
64
-
65
-
66
-
67
-
68
 |
 |
