Iomega 34166 Quick Start Guide - Page 4
FireWire/1394/i.Link, eSATA - ultramax
 |
UPC - 742709341663
View all Iomega 34166 manuals
Add to My Manuals
Save this manual to your list of manuals |
Page 4 highlights
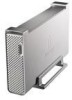
USB FireWire/1394/i.Link eSATA SATA SATA Quick Install-USB or FireWire 1. Connect the included power supply to the back of the drive and to a power outlet. CAUTION! Do not move the drive while it is powered up to avoid drive damage or data loss. 2. Identify the appropriate cable and connect it to the back of the drive. Never connect the drive to the computer with more than one cable. 3. Connect the other end of the cable to the port on your computer. Turn the drive on. Mac Users: The drive should mount and appear on the Mac Desktop. PC Users: Your computer will not recognize the drive until it is reformatted. See instructions below. Formatting the Drive for Windows CAUTION! Reformatting the drive will erase all existing data! 1. Open Windows Disk Management (right click on My Computer, select Manage, and click on Disk Management). 2. If the Disk Wizard opens, click Next. Select the disk, click Next, then Finish. If the Wizard does not open, locate the drive in the lower list. Look for a disk that does not show a drive letter or file system. Right click on the drive name and select Initialize Disk (Windows XP) or Write Signature (Windows 2000), then OK. 3. The drive will now appear as Unallocated and the bar will be black. Right click on the black bar and select New Partition (Windows XP) or Create Partition (Windows 2000). 4. When the Partition Wizard opens, click Next at each screen to select the default options and format the drive NTFS. NOTE: If you want to use the drive cross-platform, you can use Mac OS X Disk Uitlity or the Iomega FAT32 Formatter to change the format to FAT32. Visit the support area on www.iomega.com for detailed instructions. Quick Install-eSATA 1. If you are connecting to an eSATA PCI card, make sure the drivers for the card have been installed and the card is properly recognized by your operating system. NOTE: You do not need to install special drivers for the Iomega UltraMax drive. It is supported by the drivers included with the eSATA PCI card. If you are using a built-in eSATA connection, the drive is supported by native drivers in the operating system. 2. Shut down the computer. NOTE: The eSATA interface is NOT plug-and-play. Always shut down the computer before connecting or disconnecting the drive. 3. Connect the included power supply to the back of the drive and to a power outlet. CAUTION! Do not move the drive while it is powered up to avoid drive damage or data loss. 4. Identify the eSATA cable and connect it to the back of the drive. Never connect the drive to the computer with more than one cable. 5. Connect the other end of the cable to your eSATA PCI card or built-in eSATA connection. 6. Turn on the power switch on the back of the drive and restart your computer. Mac Users: The drive should mount and appear on the Mac Desktop. PC Users: Your computer will not recognize the drive until it is reformatted. See instructions to the left on Formatting the Drive for Windows. 4
-
 1
1 -
 2
2 -
 3
3 -
 4
4 -
 5
5 -
 6
6 -
 7
7 -
 8
8 -
 9
9 -
 10
10 -
11
-
12
-
13
-
14
-
15
-
16
-
17
-
18
-
19
-
20
-
21
-
22
-
23
-
24
-
25
-
26
-
27
-
28
-
29
-
30
-
31
-
32
-
33
-
34
-
35
-
36
-
37
-
38
-
39
-
40
 |
 |
