JVC DT-3D24G1U 22 page technical guide on the DT-3D24G1 24-inch 3-D Monitor - Page 9
Setting Up the DT-3D24G1, Basics of 3D camera recording
 |
View all JVC DT-3D24G1U manuals
Add to My Manuals
Save this manual to your list of manuals |
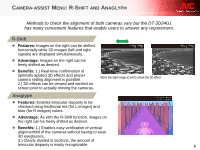
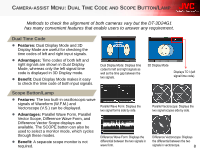
Page 9 highlights
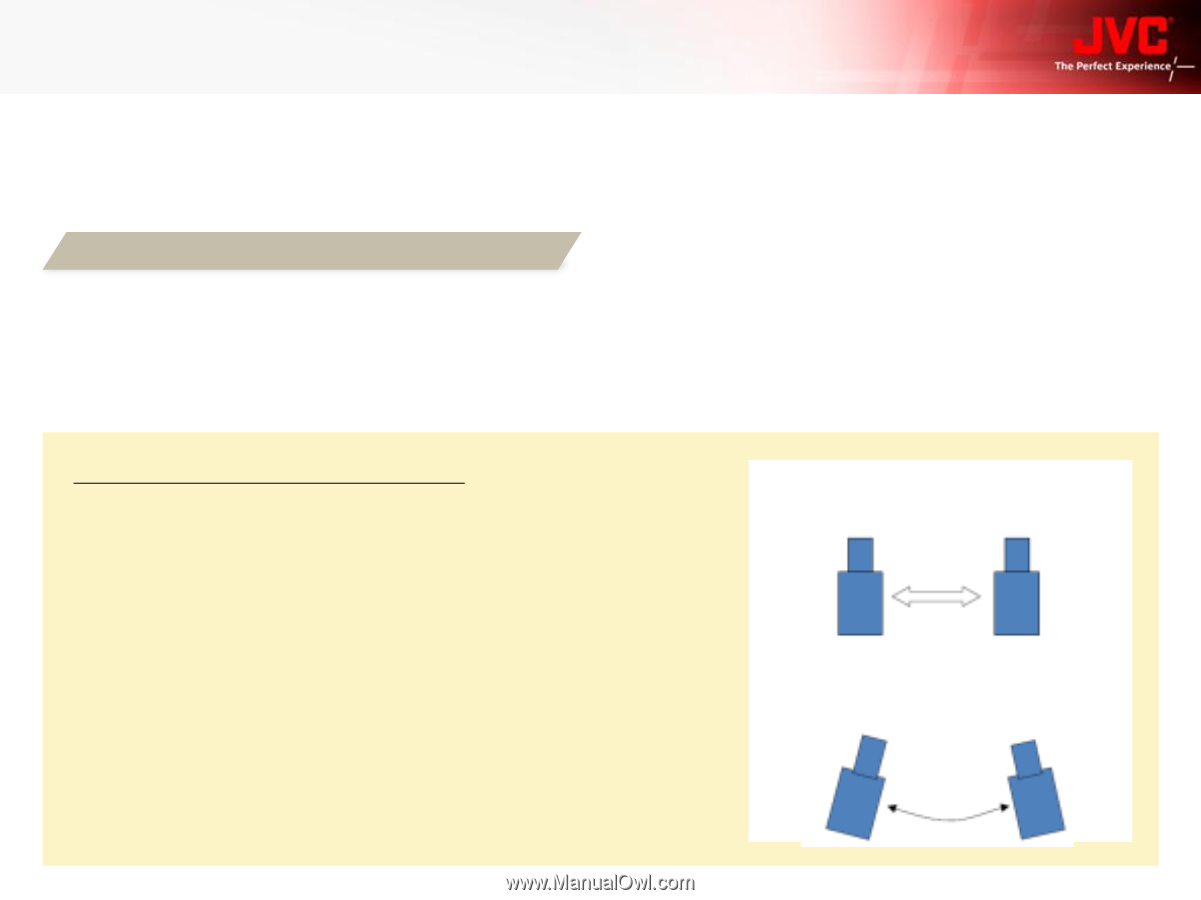
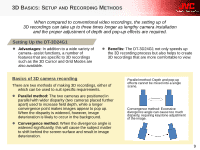
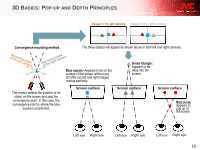
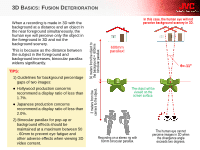
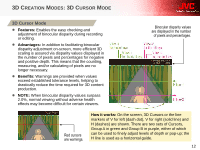
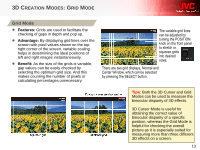
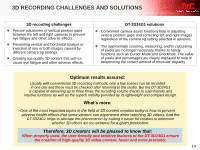
3D BASICS: SETUP AND RECORDING METHODS When compared to conventional video recordings, the setting up of 3D recordings can take up to three times longer as lengthy camera installation and the proper adjustment of depth and pop-up effects are required. Setting Up the DT-3D24G1 Advantages: In addition to a wide variety of camera- assist functions, a number of features that are specific to 3D recordings such as the 3D Cursor and Grid Modes are also available. Benefits: The DT-3D24G1 not only speeds up the 3D recording process but also helps to create 3D recordings that are more comfortable to view. Basics of 3D camera recording There are two methods of making 3D recordings, either of which can be used to suit specific requirements. Parallel method: The two cameras are positioned in parallel with wider disparity (two cameras placed further apart) used to increase field depth, while a longer convergence point makes images appear to pop up. When the disparity is widened, however, image deterioration is likely to occur in the background. Convergence method: When the divergence angle is widened significantly, this will cause the subject matter to shift behind the screen surface and result in image deterioration. Parallel method: Depth and pop-up effects cannot be mixed into a single scene. Convergence method: Excessive divergence angle can cause too much disparity, requiring keystone adjustment of the image. 9
-
 1
1 -
2
-
3
-
 4
4 -
 5
5 -
 6
6 -
 7
7 -
 8
8 -
 9
9 -
 10
10 -
 11
11 -
 12
12 -
 13
13 -
 14
14 -
15
-
16
-
17
-
18
-
19
-
20
-
21
-
22
 |
 |