JVC GR D270 Instructions - Page 15
Power-Linked Operation, Language Settings, Date/Time Settings, Grip Adjustment - screen
 |
View all JVC GR D270 manuals
Add to My Manuals
Save this manual to your list of manuals |
Page 15 highlights
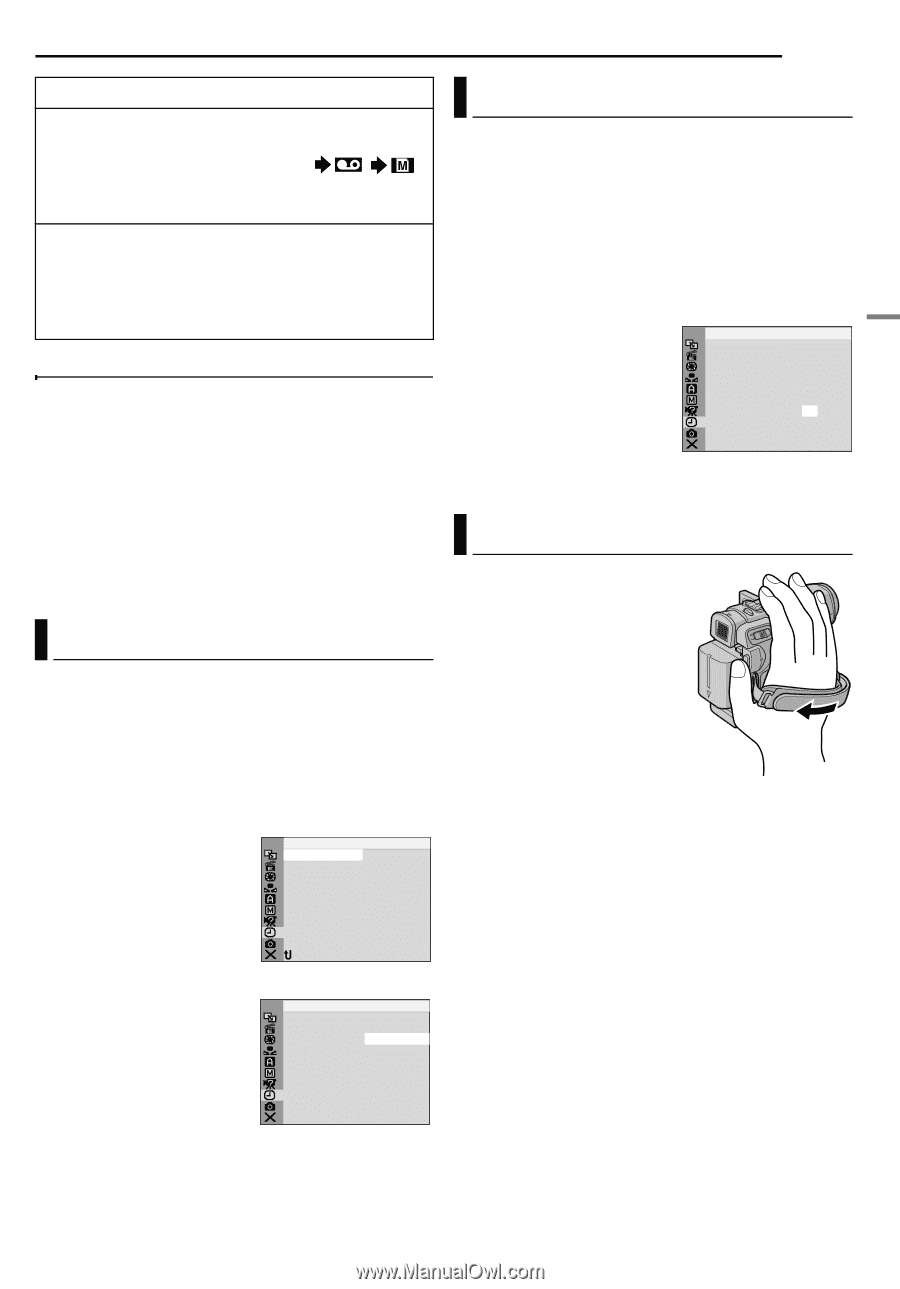
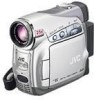
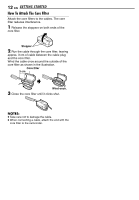
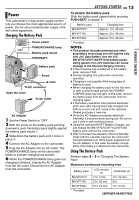
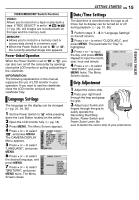
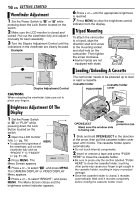
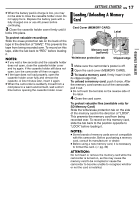
GETTING STARTED EN 15 GETTING STARTED VIDEO/MEMORY Switch Position VIDEO: Allows you to record on a tape or play back a tape. If "REC SELECT" is set to " /" (੬ pg. 35), still images are recorded both on the tape and the memory card. MEMORY: ● Allows you to record in a memory card or access data stored in a memory card. ● When the Power Switch is set to "A" or "M", the currently selected image size appears. Power-Linked Operation When the Power Switch is set to "A" or "M", you can also turn on/off the camcorder by opening/ closing the LCD monitor or pulling out/pushing in the viewfinder. INFORMATION: The following explanations in this manual supposes the use of LCD monitor in your operation. If you want to use the viewfinder, close the LCD monitor and pull out the viewfinder fully. Language Settings The language on the display can be changed. (੬ pg. 31, 34, 36) 1 Set the Power Switch to "M" while pressing down the Lock Button located on the switch. 2 Open the LCD monitor fully. (੬ pg. 18) 3 Press MENU. The Menu Screen appears. 4 Press + or - to select "n", and press MENU. The CAMERA DISPLAY Menu appears. 5 Press + or - to select CAMERA DISPLAY BRIGHT ON SCREEN - LCD / T V DATE / T I ME - AUTO T I ME CODE - OFF LANGUAGE - ENGLISH AUX M I C - ON CLOCK 2 0. 1 2 . 0 5 ADJ . 17 : 30 "LANGUAGE", and press RETURN MENU. 6 Press + or - to select CAMERA DISPLAY the desired language, and press MENU. 7 Press + or - to select "BRETURN", and press MENU twice. The Menu LANGUAGE ENGLISH FRANÇAIS - DEUTSCH ESPAÑOL ITALIANO NEDERLANDS PORTUGUÊS Screen closes. Date/Time Settings The date/time is recorded onto the tape at all times, but its display can be turned on or off during playback. (੬ pg. 31, 36) 1 Perform steps 1 - 4 in "Language Settings" on the left column. 2 Press + or - to select "CLOCK ADJ.", and press MENU. The parameter for "Day" is highlighted. 3 Press + or - to input CAMERA DISPLAY the day, and press MENU. Repeat to input the month, year, hour and minute. 4 Press + or - to select CLOCK ADJ . 2 0. 1 2 . 0 5 17 : 30 "BRETURN", and press MENU twice. The Menu Screen closes. Grip Adjustment 1 Adjust the velcro strip. 2 Pass your right hand through the loop and grasp the grip. 3 Adjust your thumb and fingers through the grip to easily operate the Recording Start/Stop Button, Power Switch and Power Zoom Lever. Be sure to fasten the velcro strip to your preference.
-
 1
1 -
2
-
3
-
4
-
5
-
6
-
7
-
8
-
9
-
 10
10 -
 11
11 -
 12
12 -
 13
13 -
 14
14 -
 15
15 -
 16
16 -
 17
17 -
 18
18 -
 19
19 -
 20
20 -
21
-
22
-
23
-
24
-
25
-
26
-
27
-
28
-
29
-
30
-
31
-
32
-
33
-
34
-
35
-
36
-
37
-
38
-
39
-
40
-
41
-
42
-
43
-
44
-
45
-
46
-
47
-
48
-
49
-
50
-
51
-
52
-
53
-
54
-
55
-
56
 |
 |