JVC GY-DV300U 42 pg. users guide on the KA-DV300 Network Pack (PDF, 916KB) - Page 28
Sending playback signals of a DV cassette tape using a LAN card
 |
View all JVC GY-DV300U manuals
Add to My Manuals
Save this manual to your list of manuals |
Page 28 highlights
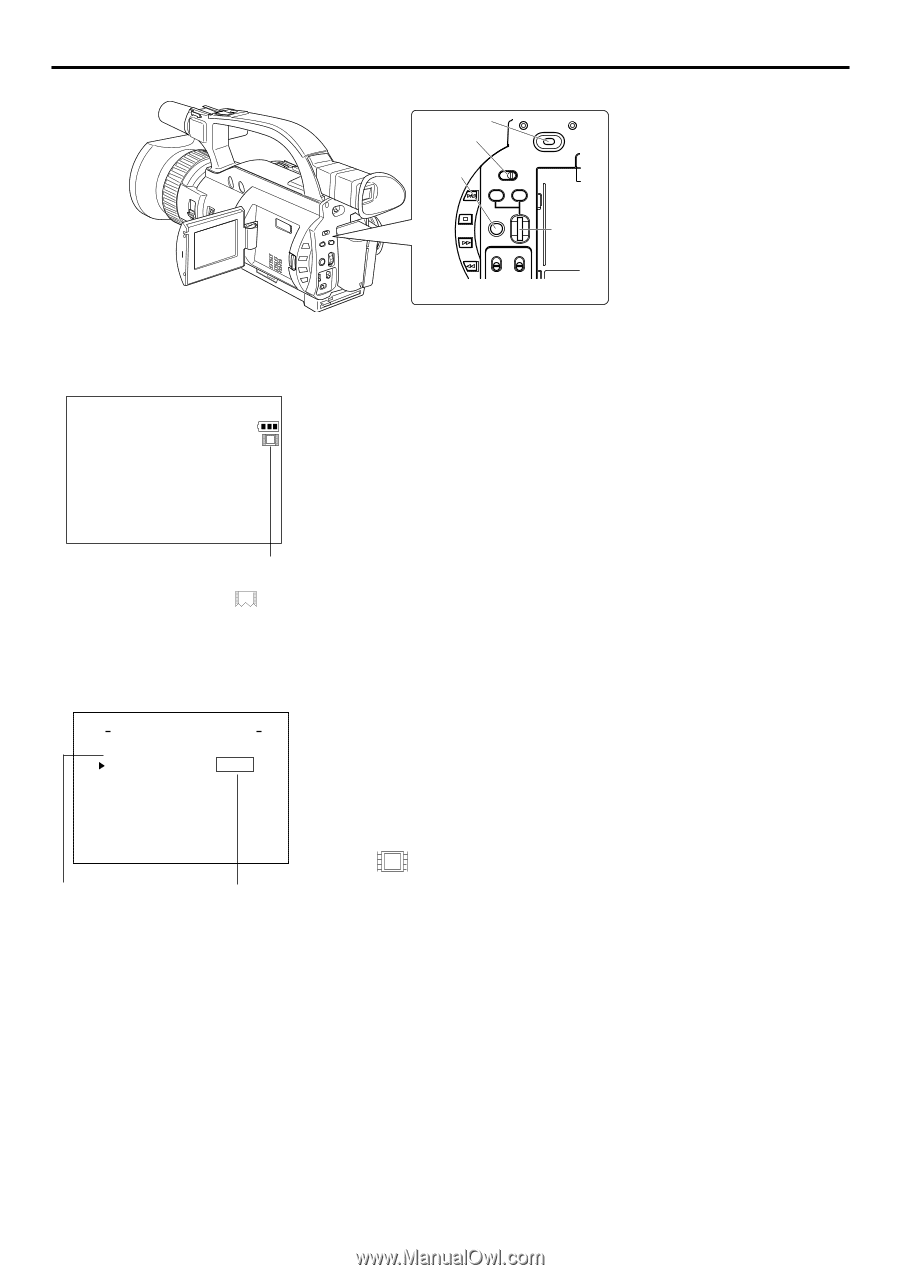
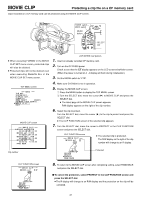
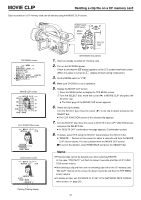
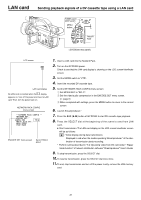
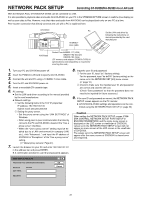
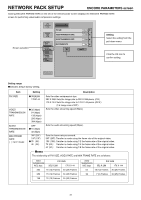
LAN card Sending playback signals of a DV cassette tape using a LAN card POWER switch MODE switch POWER OFF ON MENU button MODE CAM-B CAM-A VTR GAIN SHUTTER BAR AW MENU FWD SELECT Tdial REV LCD screen e LAN card display No LAN card is inserted when the display appears on. Turn off the power and insert a LAN card. Then, turn the power back on. NETWORK PACK CONFIG menu screen N E TWORK P A CK C ON F I G NE T WOR K S E T . . ENCODE SE T . . MPEG R EC TR I G MOV I E CL I P S E T . . MENU R E S E T PAGE BACK ENCODE SET menu screen Set to TRIG or SPLIT 1. Insert a LAN card into the Network Pack. 2. Turn on the GY-DV300 power. Check to see that the LAN card display is showing on the LCD screen/viewfinder screen. 3. Set the MODE switch to "VTR". 4. Insert the recorded DV cassette tape. 5. Set the NETWORK PACK CONFIG menu screen. q Set MPEG REC to "SPLIT". w Set the video/audio compression in the ENCODE SET menu screen. ( page 6) e When completed with settings, press the MENU button to return to the normal screen. 6. Launch Streamproducer.* 7. Press the BAR (t/w) button of GY-DV300 to start DV cassette tape playback. 8. Press the SELECT dial at the beginning of the scene to send from LAN card. ● Start transmission. The LAN card display on the LCD screen/viewfinder screen will be as follows: e : Yellow display during data transmission. Displayed in red when the media operating Streamproducer* at the destination of transmission starts recording. * Perform setting described in "5-2 Operating video from DV camcorder • Trigger mode function" of network distribution software "Streamproducer" User's Guide. 9. To stop transmission, press the SELECT dial. 10. To resume transmission, press the SELECT dial once more. 11. To end, stop transmission and turn off the power. Lastly, remove the LAN memory card. 28
-
 1
1 -
2
-
3
-
4
-
5
-
6
-
7
-
8
-
9
-
10
-
11
-
12
-
13
-
14
-
15
-
16
-
17
-
18
-
19
-
20
-
21
-
22
-
 23
23 -
 24
24 -
 25
25 -
 26
26 -
 27
27 -
 28
28 -
 29
29 -
 30
30 -
 31
31 -
 32
32 -
 33
33 -
34
-
35
-
36
-
37
-
38
-
39
-
40
-
41
-
42
 |
 |