JVC GY-HM100U Instructions - Page 22
Preparation, Viewing the Viewfinder/LCD Screen - video
 |
UPC - 046838039522
View all JVC GY-HM100U manuals
Add to My Manuals
Save this manual to your list of manuals |
Page 22 highlights
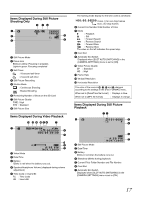
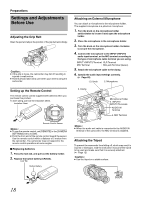
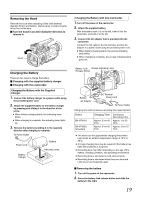
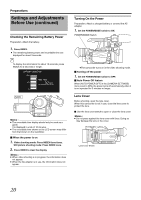
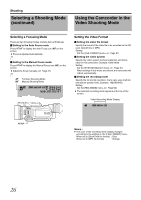
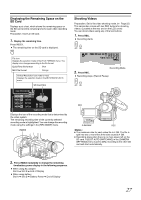
Preparations Settings and Adjustments Before Use (continued) Viewing the Viewfinder/LCD Screen You can monitor video images on this camcorder using the viewfinder, LCD screen, or both. Ⅵ Viewing with the viewfinder 1 . Pull out the viewfinder. 2 . Incline the viewfinder vertically to a position that enables easy viewing. 3 . Turn the eyepiece focus lever to adjust the focus. Ⅵ Viewing with the LCD screen 1 . Open the LCD cover. 2 . Incline the LCD cover to a position that enables easy viewing. Face-to-face Shooting Direction (direction in which the screen faces the subject) ON ON Eyepiece Focus Lever Relationship between the viewfinder and LCD screen displays VF Status OFF ON OFF ON ON LCD Status OFF OFF ON ON ON (Face-to-face shooting direction) Video Output VF VF LCD, VF (T2) In accordance with the menu settings (T1) VF and LCD T1 In accordance with [PRIORITY SETTING] in the [CAMERA SETTINGS] menu. (A Page 66) T2 When [PRIORITY SETTING] is set to [ALWAYS-ON VIEWFINDER] Memo : ● When the HDMI, COMPONENT OUT or A/V OUT terminal is connected, video images will not appear on the viewfinder. Ⅵ Adjusting the brightness of the viewfinder/LCD screen When a screen is displayed on the viewfinder, performing the following steps adjusts the brightness of the viewfinder. When a screen is displayed on the LCD, the brightness of the LCD is adjusted. When a screen is displayed on both the viewfinder and LCD, only the brightness of the viewfinder is adjusted. Select [MONITOR BRIGHT] in the [DISPLAY SETTINGS] menu. (A Page 65) A slide bar for adjusting the screen brightness appears. 1 . Push the Set Lever to the left or right. ● Doing so moves the slide bar and changes the brightness of the screen. 2 . Press the center of the Set Lever. 0 Ⅵ Setting the brightness of the LCD screen backlight Select [MONITOR BACKLIGHT] in the [DISPLAY SETTINGS] menu. (A Page 65) 22
-
 1
1 -
2
-
3
-
4
-
5
-
6
-
7
-
8
-
9
-
10
-
11
-
12
-
13
-
14
-
15
-
16
-
 17
17 -
 18
18 -
 19
19 -
 20
20 -
 21
21 -
 22
22 -
 23
23 -
 24
24 -
 25
25 -
 26
26 -
 27
27 -
28
-
29
-
30
-
31
-
32
-
33
-
34
-
35
-
36
-
37
-
38
-
39
-
40
-
41
-
42
-
43
-
44
-
45
-
46
-
47
-
48
-
49
-
50
-
51
-
52
-
53
-
54
-
55
-
56
-
57
-
58
-
59
-
60
-
61
-
62
-
63
-
64
-
65
-
66
-
67
-
68
-
69
-
70
-
71
-
72
-
73
-
74
-
75
-
76
 |
 |