JVC GZ-EX250BUS Basic User Guide - Page 4
Available Accessories For the Camera - for mac
 |
View all JVC GZ-EX250BUS manuals
Add to My Manuals
Save this manual to your list of manuals |
Page 4 highlights
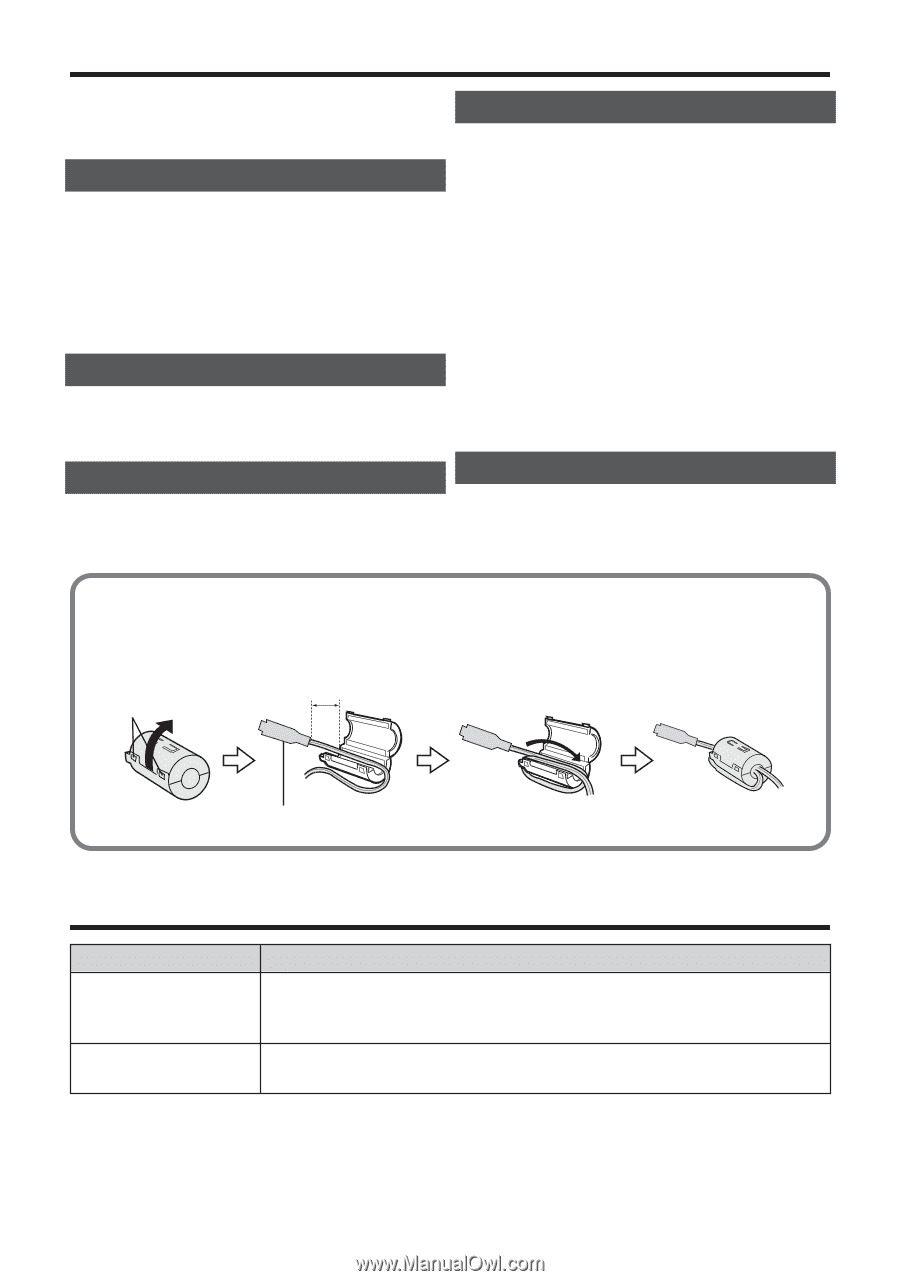
Contents Safety Precautions 2 Available Accessories For the Camera .. 4 Getting Started Charging the Battery Pack 5 Inserting an SD Card 6 Using the Icon Buttons/Thumbnails ........ 6 Changing Menu Settings 7 Clock Setting 7 Recording Video Recording 8 Still Image Recording 9 Copying Keep It High Definition (Windows) ....... 11 Install Everio MediaBrowser (Windows) ..... 12 USB Menu Operations 13 File Backup (Windows 14 View Your Video (Windows 14 AVCHD Disc Creation (Windows) ........ 15 Record to a DVD or VHS Recorder ...... 15 How to Upload a File (Video Clip) to YouTube (Windows 16 Working with iMovie and iPhoto 17 Simple File Backup with a Mac 17 Playback Playing Back/Deleting Files on this Unit .... 9 Playing Back on TV 10 Further Information Troubleshooting/Cautions 18 Recordable Time/Specifications .......... 20 o Attaching the Core Filter Attach the core filter to the AV Cable and USB Cable as shown in the illustration. The core filter reduces interference when this unit is connected to other devices. Release the stopper. 3 cm (1-3/16") Wind once (for AV Cable) Wind twice (for USB Cable) To be connected to this unit . Available Accessories For the Camera Product Name* Battery Pack 0 BN-VG114U 0 BN-VG121U Battery Charger 0 AA-VG1U Description 0 Provides a longer recording time than the battery pack that comes with this unit or it can also be used as a spare battery pack. 0 Enables the battery pack to be charged without using this unit. * To order any of these accessories please visit www.store.jvc.com or call 1-800-252-5722 4
-
 1
1 -
 2
2 -
 3
3 -
 4
4 -
 5
5 -
 6
6 -
 7
7 -
 8
8 -
 9
9 -
 10
10 -
11
-
12
-
13
-
14
-
15
-
16
-
17
-
18
-
19
-
20
-
21
-
22
-
23
-
24
-
25
-
26
-
27
-
28
-
29
-
30
-
31
-
32
-
33
-
34
-
35
-
36
-
37
-
38
-
39
-
40
-
41
-
42
-
43
-
44
-
45
-
46
-
47
-
48
-
49
-
50
-
51
-
52
-
53
-
54
-
55
-
56
-
57
-
58
-
59
-
60
 |
 |