JVC GZ-HM200BUS Guide Book - Page 58
Using with a Portable Media Player, Turning on the Export Mode, Changing the Export Setting,
 |
UPC - 046838037788
View all JVC GZ-HM200BUS manuals
Add to My Manuals
Save this manual to your list of manuals |
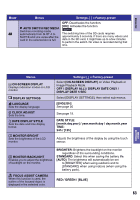
Page 58 highlights
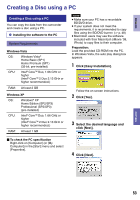
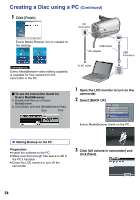
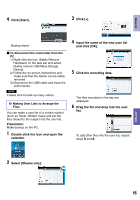
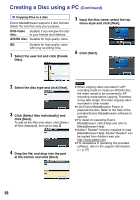
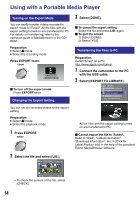
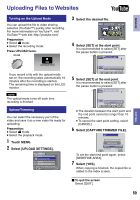
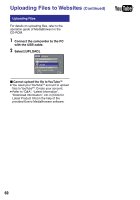
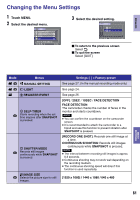
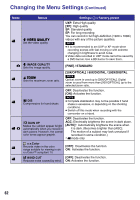
COPYING Using with a Portable Media Player Turning on the Export Mode You can easily transfer videos recorded in export mode to iTunes®. All the files with the export setting turned on are transferred to PC. For details on transferring, refer to the operation guide of MediaBrowser in the CDROM. Preparation: • Select ! mode. • Select the recording mode. Press EXPORT twice. EXPORT ON To turn off the export mode Press EXPORT twice. Changing the Export Setting You can set the recorded videos to the export setting. Preparation: • Select ! mode. • Select the playback mode. 1 Press EXPORT. EXPORT 2 Select the file and select [LIB.]. EXPORT SETTINGS 1/3 LIB. LIB. SD LIB. CHECK DONE • To check the content of the file, select [CHECK]. 3 Select [DONE]. To cancel the export setting Select the file and press LIB. again. To quit the screen 1) Select [DONE]. 2) Select [YES]. Transferring the Files to PC Preparation: Install iTunes® on a PC. http://www.apple.com/itunes/ 1 Connect the camcorder to the PC with the USB cable. 2 Select [EXPORT TO LIBRARY]. USB MENU CREATE DISC UPLOAD LIB. EXPORT TO LIBRARY BACK UP EASY VIDEO REGISTRATION SET QUIT All the files with the export setting turned on are transferred to PC. Cannot export the file to iTunes®. Refer to "Q&A", "Latest Information", "Download Information", etc. in [Click for Latest Product Info] in the help of the provided Everio MediaBrowser software. 58
-
 1
1 -
2
-
3
-
4
-
5
-
6
-
7
-
8
-
9
-
10
-
11
-
12
-
13
-
14
-
15
-
16
-
17
-
18
-
19
-
20
-
21
-
22
-
23
-
24
-
25
-
26
-
27
-
28
-
29
-
30
-
31
-
32
-
33
-
34
-
35
-
36
-
37
-
38
-
39
-
40
-
41
-
42
-
43
-
44
-
45
-
46
-
47
-
48
-
49
-
50
-
51
-
52
-
 53
53 -
 54
54 -
 55
55 -
 56
56 -
 57
57 -
 58
58 -
 59
59 -
 60
60 -
 61
61 -
 62
62 -
 63
63 -
64
-
65
-
66
-
67
-
68
-
69
-
70
-
71
-
72
-
73
-
74
-
75
-
76
-
77
-
78
 |
 |