JVC GZ MG37 Software Guide - Page 21
Connections, Macintosh - battery
 |
View all JVC GZ MG37 manuals
Add to My Manuals
Save this manual to your list of manuals |
Page 21 highlights
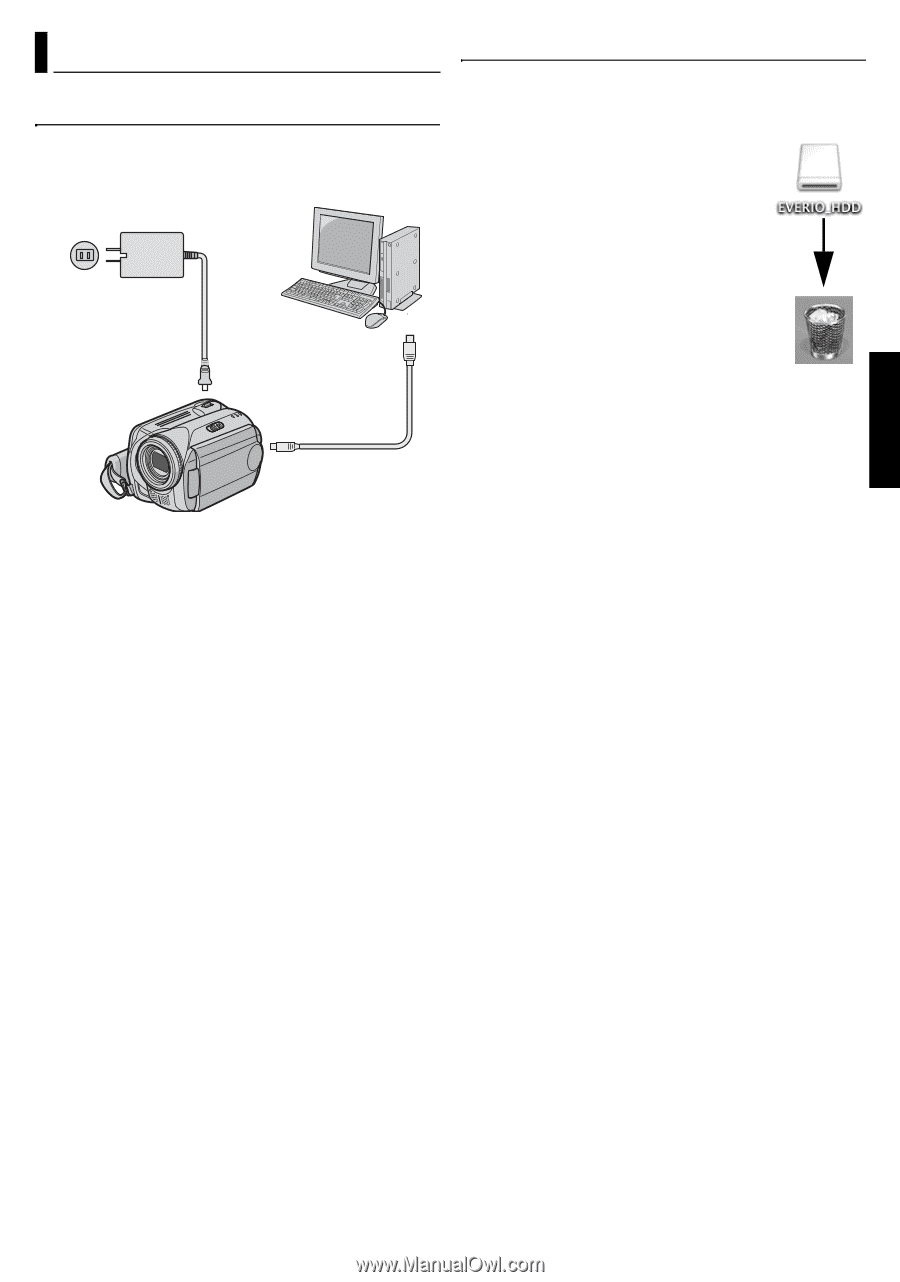
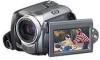
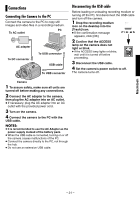
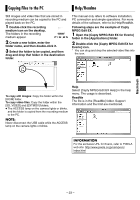
Connections Connecting the Camera to the PC Connect the camera to the PC to copy still images and video files in a recording medium. PC To AC outlet AC adapter To DC connector To USB connector USB cable To USB connector Disconnecting the USB cable Before loading or unloading recording medium or turning off the PC, first disconnect the USB cable and turn off the camera. 1 Drop the recording medium icon on the desktop into the [Trash] icon. ● If the confirmation message appears, click [OK]. 2 Confirm that the ACCESS lamp on the camera does not light or blink. ● If the ACCESS lamp lights or blinks, wait until it is turned off before proceeding. 3 Disconnect the USB cable. 4 Set the camera's power switch to off. The camera turns off. Camera 1 To assure safety, make sure all units are turned off before making any connections. 2 Connect the AC adapter to the camera, then plug the AC adapter into an AC outlet. ● If necessary, plug the AC adapter into an AC outlet with the provided power cord. 3 Turn on the camera. 4 Connect the camera to the PC with the USB cable. NOTES: ● It is recommended to use the AC Adapter as the power supply instead of the battery pack. ● When the USB cable is connected, turning on or off the camera causes malfunctions of the PC. ● Connect the camera directly to the PC, not through the hub. ● Do not use an extension USB cable. Macintosh - 21 -
-
 1
1 -
2
-
3
-
4
-
5
-
6
-
7
-
8
-
9
-
10
-
11
-
12
-
13
-
14
-
15
-
 16
16 -
 17
17 -
 18
18 -
 19
19 -
 20
20 -
 21
21 -
 22
22 -
 23
23 -
 24
24 -
 25
25 -
 26
26 -
27
-
28
-
29
-
30
-
31
-
32
-
33
-
34
-
35
-
36
-
37
-
38
-
39
-
40
-
41
-
42
-
43
-
44
-
45
-
46
-
47
-
48
-
49
-
50
-
51
-
52
-
53
-
54
-
55
-
56
-
57
-
58
-
59
-
60
-
61
-
62
-
63
-
64
-
65
-
66
-
67
-
68
 |
 |