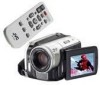
JVC GZMG70US Instructions - Page 16
Data Battery System, Using AC Power, About Batteries, Operation Mode, 1 Power Switch Position
 |
UPC - 046838021817
View all JVC GZMG70US manuals
Add to My Manuals
Save this manual to your list of manuals |
Page 16 highlights
16 EN GETTING STARTED Data Battery System You can check the remaining battery power and the recordable time. 1 Make sure the battery is attached. 2 Open the LCD monitor fully. 3 Press INFO/ repeatedly, and the battery status screen appears. ● It is displayed for approx. 3 seconds if the button is pressed and released quickly, and for approx. 15 seconds if the button is pressed and held for several seconds. ● If "COMMUNICATING ERROR" appears instead of the battery status even though you tried to press INFO/ several times, there may be a problem with your battery. In such a case, consult your nearest JVC dealer. ● The recordable time display should only be used as a guide. It is displayed in 10 minute units. Using AC Power Perform step 4 in "Charging the Battery Pack" (੬ pg. 14). NOTE: The provided AC adapter features automatic voltage selection in the AC range from 110 V to 240 V. About Batteries DANGER! Do not attempt to take the batteries apart, or expose them to flame or excessive heat, as it may cause a fire or explosion. WARNING! Do not allow the battery or its terminals to come in contact with metals, as this can result in a short circuit and possibly start a fire. To resume the original function of the accurate battery power indication If the battery power indication differs from the actual operating time, fully charge the battery, and then run it down. However this function may not work properly if the battery was used for a long period of time under extremely high/low temperature condition or charged too many times. Operation Mode To turn on the camera, set the power switch to or while pressing down the lock button located on the switch. ● The power/charge lamp turns on. To turn off the camera, set the power switch to OFF. 1 Power Switch Power/Charge Lamp 2 MODE 4 LCD Monitor 3 Lock Button Set the appropriate operation mode according to your preference using the power and MODE switches and ( / ) button. 1 Power Switch Position Set the power switch for recording ( ) or playback ( ) while pressing down the lock button. Power Switch Power Off Playback Recording
-
 1
1 -
2
-
3
-
4
-
5
-
6
-
7
-
8
-
9
-
10
-
 11
11 -
 12
12 -
 13
13 -
 14
14 -
 15
15 -
 16
16 -
 17
17 -
 18
18 -
 19
19 -
 20
20 -
 21
21 -
22
-
23
-
24
-
25
-
26
-
27
-
28
-
29
-
30
-
31
-
32
-
33
-
34
-
35
-
36
-
37
-
38
-
39
-
40
-
41
-
42
-
43
-
44
-
45
-
46
-
47
-
48
-
49
-
50
-
51
-
52
-
53
-
54
-
55
-
56
-
57
-
58
-
59
-
60
-
61
-
62
-
63
-
64
 |
 |
