JVC GZX900US Instructions - Page 17
Language Setting, Using an SD Card, Select [FORMAT SD CARD] to format
 |
UPC - 046838039515
View all JVC GZX900US manuals
Add to My Manuals
Save this manual to your list of manuals |
Page 17 highlights
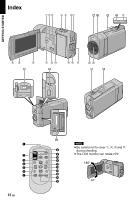
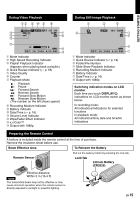
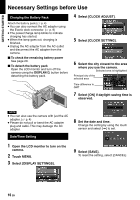
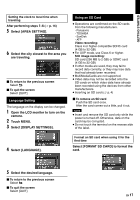
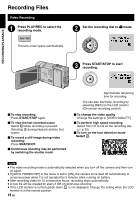
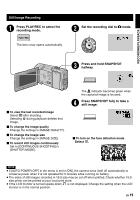
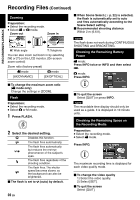
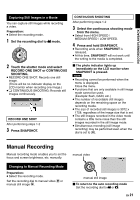
GETTING STARTED Setting the clock to local time when traveling After performing steps 1-4 (Z p. 16) 5 Select [AREA SETTING]. 6 Select the city closest to the area you are traveling. To return to the previous screen Select @. To quit the screen Select [QUIT]. Language Setting The language on the display can be changed. 1 Open the LCD monitor to turn on the camera. 2 Touch MENU. 3 Select [DISPLAY SETTINGS]. Using an SD Card • Operations are confirmed on the SD cards from the following manufacturers. - Panasonic - TOSHIBA - SanDisk - ATP Video recording: Class 4 or higher compatible SDHC card (4 GB to 32 GB) • For UXP mode, use Class 6 or higher. Still image recording: SD card (256 MB to 2 GB) or SDHC card (4 GB to 32 GB) • If other media are used, they may fail to record data correctly, or they may lose data that had already been recorded. • MultiMediaCards are not supported. • Video data may not be recorded onto the SD cards on which video data have already been recorded using the devices from other manufacturers. • Inserting an SD card (Z p. 4) To remove an SD card Push the SD card once. After the card comes out a little, pull it out. NOTE • Insert and remove the SD card only while the power is turned off. Otherwise, data on the card may be corrupted. • Do not touch the terminal on the reverse side of the label. 4 Select [LANGUAGE]. Format an SD card when using it for the first time Select [FORMAT SD CARD] to format the card. 5 Select the desired language. To return to the previous screen Select @. To quit the screen Select [QUIT]. EN 17
-
 1
1 -
2
-
3
-
4
-
5
-
6
-
7
-
8
-
9
-
10
-
11
-
 12
12 -
 13
13 -
 14
14 -
 15
15 -
 16
16 -
 17
17 -
 18
18 -
 19
19 -
 20
20 -
 21
21 -
 22
22 -
23
-
24
-
25
-
26
-
27
-
28
-
29
-
30
-
31
-
32
-
33
-
34
-
35
-
36
-
37
-
38
-
39
-
40
-
41
-
42
-
43
-
44
-
45
-
46
-
47
-
48
-
49
-
50
-
51
-
52
-
53
-
54
-
55
-
56
-
57
-
58
-
59
-
60
-
61
-
62
-
63
-
64
-
65
-
66
-
67
-
68
-
69
-
70
-
71
-
72
-
73
-
74
-
75
-
76
-
77
-
78
-
79
-
80
-
81
-
82
-
83
-
84
-
85
-
86
-
87
-
88
 |
 |
