JVC HD52FA97 Instructions - Page 79
WARNING, NOTICE for USA, Remember it is very important that YOU DO NOT TOUCH THE LAMP SURFACE. Please - lamp with housing
 |
UPC - 046838028212
View all JVC HD52FA97 manuals
Add to My Manuals
Save this manual to your list of manuals |
Page 79 highlights
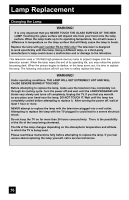
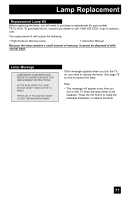
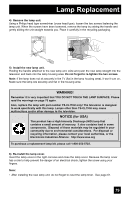
Lamp Replacement 4) Remove the lamp unit. Using a Philips head type screwdriver (cross-head type), loosen the two screws fastening the lamp unit. When the screws have been loosened, remove the lamp by raising the handle and gently sliding the unit straight towards you. Place it carefully in the recycling packaging. 5) Install the new lamp unit. Holding the handle attached to the new lamp unit, slide and push the new lamp straight into the television and back into the lamp housing area. Do not forget to re-tighten the two screws. Note: If the lamp does not sit securely in the TV (flat in the lamp housing area), it won't turn on. Make sure the lamp sits securely and flat in the housing area. WARNING! Remember it is very important that YOU DO NOT TOUCH THE LAMP SURFACE. Please read the warnings on page 76 again. Also, replace the lamp with part number TS-CL110U only! The television is designed to work specifically with this lamp. Lamps other than TS-CL110U may cause malfunctions and/or other damage to the television. NOTICE (for USA) This product has a High Intensity Discharge (HID) lamp that contains a small amount of mercury. It also contains lead in some components. Disposal of these materials may be regulated in your community due to environmental considerations. For disposal or recycling information, please contact your local authorities, or the Electronics Industries Alliance: http://www.eiae.org To purchase a replacement lamp kit, please call 1-800-252-5722. 6) Re-install the lamp cover. Insert the lamp cover in the right concave and close the lamp cover. Because the lamp cover has a role to help prevent the danger of an electrical shock, tighten the screw using your fingers. Note: • After installing the new lamp unit, do not forget to reset the lamp timer. See page 61. 79
-
 1
1 -
2
-
3
-
4
-
5
-
6
-
7
-
8
-
9
-
10
-
11
-
12
-
13
-
14
-
15
-
16
-
17
-
18
-
19
-
20
-
21
-
22
-
23
-
24
-
25
-
26
-
27
-
28
-
29
-
30
-
31
-
32
-
33
-
34
-
35
-
36
-
37
-
38
-
39
-
40
-
41
-
42
-
43
-
44
-
45
-
46
-
47
-
48
-
49
-
50
-
51
-
52
-
53
-
54
-
55
-
56
-
57
-
58
-
59
-
60
-
61
-
62
-
63
-
64
-
65
-
66
-
67
-
68
-
69
-
70
-
71
-
72
-
73
-
 74
74 -
 75
75 -
 76
76 -
 77
77 -
 78
78 -
 79
79 -
 80
80 -
 81
81 -
 82
82 -
 83
83 -
 84
84 -
85
-
86
-
87
-
88
 |
 |
