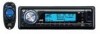
JVC KD-AR880 Instructions
JVC KD-AR880 - Radio / CD Manual
 |
UPC - 046838028342
View all JVC KD-AR880 manuals
Add to My Manuals
Save this manual to your list of manuals |
JVC KD-AR880 manual content summary:
- JVC KD-AR880 | Instructions - Page 1
/KD-G830 KD-AR880/KD-G830 KD-AR880/KD-G830 For canceling the display demonstration, see page 6. Para cancelar la demostración en pantalla, consulte la página 6. Pour annuler la démonstration des affichages, référez-vous à la page 6. For installation and connections, refer to the separate manual - JVC KD-AR880 | Instructions - Page 2
an outlet on a circuit different from that to which the receiver is connected. - Consult the dealer or an experienced radio/TV technician for help. Caution: Changes or modifications not approved by JVC could void the user's authority to operate the equipment. IMPORTANT FOR LASER PRODUCTS 1. CLASS - JVC KD-AR880 | Instructions - Page 3
functions again, wait for 15 seconds (or 30 seconds for Bluetooth sources) without pressing any of these buttons until the control is driving dangerous. • Stop the car before performing any complicated operations. Temperature inside the car... If you have parked the car for a long time in hot - JVC KD-AR880 | Instructions - Page 4
and button illustrations used for explanation in this manual is KD-G830. Caution: If the temperature inside the car is below 0°C (32°F), the movement output level. KD-AR880 is equipped with the steering wheel remote control function. • See the Installation/Connection Manual (separate volume) - JVC KD-AR880 | Instructions - Page 5
the USB device 13 EXTERNAL DEVICES Using the Bluetooth® devices 14 • Using the Bluetooth cellular phone 17 • Using the Bluetooth audio player 19 Listening to the CD changer 20 Listening to the satellite radio 22 Listening to the iPod / D. player 25 Listening to the other external components - JVC KD-AR880 | Instructions - Page 6
adjust the hour. Select "Clock Min" (minute), then adjust the minute. Select "24H/12H," then "24Hours" or "12Hours." Finish the procedure. Changing the display information and pattern Ex.: When tuner is selected as the source Source operation display Audio level meter display (see "LevelMeter - JVC KD-AR880 | Instructions - Page 7
Select the source. TUNER = SIRIUS*1/XM*1 = CD*1 = USB = CD-CH*1/iPod*1/D.PLAYER*1 (or EXT IN) = Bluetooth Phone*1 = Bluetooth Audio*1 = LINE IN*2 = (back to the beginning) *1 You cannot select these sources if they are not ready or not connected. *2 Only for KD-AR880. 2 Select the bands. 3 • Turn on - JVC KD-AR880 | Instructions - Page 8
accidents and damage • Do not install any battery other than CR2025 or CD changer: - Changes the disc if pressed briefly. - Changes the folder if pressed and held. • While listening to the satellite (SIRIUS or XM) radio: - Changes the categories. • While listening to an Apple iPod or a JVC D. player - JVC KD-AR880 | Instructions - Page 9
- Changes the channels rapidly if pressed and held. • While listening to an iPod or a D. player (in menu selecting mode): - Selects an item if pressed briefly. (Then, press D ∞ to confirm the selection.) - Skips 10 items at a time if pressed and held. • Reverse skip/forward skip for Bluetooth audio - JVC KD-AR880 | Instructions - Page 10
ENGLISH When an FM stereo broadcast is hard to receive 1 2 Manual presetting Ex.: Storing FM station of 92.5 MHz into preset number 4 of the FM1 band. Using the number buttons 1 Reception improves, but stereo effect will - JVC KD-AR880 | Instructions - Page 11
to the selected station. Disc operations Open the control panel and insert the disc. Playback starts automatically. Change the display information and pattern To stop play and eject the disc • Press SRC to listen to another playback source. Prohibiting disc ejection To cancel - JVC KD-AR880 | Instructions - Page 12
-01, 02, 03, and so on. After pressing Button , press the following buttons to... MP3/WMA/AAC file Skip 10 tracks (within the same folder) Audio CD/CD Text Skip 10 tracks Intro Track: Plays the beginning 15 seconds of all tracks Intro Folder: Plays the beginning 15 seconds of the first tracks - JVC KD-AR880 | Instructions - Page 13
or 6 ( ) repeatedly. 5 Change to the selected item. • If File List is selected • If Folder List is selected • The list disappears and playback starts. Listening to the USB device You can connect a USB mass storage class device such as a USB memory, Digital Audio Player*1, portable HDD, etc. to the - JVC KD-AR880 | Instructions - Page 14
Change the device in the car, expose to Bluetooth® devices For Bluetooth operations, it is required to connect the Bluetooth Adapter (KS-BTA200) to the CD changer jack on the rear of this unit. See also page 42. • Refer also to the instructions supplied with the Bluetooth adapter and the Bluetooth - JVC KD-AR880 | Instructions - Page 15
. 1 Select "Bluetooth Phone" or "Bluetooth Audio." 2 Select a number. 3 Repeat steps 1 and 2 until you finish entering a PIN code. 4 Confirm the entry. "Open..." flashes on the display. 2 Select "New." 3 Enter setting menu. 4 Select "Open." 6 Use the Bluetooth device to search and connect. On the - JVC KD-AR880 | Instructions - Page 16
code of the device to the unit. • Refer to the instructions supplied with the device to check the PIN code. 4 Use the Bluetooth device to connect. Now connection is established and you can use the device through the unit. Connecting a special device Perform steps 1 - 3 on page 15, then... 1 Select - JVC KD-AR880 | Instructions - Page 17
setting menu. (See pages 18 and 36.) When a call comes in.... The source is automatically changed to "Bluetooth Phone." When "Auto Answer" is activated.... The unit answers the incoming calls automatically, see page 36. • When "Auto Answer" is deactivated, press any button (except / - JVC KD-AR880 | Instructions - Page 18
Bluetooth Phone." * Displays only when your cellular phone is equipped with these functions. - If not displayed, please try to transfer the phone book memory of the cellular phone to this unit. (Refer to the instruction manual Shows the phone book of the connected cellular phone. Go to the following - JVC KD-AR880 | Instructions - Page 19
operate the Bluetooth audio player to start playback. • Refer also to page 16 for connecting/disconnecting/deleting a registered device. * Operation may be different according to the connected phone. Bluetooth Information: If you wish to receive more information about Bluetooth, visit our JVC web - JVC KD-AR880 | Instructions - Page 20
to the CD changer ENGLISH Change the display information and pattern It is recommended to use a JVC MP3-compatible CD changer with your unit. You can connect a CD changer to the CD changer jack on the rear of the unit. See also page 42. • You can only play conventional CDs (including CD Text) and - JVC KD-AR880 | Instructions - Page 21
a folder/track on the list (only for MP3/WMA/AAC disc)" on page 13. Select "Disc" in step 3 to display the Disc List of the CD changer. EXTERNAL DEVICES 21 - JVC KD-AR880 | Instructions - Page 22
, connect either one of the following (separately purchased) to the CD changer jack on the rear of this unit. See also page 42. • JVC SIRIUS radio DLP-Down Link Processor, for listening to the SIRIUS Satellite radio. • XMDirect™ Universal Tuner Box-Using a JVC Smart Digital Adapter (XMDJVC100 - JVC KD-AR880 | Instructions - Page 23
: XM: ! Select a category. ⁄ Select a channel to listen. • Holding the button changes the channels rapidly. • SIRIUS: If you select "ALL" in step !, you can tune in Checking the XM Satellite radio ID While selecting "XM1," "XM2," or "XM3," select "Channel 0." The display shows "RADIO ID" and the - JVC KD-AR880 | Instructions - Page 24
Listening to a user channel 1 Display the Preset Channel list, then select the preset number you want to listen to. 2 Change to the selected pressing number button 5 or 6 repeatedly. Ex.: When listening to the SIRIUS Satellite radio. 1 To select a category 1 Follow steps 2 to 4 on left column. - JVC KD-AR880 | Instructions - Page 25
) * Only for SIRIUS Satellite radio. Listening to the iPod / D. player Change the display information and pattern Before operating, connect either one of the following (separately purchased) to the CD changer jack on the rear of the unit. See also page 42. • Interface adapter for iPod-KS-PD100 for - JVC KD-AR880 | Instructions - Page 26
All: Functions the same as "Repeat One" of the iPod or "Repeat Mode = One" of the D. player. Functions the same as "Repeat All" of the iPod or "Repeat Mode = All" of the D. player. Random Album*: Functions the same as "Shuffle Albums" of the iPod. Random Song: Functions the same as "Shuffle Songs - JVC KD-AR880 | Instructions - Page 27
information and pattern You can connect an external component to: • CD changer jack on the rear of this unit using the following adapters: - Line Input Adapter, KS-U57 - AUX Input Adapter, KS-U58 Make sure "Ext In" is selected for the external input setting, see page 33. • KD-AR880: LINE IN plugs on - JVC KD-AR880 | Instructions - Page 28
Selecting a preset sound mode ENGLISH Level FREQ (Frequency) Q (Band width) Level FREQ (Frequency) Q (Band width) Level FREQ (Frequency) Q (Band width) The list below shows the preset value setting for each sound mode: Preset values Low Mid High Sound modes FLAT 00 60 Hz Q1.25 00 1 kHz Q1 - JVC KD-AR880 | Instructions - Page 29
ENGLISH Adjusting the sound You can adjust the sound characteristics to your preference. • When appears on the display, you can move back to the previous display by pressing number button 3. 1 2 C VolAdjust, [-5 to +5] Turn the control dial to adjust the input level of each source (except - JVC KD-AR880 | Instructions - Page 30
ENGLISH 3 Select a frequency range. 6 Store the adjustments. 4 Adjust the sound elements of the selected frequency range. 1 Use 5 / ∞ to adjust the level. 2 Press number button 2 ( ), then turn the control dial to select the frequency. 3 Press number button 2 ( ), then turn the control dial to - JVC KD-AR880 | Instructions - Page 31
MOVIE ENGLISH General settings-PSM You can change PSM (Preferred Setting Mode) items listed in the table below and on other PSM items if necessary. 6 Finish the procedure. Category Indication Demo Display demonstration LevelMeter Audio level meter Item ( : Initial) • On • Off • Meter 1 • Meter 2 - JVC KD-AR880 | Instructions - Page 32
is not interrupted by turning off the ignition key of your car, it is recommended to select "Off" to save the car's battery. *2 Displayed only when SIRIUS Satellite radio or XM Satellite radio is connected. *3 Adjustable only when "Clock Adj" is set to "Auto." Press number button 1 ( ) to show the - JVC KD-AR880 | Instructions - Page 33
use a JVC CD changer, [20], or an Apple iPod/a JVC D. player, [25]. : To use any other external component, [27]. AUDIO Beep • radio is connected. *8 Displayed only when one of the following sources is selected-TUNER, SIRIUS, XM, CD, Bluetooth Phone, Bluetooth Audio, or LINE IN (only for KD-AR880 - JVC KD-AR880 | Instructions - Page 34
AUDIO Category Indication Amp Gain Amplifier gain control Item ( : Initial) • High PWR • Low PWR • Off*9 Color Sel Color selection Initial: All Source COLOR Color Set Color setting Red Green Blue - Day Color NightColor 00 - 11 00 - 11 00 - 11 *9 Only for KD-AR880 setting. Changing the - JVC KD-AR880 | Instructions - Page 35
XM*4 Ô iPod*4/D.PLAYER*4 Ô BT Phone*4 Ô BT Audio*4 Ô (back to the beginning) *1 When you select "All Source," you can use the same color for all the sources. *2 Depends on the "Ext Input" setting, see page 33. *3 Only for KD-AR880. *4 Displayed only when the target component is connected. 4 Select - JVC KD-AR880 | Instructions - Page 36
by ringing and displaying "MSG." Manual: The unit does not inform you of the arrival of a message. *1 Appears only when a Bluetooth phone is connected. *2 Appears only when a Bluetooth phone is connected and it is compatible with text message. *3 Bluetooth Audio: Shows only "Version." MIC setting - JVC KD-AR880 | Instructions - Page 37
Assigning titles ENGLISH You can assign titles to station frequencies and external components (EXT IN and LINE IN). Sources Maximum number of characters FM/AM tuner Up to 10 characters (up to 30 station frequencies including both FM and AM) External components Up to 8 characters ("EXT IN" or - JVC KD-AR880 | Instructions - Page 38
lens inside the unit in the following cases: • After starting the heater in the car. • If it becomes very humid inside the car. Should this occur, the unit may malfunction. In this case, eject the disc use. Sticker Sticker residue Stick-on label Unusual shape Single CD- 8 cm (3-3/16") disc 38 - JVC KD-AR880 | Instructions - Page 39
RWs (Rewritable) in audio CD (CD-DA), MP3/WMA/AAC formats. • When a disc is inserted upside down, "Please Eject" appears on the display. Press 0 to eject the disc. • While fast-forwarding or reversing on an MP3/WMA/ AAC disc, you can only hear intermittent sounds. • In this manual, words "track" and - JVC KD-AR880 | Instructions - Page 40
connection ports, some USB devices may not be attached properly or the connection might be loose. • When connecting a USB mass storage class device, refer also to its instructions. • Connect If you connect an MTP device featuring "USB digital media streaming" to this unit (except JVC D. Player XA- - JVC KD-AR880 | Instructions - Page 41
(or reset the unit). Reset 08 Check the connection between the adapter and this unit. Satellite radio operations • You can also connect the JVC SIRIUS radio PnP (Plug and Play), using the JVC SIRIUS radio adapter, KS-U100K (not supplied) to the CD changer jack on the rear. Continued on the next - JVC KD-AR880 | Instructions - Page 42
Installation/Connection manual (separate volume). LINE IN plugs on the rear Unit CD changer jack with or without (see pages 14 - 19) : Adapter (separately purchased) 42 (see page 33 of the "Ext Input" setting) (see page 33 of the "Ext Input" setting) MD player, etc., [27] SIRIUS Satellite radio - JVC KD-AR880 | Instructions - Page 43
stations manually. • Static noise while listening to the radio. Connect the antenna firmly. • Disc cannot be played back. Insert the disc correctly. • CD-R/CD-RW cannot be played back. • Insert a finalized CD-R/CD-RW. • Tracks on the CD-R/CD-RW cannot be skipped. • Finalize the CD-R/CD-RW - JVC KD-AR880 | Instructions - Page 44
• "No Files" appears on the display. Change the disc that contains MP3/WMA/AAC tracks. one played back using them to play. other players. • "File Check" keeps flashing on the the display. Connect a USB device that contains tracks encoded in an appropriate format. • "Not Support" appears on - JVC KD-AR880 | Instructions - Page 45
the device again. • The connected audio device cannot be controlled. Check whether the connected audio device supports AVRCP (Audio Video Remote Control Profile). Bluetooth* * For Bluetooth operations, refer also to the instructions supplied with the Bluetooth Adapter. Continued on the next - JVC KD-AR880 | Instructions - Page 46
display. Connect this unit and the CD changer correctly and press the reset button of the CD changer. audio. Text information are temporarily unavailable. • Satellite radio does not work at all. Reconnect this unit and the satellite radio correctly, then reset the unit. Satellite radio * Changes - JVC KD-AR880 | Instructions - Page 47
the display. Disconnect the adapter from both the unit and iPod/ D. player. Then, connect it again. • "Reset 08" appears on the display. Check the connection between the adapter and this unit. • The iPod's or D. player's controls do not work Reset the iPod or D. player. after disconnecting from - JVC KD-AR880 | Instructions - Page 48
ENGLISH Specifications AUDIO AMPLIFIER SECTION Power Output: 20 W RMS × 4 Channels at 4 Ω and ≤ 1% THD+N Signal to Noise KD-AR880: 5.0 V/20 kΩ load (full scale) KD-G830: 4.0 V/20 kΩ load (full scale) Other Terminal: KD-AR880: CD changer, Steering wheel remote input and LINE IN KD-G830: CD - JVC KD-AR880 | Instructions - Page 49
2-1/16" × 6-1/4") 188 mm × 58 mm × 12 mm (7-7/16" × 2-5/16" × 1/2") 1.3 kg (2.9 lbs) (excluding accessories) Design and specifications are subject to change without notice. If a kit is necessary for your car, consult your telephone directory for the nearest car audio speciality shop. REFERENCES 49 - JVC KD-AR880 | Instructions - Page 50
Muchas gracias por la compra de un producto JVC. Como primer paso, por favor lea detenidamente este manual para comprender a fondo todas las instrucciones o a un técnico experto en radio/televisión. Precaución: Los cambios o modificaciones no aprobados por JVC pueden anular la autoridad del usuario - JVC KD-AR880 | Instructions - Page 51
de cuenta atrás del tiempo. Para volver a utilizar estos controles para sus funciones originales, espere 15 segundos (o 30 segundos para fuentes Bluetooth) sin pulsar ninguno de estos botones hasta que se cancele el control. • Pulse M MODE otra vez para restablecer las funciones originales. Sin - JVC KD-AR880 | Instructions - Page 52
dispositivos digitales, baje el volumen para evitar daños a los altavoces debido a un repentino aumento del nivel de salida. El KD-AR880 está equipado con la función de control remoto en el volante de dirección. • Para la conexión, consulte el Manual de instalación/conexión (volumen separado). 4 - JVC KD-AR880 | Instructions - Page 53
USB 13 DISPOSITIVOS EXTERNOS Uso de dispositivos Bluetooth 14 • Usar el teléfono celular Bluetooth 17 • Uso del reproductor de audio Bluetooth 19 Escuchando el cambiador de CD 20 Para escuchar la radio satelital 22 Escuchando el iPod / reproductor D 25 Escuchando otros componentes externos - JVC KD-AR880 | Instructions - Page 54
a continuación, "Off". Ponga el reloj en hora Seleccione "Clock Hr" (hora) y, seguidamente ajuste la hora. Seleccione "Clock Min" (minutos) y, seguidamente ajuste los minutos. Seleccione "24H de fuente Visualización del medidor de nivel de audio (véase "LevelMeter" en la página 31) 6 INTRODUCCIÓN - JVC KD-AR880 | Instructions - Page 55
la fuente. TUNER = SIRIUS*1/XM*1 = CD*1 = USB = CD-CH*1/iPod*1/D.PLAYER*1 (o EXT IN) = Bluetooth Phone*1 = Bluetooth Audio*1 = LINE IN*2 = (vuelta al comienzo) *1 No podrá seleccionar estas fuentes si no están preparadas o conectadas. *2 Sólo para KD-AR880. 2 Selecciona las bandas. 3 • Enciende el - JVC KD-AR880 | Instructions - Page 56
accidentes • No instale ninguna otra pila CD compatible con MP3: - Cambia el disco si lo pulsa brevemente. - Cambia la carpeta si lo pulsa y mantiene pulsado. • Mientras escucha la radio satelital (SIRIUS o XM): - Cambia las categorías. • Mientras escucha un Apple iPod o un reproductor D. JVC - JVC KD-AR880 | Instructions - Page 57
lo pulsa y mantiene pulsado. • Mientras escucha un iPod o un reproductor D. (en el modo de selecci Bluetooth audio. * 5 U : Vuelve al menú anterior. D ∞ : Confirma la selección. Para escuchar la radio ática. Búsqueda manual: Mantenga pulsado uno de los botones hasta que "Manual Search" aparezca en - JVC KD-AR880 | Instructions - Page 58
ESPAÑOL Cuando una radiodifusión en FM estéreo sea difícil de recibir 1 2 Preajuste manual Ej.: Almacenando una emisora FM de 92,5 MHz en el número de preajuste 4 de la banda FM1. Uso de los botones numéricos 1 Se consigue - JVC KD-AR880 | Instructions - Page 59
ESPAÑOL 4 Seleccione el número de preajuste en que desea almacenar. • Podrá desplazarse a las listas de otras bandas FM pulsando repetidamente el botón numérico 5 ( ) o 6 ( ). 5 Almacene la emisora. Para escuchar la emisora preajustada de la Lista de Emisoras Preajustadas 1 Visualice la lista de - JVC KD-AR880 | Instructions - Page 60
que preceda a sus respectivos nombres-01, 02, 03, y así sucesivamente. Tras pulsar , pulse los siguientes botones para... Botón Archivo MP3/WMA/AAC CD de audio/CD Text Saltar 10 pistas (dentro de la misma carpeta) Saltar 10 pistas Intro Track: Reproduce los primeros 15 segundos de todas las - JVC KD-AR880 | Instructions - Page 61
el dispositivo USB Puede conectar a la unidad un dispositivo de clase de almacenamiento masivo USB tal como una memoria USB, un reproductor de audio digital*1, un HDD (disco duro) portátil, etc. *1 Puede conectar tanto dispositivos MTP (Media Transfer Protocol) como dispositivos de clase de - JVC KD-AR880 | Instructions - Page 62
son los países en que se puede utilizar la función Bluetooth®. Para utilizar por primera vez un dispositivo Bluetooth a través de la unidad ("Bluetooth Phone" y "Bluetooth Audio"), usted deberá establecer una conexión Bluetooth inalámbrica entra la unidad y el dispositivo. • Una vez establecida la - JVC KD-AR880 | Instructions - Page 63
el dispositivo para activar su función Bluetooth. 1 Seleccione "Bluetooth Phone" o "Bluetooth Audio". 2 Selecciona un número. 3 Repita dispositivo permanece registrado aún después de desconectarlo. Utilice "Connect" (o active "Auto Connect") para que se conecte el mismo dispositivo a partir de - JVC KD-AR880 | Instructions - Page 64
configurar para que se conecte automáticamente un dispositivo Bluetooth al encender la unidad. (Vea "Auto Connect" en la página 36). Borrar un dispositivo registrado 1 Seleccione "Bluetooth Phone" o "Bluetooth Audio". 2 Seleccione un dispositivo que desea conectar. 2 Seleccione el dispositivo - JVC KD-AR880 | Instructions - Page 65
. (Consulte las páginas 18 y 36.) Cuando entra una llamada... La fuente será cambiada automáticamente a "Bluetooth Phone". Cuando "Auto Answer" está activado.... La unidad contesta automáticamente las llamadas entrantes, consulte la página 36. • Cuando se ha desactivado "Auto Answer", pulse - JVC KD-AR880 | Instructions - Page 66
la visualización anterior pulsando el botón numérico 3. 1 Seleccione "Bluetooth Phone". * Se visualiza solamente cuando su teléfono celular está equipado ía telefónica del teléfono celular a esta unidad. (Consulte el manual de instrucciones suministrado con su teléfono celular). - Con algunos telé - JVC KD-AR880 | Instructions - Page 67
Bluetooth audio para iniciar la reproducción. • Para conectar/desconectar/borrar un dispositivo registrado, consulte también la página 16. * La operación puede diferir según el teléfono conectado. Información Bluetooth: Si desea obtener más información sobre Bluetooth, visite el sitio web de JVC - JVC KD-AR880 | Instructions - Page 68
ÑOL Cambio de la información en pantalla y del patrón de visualización Se recomienda usar un cambiador de CD- compatible con MP3 JVC con este receptor. Puede conectar un cambiador de CD al jack del cambiador de CD en la parte trasera de la unidad. Consulte también la página 42. • Solamente se podr - JVC KD-AR880 | Instructions - Page 69
(sólo para el archivo MP3/WMA/AAC)" en la página 13. Seleccione "Disc" en el paso 3 para visualizar la lista de discos del cambiador de CD. DISPOSITIVOS EXTERNOS 21 - JVC KD-AR880 | Instructions - Page 70
) al jack del cambiador de CD de la parte trasera de esta unidad. Consulte también la página 42. • SIRIUS radio DLP (Down Link Processor) de JVC, para escuchar la radio satelital SIRIUS. • XMDirect™ Universal Tuner Box-Usando un Smart Digital Adapter JVC (XMDJVC100: no suministrado), para escuchar - JVC KD-AR880 | Instructions - Page 71
y aquellos a los que no está suscrito. Para consultar el número de identificación de la radio satelital XM Mientras selecciona "XM1", "XM2" o "XM3", seleccione "Channel 0". En la pantalla se exhiben "RADIO ID" y el número de identificación de 8 dígitos (alfanuméricos). Para cancelar la visualizaci - JVC KD-AR880 | Instructions - Page 72
érico 3. • Cuando aparece / en la pantalla, podrá desplazarse a otras listas pulsando repetidamente el botón numérico 5 o 6. Ej.: Para escuchar la radio por satélite SIRIUS. 1 Para seleccionar una categoría 1 Realice los pasos 2 a 4 de la columna izquierda. • En el paso 4, seleccione "Category - JVC KD-AR880 | Instructions - Page 73
nivel de audio = (vuelta al comienzo) * Sólo para la radio satelital SIRIUS. Escuchando el iPod / CD de la parte trasera de esta unidad. Consulte también la página 42. • Adaptador de interfaz para iPod-KS-PD100 para controlar un iPod Seleccione "iPod" o "D. PLAYER". Ÿ Seleccione una canci - JVC KD-AR880 | Instructions - Page 74
una pista, la reproducción se inicia automáticamente. • Si mantiene pulsado 4/¢ se pueden saltar 10 opciones simultáneamente. Para iPod: Playlists Ô Artists Ô Albums Ô Songs Ô Genres Ô Composers Ô (vuelta al comienzo) Para el reproductor D.: Playlist Ô Artist Ô Album Ô Genre Ô Track Ô (vuelta al - JVC KD-AR880 | Instructions - Page 75
del cambiador de CD de la parte trasera de esta unidad utilizando los siguientes adaptadores: - Adaptador de entrada de línea, KS-U57 - Adaptador de entrada AUX, KS-U58 Asegúrese de que se ha seleccionado "Ext In" para el ajuste de entrada externa, consulte la página 33. • KD-AR880: Clavijas LINE IN - JVC KD-AR880 | Instructions - Page 76
Selección de un modo de sonido preajustado ESPAÑOL En la lista de abajo se muestran los valores de preajuste para cada modo de sonido. Valores preajustados Modos de sonido Low (Bajo) Mid (Mid) High (Alto) Nivel FREQ (Frecuencia) Q (Ancho de banda) Nivel FREQ (Frecuencia) Q (Ancho de banda) - JVC KD-AR880 | Instructions - Page 77
Cómo ajustar el sonido Usted puede ajustar las características de sonido según sus preferencias. • Cuando aparezca en la pantalla, podrá volver a la visualización anterior pulsando el botón numérico 3. 1 2 C VolAdjust, [-5 a +5] Gire el control giratorio para ajustar el nivel de entrada de - JVC KD-AR880 | Instructions - Page 78
ESPAÑOL 3 Seleccione una gama de frecuencias. 6 Almacene los ajustes. 4 Ajuste los elementos de sonido de la gama de frecuencias seleccionada. 1 Utilice 5 / ∞ para ajustar el nivel. 2 Pulse el botón numérico 2 ( ) y, a continuación, gire el control giratorio para seleccionar la frecuencia. 3 - JVC KD-AR880 | Instructions - Page 79
procedimiento. Categoría Indicación Opción ( : Inicial) Demo • On Demostración en pantalla • Off LevelMeter • Meter 1 Medidor de nivel de • Meter 2 audio • Meter 3 Ajuste, [página de referencia] : La demostración en pantalla se activará automáticamente si no se efectúa ninguna operaci - JVC KD-AR880 | Instructions - Page 80
óvil, se recomienda seleccionar "Off" para economizar batería del automóvil. *2 Sólo aparece cuando está conectada la radio satelital SIRIUS o XM. *3 Solamente se puede ajustar cuando "Clock Adj" está ajustado a "Auto". Pulse el botón numérico 1 ( ) para mostrar la pantalla de ajuste. *4 Algunos - JVC KD-AR880 | Instructions - Page 81
del ajuste de "Dimmer". *7 Sólo aparece cuando está conectada la radio satelital SIRIUS. *8 Se visualiza sólo cuando se ha seleccionado una de las siguientes fuentes-TUNER, SIRIUS, XM, CD, Bluetooth Phone, Bluetooth Audio, o LINE IN (sólo para KD-AR880). Continúa en la página siguiente AJUSTES 33 - JVC KD-AR880 | Instructions - Page 82
PWR Control de ganancia • Low PWR del amplificador AUDIO • Off*9 Color Sel Inicial: All Selección del color Source COLOR Color Set Ajuste de color Red (Rojo) Green (Verde) Blue (Azul) - Day Color NightColor 00 - 11 00 - 11 00 - 11 *9 Sólo para KD-AR880. *10 Depende del ajuste de "Dimmer - JVC KD-AR880 | Instructions - Page 83
iPod*4/D.PLAYER*4 Ô BT Phone*4 Ô BT Audio*4 Ô (vuelta al comienzo) *1 Cuando selecciona "All Source", se podrá usar el mismo color para todas las fuentes. *2 Depende del ajuste "Ext Input" consulte la página 33. *3 Sólo para KD-AR880 Honey Ô Violet Ô Grape Ô Pale Ô User*6 Ô (vuelta al comienzo) *5 El - JVC KD-AR880 | Instructions - Page 84
cambiar según sus preferencias. 1 Seleccione "Bluetooth Phone" o "Bluetooth Audio". Menú de ajustes ( : Inicial) Auto Connect Al encender la unidad, la conexión se establece automáticamente con.... Off : Ningún dispositivo Bluetooth. Last: El dispositivo Bluetooth conectado en último término. Order - JVC KD-AR880 | Instructions - Page 85
( ) para seleccionar un conjunto de caracteres. 2 Gire el control giratorio para seleccionar un carácter. • Para los caracteres disponibles, consulte debajo. 3 Utilice 4/¢ para desplazarse a la posición del carácter siguiente (o anterior). 4 Repita los pasos 1 a 3 hasta que termine de introducir el - JVC KD-AR880 | Instructions - Page 86
irregularidades raspando los bordes con un lápiz o bolígrafo, etc. No utilice los siguientes discos: Disco alabeado Pegatina Restos de pegatina Rótulo autoadhesivo Forma irregular CD simple- disco de 8 cm (33/16 pulgada) 38 - JVC KD-AR880 | Instructions - Page 87
) en formato de audio CD (CD-DA), MP3/WMA/AAC. • Cuando se inserta un disco al revés, aparecerá "Please Eject" en la pantalla. Pulse 0 para sacar el disco. • Durante el avance rápido o el retroceso de un disco MP3/WMA/AAC, podrá escuchar sólo sonidos intermitentes. • En este manual, las palabras - JVC KD-AR880 | Instructions - Page 88
ESPAÑOL • No utilice los CD-Rs o CD-RWs siguientes: - Discos con pegatinas, etiquetas o un sello de dispositivo MTP que cuenta con "USB digital media streaming" (excepto el reproductor D. XA-HD500 de JVC) podrá reproducir, a través de la misma, archivos WMA-DRM10 (Gestión de derechos digitales - JVC KD-AR880 | Instructions - Page 89
ónica). : Teléfono celular : Teléfono del hogar : Oficina : Sólo Teléfono : Teléfono/audio : Sólo audio : General : Desconocido : Excepto lo de arriba Mensajes de advertencia para las operaciones Bluetooth Connection Error El dispositivo está registrado pero ha fallado la conexión. Utilice - JVC KD-AR880 | Instructions - Page 90
JVC: Para usuarios de iPod: Para los usuarios del reproductor D.: - JVC KD-AR880 | Instructions - Page 91
3). • Aparece "Connect Error" en la radio. Conecte firmemente la antena. • No se puede reproducir el disco. Inserte correctamente el disco. • No se puede reproducir el CD-R/CD-RW. • Inserte un CD-R/CD-RW finalizado. • No se pueden saltar las pistas del CD-R/CD-RW. • Finalice el CD-R/CD - JVC KD-AR880 | Instructions - Page 92
grabadas las pistas en el disco. • Aparece "Please Eject" en la pantalla. Inserte un disco que contenga pistas MP3/WMA/AAC. • Aparece "Not Support" en la pantalla y se omiten las pistas. Vaya a la siguiente pista codificada en un formato apropiado o a la siguiente pista WMA no protegida contra - JVC KD-AR880 | Instructions - Page 93
la posición de la unidad del micrófono. • La calidad del sonido telefónico es mala. • Reduzca la distancia entre la unidad y el dispositivo de audio Bluetooth. • Mueva el coche a un lugar donde pueda mejorar la recepción de la señal. • El sonido se interrumpe u omite durante la reproducción de un - JVC KD-AR880 | Instructions - Page 94
. Pulse el botón de reinicialización del cambiador de CD. • El cambiador de CD no funciona en absoluto. Reinicialice el receptor (consulte la audio. La información de texto no está disponible temporalmente. • La radio satelital no funciona. Vuelva a conectar correctamente esta unidad y la radio - JVC KD-AR880 | Instructions - Page 95
Inc. y de XM Satellite Radio, Inc. • iPod es una marca comercial de Apple Inc., registrada en los EE.UU. y otros países. • La marca Bluetooth y sus logotipos son propiedad de Bluetooth SIG, Inc., y cualquier uso de los mismos por Victor Company of Japan, Limited (JVC) se realiza bajo licencia. Otras - JVC KD-AR880 | Instructions - Page 96
Especificaciones SECCIÓN DEL AMPLIFICADOR DE AUDIO Salida de potencia: 20 W : Otro terminal: Baja: Mediana: Alta: KD-AR880: KD-G830: KD-AR880: KD-G830: KD-AR880: KD-G830: 4 Ω (tolerancia de 4 Ω ) Cambiador de CD, Entrada remota en el volante de dirección y LINE IN Cambiador de CD SECCIÓN DEL - JVC KD-AR880 | Instructions - Page 97
ESPAÑOL SECCIÓN DEL REPRODUCTOR DE CD Tipo: Reproductor de discos compactos Sistema de detección de señal: Captor óptico sin contacto (láser semiconductor) Nú un kit para su automóvil, consulte su directorio telefónico para buscar la tienda especializada en car audio más cercana. REFERENCIAS 49 - JVC KD-AR880 | Instructions - Page 98
avoir acheté un produit JVC. Veuillez lire attentivement toutes les instructions avant d'utiliser l'appareil afin de bien comprendre son fonctionnement et d'obtenir les meilleures performances possibles. Précautions: Tout changement ou modification non approuvé par JVC peut annuler l'autorité de - JVC KD-AR880 | Instructions - Page 99
réinitialiser l'autoradio. Pour sécurité... • N'augmentez pas trop le volume car cela bloquerait les sons de l'extérieur rendant la conduite dangereuse. • Arr originales, attendez 15 secondes (ou 30 secondes pour les sources Bluetooth) sans appuyer sur aucune touche jusqu'à ce que la commande soit - JVC KD-AR880 | Instructions - Page 100
volume avant de reproduire ces appareils numériques afin d'éviter d'endommager les enceintes par la soudaine augmentation du niveau de sortie. Le KD-AR880 est muni d'une fonction de télécommande de volant. • Référez-vous au Manuel d'installation/ raccordement (volume séparé) pour les connexion. 4 - JVC KD-AR880 | Instructions - Page 101
rique USB 13 APPAREILS EXTÉRIEURS Utilisation d'appareil Bluetooth 14 • Utilisation d'un téléphone portable Bluetooth 17 • Utilisation d'un lecteur audio Bluetooth 19 Écoute du changeur de CD 20 Écoute de la radio satellite 22 Écoute de iPod / lecteur D 25 Écoute d'un autre appareil extérieur - JVC KD-AR880 | Instructions - Page 102
édez aux réglages PSM. Annulez de la démonstration des affichages Choisissez "Demo", puis "Off". Réglez l'horloge Choisissez "Clock Hr" (heures), puis ajustez les heures. Choisissez "Clock Min" (minutes), puis ajustez les minutes. Choisissez "24H/12H", puis "24Hours" ou "12Hours". Terminez la proc - JVC KD-AR880 | Instructions - Page 103
TUNER = SIRIUS*1/XM*1 = CD*1 = USB = CD-CH*1/iPod*1/D.PLAYER*1 (ou EXT IN) = Bluetooth Phone*1 = Bluetooth Audio*1 = LINE IN*2 = (retour au début) *1 Vous ne pouvez pas choisir ces sources si elles ne sont pas prêtes ou connectées. *2 Uniquement pour le KD-AR880. 2 Choisissez les bandes. 3 • Mettez - JVC KD-AR880 | Instructions - Page 104
un changeur de CD compatible MP3: - Change le disque si la touche est pressée brièvement. - Change le dossier si la touche est maintenue pressée. • Lors de l'écoute de la radio satellite (SIRIUS ou XM): - Change les catégories. • Lors de l'écoute de iPod Apple ou d'un lecteur D. JVC: - Pausez/arr - JVC KD-AR880 | Instructions - Page 105
Change les canaux si les touches sont pressées brièvement. - Maintenez-les pressées pour changer rapidement les canaux. • Lors de l'écoute de iPod Audio Bluetooth. * 5 U : Retourne au menu précédent. D ∞ : Valide la sélection. Écoute de la radio jusqu'à ce que "Manual Search" apparaisse sur l' - JVC KD-AR880 | Instructions - Page 106
Quand une émission FM stéréo est difficile à recevoir 1 2 Préréglage manuel Ex.: Mémorisation de la station FM de fréquence 92,5 MHz sur le numéro de préréglage 4 de la bande FM1. Utilisation des touches numériques 1 La réception est améliorée, mais l'effet stéréo est perdu. 2 • s'allume sur - JVC KD-AR880 | Instructions - Page 107
4 Choisissez le numéro de préréglage sur lequel vous souhaitez mémoriser le programme. Écoute d'une station préréglée de la liste des stations préréglées 1 Affichez la liste des stations préréglée, puis choisissez la station préréglée que vous souhaitez écouter. • Vous pouvez aller directement à - JVC KD-AR880 | Instructions - Page 108
début du nom des dossiers-01, 02, 03, etc. Après avoir appuyé sur , appuyez sur les touches suivantes pour... Touche Fichier MP3/WMA/AAC CD Audio/CD Text Sauter 10 plages (à l'intérieur du même dossier) Sauter 10 plages FRANÇAIS Intro Track: Intro Track: Reproduit les 15 premières secondes - JVC KD-AR880 | Instructions - Page 109
un périphérique USB à mémoire de grande capacité tel qu'une mémoire USB, un lecteur audio numérique*1, un disque dur portable, etc. à cet appareil. *1 Vous pouvez connecter des périphériques MTP (Media Tranfer Protocol) et USB à mémoire de grande capacité. Fixation d'une mémoire USB Prise d'entr - JVC KD-AR880 | Instructions - Page 110
et 13. Utilisation d'appareil Bluetooth ® Pour les opérations Bluetooth, il faut connecter l'adaptateur Bluetooth (KS-BTA200) à la prise de changeur de CD à l'arrière de cet appareil. Voir aussi page 42. • Référez-vous aussi aux instructions fournies avec l'adaptateur Bluetooth et le périphérique - JVC KD-AR880 | Instructions - Page 111
Réglez le périphérique pour mettre en service la fonction Bluetooth. 1 Choisissez "Bluetooth Phone" ou "Bluetooth Audio". 2 Choisissez un nombre. 3 Répétez après que vous le déconnectez. Utilisez "Connect" (ou mettez en service "Auto Connect") pour connecter le même appareil la prochaine fois. ( - JVC KD-AR880 | Instructions - Page 112
-vous aux instructions fournies avec le périphérique pour vérifier le code PIN. 4 Utilisez le périphérique Bluetooth pour réaliser Connect" à la page 36.) Suppression d'un appareil enregistré 1 Choisissez "Bluetooth Phone" ou "Bluetooth Audio". 2 Choisissez un appareil que vous souhaitez connecter - JVC KD-AR880 | Instructions - Page 113
un appel ou des réglages en utilisant le menu de réglage Bluetooth. (Voir pages 18 et 36.) Quand un appel arrive.... La source change automatiquement sur "Bluetooth Phone". Quand "Auto Answer" est en service.... L'appareil répond automatiquement aux appels entrant, voir page 36. • Quand "Auto - JVC KD-AR880 | Instructions - Page 114
la touche numérique 3. 1 Choisissez "Bluetooth Phone". * Apparaît uniquement quand votre télé . (Référez-vous au manuel d'instructions fourni avec votre téléphone portable.) Voice Dialing (accessible uniquement quand le téléphone portable connecté possède un système de reconnaissance vocale): - JVC KD-AR880 | Instructions - Page 115
* Saut vers l'arrière/saut vers l'avant ~ Choisissez "Bluetooth Audio". Si la lecture ne démarre pas automatiquement, utilisez le lecture audio Bluetooth pour démarrer la lecture. • Référez-vous aussi à la page 16 pour connecter/déconnecter/supprimer un périphérique enregistré. * L'opération peut - JVC KD-AR880 | Instructions - Page 116
Changez les informations et la courbe sur l'affichage Il est recommandé d'utiliser un changeur de CD JVC compatible MP3- avec votre autoradio. Vous pouvez connecter un changeur de CD à la prise de changeur de CD à l'arrière de l'appareil. Voir aussi page 42. • Vous pouvez uniquement reproduire les - JVC KD-AR880 | Instructions - Page 117
sur la liste (uniquement pour les fichiers MP3/WMA/AAC)" à la page 13. Choisissez "Disc" à l'étape 3 pour afficher la liste des disques du changeur de CD. APPAREILS EXTÉRIEURS 21 - JVC KD-AR880 | Instructions - Page 118
™ Universal Tuner Box-Utilisation d'un adaptateur numérique intelligent JVC (XMDJVC100: non fourni), pour écouter la radio satellite XM. • Référez-vous aussi aux instructions fournies avec votre radio satellite SIRIUS ou radio satellite XM. 3 Vérifiez votre numéro d'identification SIRIUS (SIRIUS - JVC KD-AR880 | Instructions - Page 119
auxquels vous n'avez pas souscrits sont sautés. Vérification du numéro d'identification de la radio satellite XM Lors de la sélection de "XM1", "XM2" ou "XM3", choissiez le "Channel 0". "RADIO ID" et le numéro d'identification à 8 chiffres (alphanumérique) apparaissent sur l'affichage. Pour annuler - JVC KD-AR880 | Instructions - Page 120
, vous pouvez passer sur d'autres listes en appuyant répétitivement sur la touche numérique 5 ou 6. Ex.: Lors de l'écoute de la radio satellite SIRIUS. 1 Pour choisir une catégorie 1 Suivez les étapes 2 à 4 de la colonne de gauche. • À l'étape 4, choisissez "Category". 5 Choisissez le num - JVC KD-AR880 | Instructions - Page 121
sonore = (retour au début) * Uniquement pour la radio satellite SIRIUS. Écoute de iPod / lecteur D. FRANÇAIS Changez les informations et la du changeur de CD à l'arrière de l'appareil. Voir aussi page 42. • Adaptateur d'interface pour iPod-KS-PD100 pour commander un iPod. • Adaptateur d' - JVC KD-AR880 | Instructions - Page 122
répétition = Tous" pour le lecteur D. Random Album*: Fonctionne de la même façon que "Aléatoire Albums" pour iPod. Random Song: Fonctionne de la même façon que "Aléatoire Morceaux" pour iPod ou que "Lecture aléatoire = Activé" pour le lecteur D. • Vous pouvez aussi annuler le mode de lecture en - JVC KD-AR880 | Instructions - Page 123
la courbe sur l'affichage Vous pouvez connecter un appareil extérieur à: • la prise de changeur de CD à l'arrière de cet appareil rieure, voir page 33. • KD-AR880: Fiches LINE IN à l'arrière de cet appareil. ~ Choisissez "EXT IN" ou "LINE IN". Ÿ Mettez l'appareil connecté sous tension et démarrez la - JVC KD-AR880 | Instructions - Page 124
Sélection d'un mode sonore préréglé FRANÇAIS Niveau FREQ (fréquence) Q (bande passante) Niveau FREQ (fréquence) Q (bande passante) Niveau FREQ (fréquence) Q (bande passante) La liste ci-dessous montre les valeurs préréglées des réglages de chaque mode sonore: Valeurs préréglées Modes sonores - JVC KD-AR880 | Instructions - Page 125
Ajustement du son Vous pouvez ajuster les caractéristiques du son comme vous le souhaitez. • Quand apparaît sur l'affichage, vous pouvez retourner à l'affichage précédent en appuyant sur la touche numérique 3. 1 2 C VolAdjust, [-5 à +5] Tournez la molette de commande pour ajuster le niveau - JVC KD-AR880 | Instructions - Page 126
FRANÇAIS 3 Choisissez une plage de fréquences. 6 Mémorisez les ajustements. 4 Ajustez les éléments du son de la plage de fréquences choisie. 1 Utilisez 5 / ∞ pour ajuster le niveau. 2 Appuyez sur la touche numérique 2 ( ), puis tournez la molette de commande pour choisir la fréquence. 3 Appuyez - JVC KD-AR880 | Instructions - Page 127
Off LevelMeter • Meter 1 Indicateur de niveau • Meter 2 sonore • Meter 3 Réglage, [page de référence] : La démonstration des affichages entre en service si aucune opération n'est réalisée pendant environ 20 secondes, [6]. : Annulation. : Choisissez les différents modèles d'indicateur de niveau - JVC KD-AR880 | Instructions - Page 128
Newfound DST*2, *3 • On Heure d'été • Off : Mettez en service l'heure d'été si votre zone d'habitation y est soumise. : Annulation ne pas user la batterie de la voiture. *2 Est affiché uniquement quand la radio satellite SIRIUS ou XM est connectée. *3 Est ajustable uniquement quand "Clock Adj" - JVC KD-AR880 | Instructions - Page 129
est en service. AUDIO *6 Dépend du réglage "Dimmer". *7 Est affiché uniquement quand la radio satellite SIRIUS est connectée. *8 Est affiché uniquement quand une des sources suivantes est choisie-TUNER, SIRIUS, XM, CD, Bluetooth Phone, Bluetooth Audio ou LINE IN (pour le KD-AR880). Suite à la - JVC KD-AR880 | Instructions - Page 130
) Réglage, [page de référence] AUDIO Amp Gain • High PWR Commande du viter tout dommage des enceintes.) : Met hors service l'amplificateur intégré. Color Sel Sélection : Day Color: +07, NightColor: +05 *9 Uniquement pour le KD-AR880. *10 Dépend du réglage "Dimmer". FRANÇAIS COLOR Réglage - JVC KD-AR880 | Instructions - Page 131
*4/D.PLAYER*4 Ô BT Phone*4 Ô BT Audio*4 Ô (retour au début) *1 Si vous choisissez "All Source", vous pouvez utiliser la même couleur pour toutes les sources. *2 Dépend du réglage "Ext Input", voir page 33. *3 Uniquement pour le KD-AR880. *4 Est affiché uniquement quand l'appareil source est connect - JVC KD-AR880 | Instructions - Page 132
Bluetooth est connecté. *2 Apparaît uniquement quand un téléphone Bluetooth est connecté et qu'il est compatible avec les messages textuels. *3 Bluetooth Audio ". Manual : L'appareil ne vous informe pas de l'arrivée d'un message. MIC setting Uniquement pour l'appareil connecté pour "Bluetooth Phone - JVC KD-AR880 | Instructions - Page 133
Affectation de titres FRANÇAIS Vous pouvez affecter des titres aux fréquences des stations est aux appareils extérieurs (EXT IN et LINE IN). Sources Le nombre maximum de caractères Tuner FM/AM 10 caractères maximum (pour 30 fréquences de station maximum pour FM et AM) Appareils extérieurs 8 - JVC KD-AR880 | Instructions - Page 134
enregistrée. Pour remettre un disque dans sa boîte, insérez-le délicatement sur le support central (avec la surface imprimée dirigée vers le haut). • Conservez les disques dans leur Reste d'étiquette Étiquette autocollante Forme inhabituelle CD Single-disque de 8 cm (3-3/16 pouces) 38 - JVC KD-AR880 | Instructions - Page 135
é sur le disque si un disque comprend à la fois des fichiers CD audio (CD-DA) et des fichiers MP3/WMA/AAC. • Cet autoradio peut reproduire enregistrement (données manquantes, etc.) ou du support (tâche, rayure, gondolage) sont incorrectes. • Les CD-RW nécessite un temps d'initialisation plus long - JVC KD-AR880 | Instructions - Page 136
les CD-R ou CD-RW partir d'un périphérique USB • Connecter un périphérique USB automatiquement change la source sur "USB". • Lors de connectés correctement ou que la connexion soit lâche. • Lors de la connexion d'un périphérique USB à mémoire de grande capacité, référez-vous aussi à ses instructions - JVC KD-AR880 | Instructions - Page 137
entre l'adaptateur et cet appareil. Utilisation de la radio satellite • Vous pouvez aussi connecter la radio JVC SIRIUS PnP ("Plug and Play"), en utilisant l'adaptateur de radio SIRIUS JVC, KS-U100K (non fourni) sur la prise de changeur de CD à l'arrière de l'appareil. Suite à la page suivante - JVC KD-AR880 | Instructions - Page 138
ou comme prévues. Dans ce cas, consultez le site Web JVC suivant: Pour les utilisateurs de iPod: Pour les utilisateurs d'un lecteur D.: Affectation d'un titre • Si vous - JVC KD-AR880 | Instructions - Page 139
l'écoute de la radio. Connectez l'antenne solidement. • Le disque ne peut pas être reproduit. Insérez le disque correctement. • Le CD-R/CD-RW ne peut pas être reproduit. • Insérez un CD-R/CD-RW finalisé. • Les plages sur les le CD-R/CD-RW ne peuvent • Finalisez le CD-R/CD RW avec l'appareil - JVC KD-AR880 | Instructions - Page 140
contient des plages codées dans un format approprié. • "Not Support" apparaît sur l'affichage et la La plage ne peut pas être reproduite. plage est sautée. • "Read Failed" apparaît sur l'affichage. Le périphérique USB connecté peut ne pas fonctionner correctement, ou peut ne pas avoir été format - JVC KD-AR880 | Instructions - Page 141
), connectez de nouveau le périphérique. Vérifiez si le périphérique audio connecté prend en charge AVRCP (Audio Video Remote Control Profile). Bluetooth* * Pour les opérations Bluetooth, référez-vous aux instructions fournies avec l'adaptateur Bluetooth. Suite à la page suivante RÉFÉRENCES 45 - JVC KD-AR880 | Instructions - Page 142
de changer les informations du canal et audio. Le texte d'information est temporairement indisponible. • La radio satellite ne fonctionne pas du tout. Reconnectez cet appareil et la radio satellite correctement, puis réinitialisez l'appareil. Radio satellite * Change chaque fois que 20% de la - JVC KD-AR880 | Instructions - Page 143
de XM Satellite Radio, Inc. • iPod est une marque de commerce d'Apple Inc., enregistrée aux États-Unis et dans les autres pays. • La marque du mot et les logos Bluetooth sont la propriété de Bluetooth SIG, Inc. et toute utilisation de ces marques par Victor Company of Japan, Limited (JVC) est faite - JVC KD-AR880 | Instructions - Page 144
SECTION DE L'AMPLIFICATEUR AUDIO Puissance de sortie: KD-AR880: 5,0 V/20 kΩ en charge (pleine échelle) de grave/Impédance: KD-G830: 4,0 V/20 kΩ en charge (pleine échelle) Autre prise: KD-AR880: Changeur de CD, Entrée pour la télécommande de volant et LINE IN KD-G830: Changeur de CD - JVC KD-AR880 | Instructions - Page 145
CD Type: Système de détection du signal: Nombre de canaux: Réponse en fréquence: Plage dynamique: Rapport signal sur bruit Pleurage et scintillement: Format de décodage MP3: (MPEG1/2 Audio Layer 3) Format de décodage WMA (Windows Media® Audio): Format de décodage AAC (Advanced Audio d'installation: - JVC KD-AR880 | Instructions - Page 146
Having TROUBLE with operation? Please reset your unit Refer to page of How to reset your unit Still having trouble?? USA ONLY Call 1-800-252-5722 http://www.jvc.com We can help you! EN, SP, FR © 2007 Victor Company of Japan, Limited 0307DTSMDTJEIN - JVC KD-AR880 | Instructions - Page 147
Instructions CD RECEIVER KD-AR880/KD-G830
-
 1
1 -
 2
2 -
 3
3 -
 4
4 -
 5
5 -
 6
6 -
 7
7 -
8
-
9
-
10
-
11
-
12
-
13
-
14
-
15
-
16
-
17
-
18
-
19
-
20
-
21
-
22
-
23
-
24
-
25
-
26
-
27
-
28
-
29
-
30
-
31
-
32
-
33
-
34
-
35
-
36
-
37
-
38
-
39
-
40
-
41
-
42
-
43
-
44
-
45
-
46
-
47
-
48
-
49
-
50
-
51
-
52
-
53
-
54
-
55
-
56
-
57
-
58
-
59
-
60
-
61
-
62
-
63
-
64
-
65
-
66
-
67
-
68
-
69
-
70
-
71
-
72
-
73
-
74
-
75
-
76
-
77
-
78
-
79
-
80
-
81
-
82
-
83
-
84
-
85
-
86
-
87
-
88
-
89
-
90
-
91
-
92
-
93
-
94
-
95
-
96
-
97
-
98
-
99
-
100
-
101
-
102
-
103
-
104
-
105
-
106
-
107
-
108
-
109
-
110
-
111
-
112
-
113
-
114
-
115
-
116
-
117
-
118
-
119
-
120
-
121
-
122
-
123
-
124
-
125
-
126
-
127
-
128
-
129
-
130
-
131
-
132
-
133
-
134
-
135
-
136
-
137
-
138
-
139
-
140
-
141
-
142
-
143
-
144
-
145
-
146
-
147
 |
 |

ENGLISH
ESPAÑOL
FRANÇAIS
CD RECEIVER
KD-AR880/KD-G830
RECEPTOR CON CD
KD-AR880/KD-G830
RÉCEPTEUR CD
KD-AR880/KD-G830
For canceling the display demonstration, see page 6.
Para cancelar la demostración en pantalla, consulte la página 6.
Pour annuler la démonstration des affichages, référez-vous à la page 6.
For installation and connections, refer to the separate manual.
Para la instalación y las conexiones, refiérase al manual separado.
Pour l’installation et les raccordements, se référer au manuel séparé.
INSTRUCTIONS
MANUAL DE INSTRUCCIONES
MANUEL D’INSTRUCTIONS
GET0434-001A
[J]
For customer Use:
Enter below the Model
No. and Serial No. which
are located on the top or
bottom of the cabinet. Retain
this information for future
reference.
Model No.
Serial No.