JVC KD-T900BTS Instruction Manual America - Page 35
References
 |
View all JVC KD-T900BTS manuals
Add to My Manuals
Save this manual to your list of manuals |
Page 35 highlights
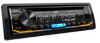
DISPLAY SETTINGS [COLOR] (for KD-T905BTS/KD-T900BTS/KD-T805BTS/KD-TD90BTS) [PRESET] Selects illumination colors for the buttons on different zones separately. 1 Select a zone ([ZONE 1], [ZONE 2], [ALL ZONE]). (See the illustration on page 30.) 2 Select a color for the selected zone. • [COLOR 01] to [COLOR 49] • [USER]: The color you have created for [DAY COLOR] or [NIGHT COLOR] is shown. • [COLOR FLOW01] to [COLOR FLOW03]: Color changes at different speeds. • [CRYSTAL]/[FLOWER]/[FOREST]/[GRADATION]/[OCEAN]/[RELAX]/ [SUNSET]: The selected color pattern is shown.*4 (Selectable only when [ALL ZONE] is selected in step 1.) [DAY COLOR] [NIGHT COLOR] Stores your own day and night illumination colors for different zones. 1 Select a zone ([ZONE 1], [ZONE 2]). (See the illustration on page 30.) 2 [RED]/[GREEN]/[BLUE]: Select a primary color. 3 [00] to [31]: Select the level. Repeat steps 2 and 3 for all the primary colors. • Your setting is stored to [USER] in [PRESET]. • [NIGHT COLOR] or [DAY COLOR] is changed by turning on or off your car's headlights. [COLOR GUIDE] [ON]: The illumination color of [ZONE 1] and [ZONE 2] change to white color when settings are performed on menu and list search, except in color setting mode. ; [OFF]: Cancels. *1 The illumination control wire connection is required. (Page 40) *2 Some characters or symbols will not be shown correctly (or will be blank). *3 Functionality depends on the type of phone used. *4 If one of these color patterns is selected, the [ZONE 1] and [ZONE 2] illumination colors will change to the default colors. REFERENCES Maintenance Cleaning the unit Wipe off dirt on the faceplate with a dry silicone or soft cloth. Cleaning the connector Detach the faceplate and clean the connector gently with a cotton swab. Be careful not to damage the connector. Handling discs Connector (on the reverse side of the faceplate) • Do not touch the recording surface of the disc. • Do not stick tape etc. on the disc, or use a disc with tape stuck on it. • Do not use any accessories for the disc. • Clean from the center of the disc and move outward. • Clean the disc with a dry silicone or soft cloth. Do not use any solvents. • When removing a disc from this unit, pull it out horizontally. • Remove burrs from the center hole and disc edge before inserting a disc. More information For: - Latest firmware updates and latest compatible item list - JVC original application - Any other latest information Visit . General • This unit can only play the following CDs: • DualDisc playback: The Non-DVD side of a "DualDisc" does not comply with the "Compact Disc Digital Audio" standard. Therefore, the use of Non-DVD side of a DualDisc on this product cannot be recommended. • For detailed information and notes about the playable audio files, visit . ENGLISH 31
-
 1
1 -
2
-
3
-
4
-
5
-
6
-
7
-
8
-
9
-
10
-
11
-
12
-
13
-
14
-
15
-
16
-
17
-
18
-
19
-
20
-
21
-
22
-
23
-
24
-
25
-
26
-
27
-
28
-
29
-
 30
30 -
 31
31 -
 32
32 -
 33
33 -
 34
34 -
 35
35 -
 36
36 -
 37
37 -
 38
38 -
 39
39 -
 40
40 -
41
-
42
-
43
-
44
-
45
-
46
-
47
-
48
-
49
-
50
-
51
-
52
-
53
-
54
-
55
-
56
-
57
-
58
-
59
-
60
-
61
-
62
-
63
-
64
-
65
-
66
-
67
-
68
-
69
-
70
-
71
-
72
-
73
-
74
-
75
-
76
-
77
-
78
-
79
-
80
-
81
-
82
-
83
-
84
-
85
-
86
-
87
-
88
-
89
-
90
-
91
-
92
-
93
-
94
-
95
-
96
-
97
-
98
-
99
-
100
-
101
-
102
-
103
-
104
-
105
-
106
-
107
-
108
-
109
-
110
-
111
-
112
-
113
-
114
-
115
-
116
-
117
-
118
-
119
-
120
-
121
-
122
-
123
-
124
-
125
-
126
-
127
-
128
-
129
-
130
-
131
-
132
 |
 |
