JVC RAP31B Instructions - Page 1
JVC RAP31B Manual
 |
UPC - 046838033742
View all JVC RAP31B manuals
Add to My Manuals
Save this manual to your list of manuals |
Page 1 highlights
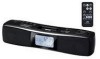
PORTABLE AUDIO SYSTEM RA-P31B/RA-P30W INSTRUCTIONS LVT1848-002A [C] EN ©2008 Victor Company of Japan, Limited 0208NYMCREBET Warnings, Cautions and Others / Mises en garde, précautions et indications diverses Thank you for purchasing a JVC product. Please read all instructions carefully before operation, to ensure your complete understanding and to obtain the best possible performance from the unit. (For U.S.A) CAUTION RISK OF ELECTRIC SHOCK DO NOT OPEN CAUTION: TO REDUCE THE RISK OF ELECTRIC SHOCK, DO NOT REMOVE COVER (OR BACK). NO USER SERVICEABLE PARTS INSIDE. REFER SERVICING TO QUALIFIED SERVICE PERSONNEL. The lightning flash with arrowhead symbol, within an equilateral triangle is intended to alert the user to the presence of uninsulated "dangerous voltage" within the product's enclosure that may be of sufficient magnitude to constitute a risk of electric shock to persons. The exclamation point within an equilateral triangle is intended to alert the user to the presence of important operating and maintenance (servicing) instructions in the literature accompanying the appliance. ATTENTION RISQUE D'ÉLECTROCUTION NE PAS OUVRIR ATTENTION: POUR ÉVITER TOUT RISQUE D'ÉLECTROCUTION, NE PAS OUVRIR LE BOîTIER. AUCUNE PIÈCE INTÉRIEURE N'EST À RÉGLER PAR L'UTILISATEUR. SE RÉFÉRER À UN AGENT QUALIFIÉ EN CAS DE PROBLÈME. Le symbole de I'éclair à I'intérieur d'un triangle équilatéral est destiné à alerter I'utilisateur sur la présence d'une "tension dangereuse" non isolée dans le boîtier du produit. Cette tension est suffisante pour provoquer I'électrocution de personnes. Le point d'exclamation à I'intérieur d'un triangle équilatéral est destiné à alerter I'utilisateur sur la présence d'opérations d'entretien importantes au sujet desquelles des renseignements se trouvent dans le manuel d'instructions. (For U.S.A) WARNING: TO REDUCE THE RISK OF FIRE OR ELECTRIC SHOCK, DO NOT EXPOSE THIS APPLIANCE TO RAIN OR MOISTURE. For U.S.A This equipment has been tested and found to comply with the limits for a Class B digital device, pursuant to part 15 of the FCC Rules. These limits are designed to provide reasonable protection against harmful interference in a residential installation. This equipment generates, uses and can radiate radio frequency energy and, if not installed and used in accordance with the instructions, may cause harmful interference to radio communications. However, there is no guarantee that interference will not occur in a particular installation. If this equipment does cause harmful interference to radio or television reception, which can be determined by turning the equipment off and on, the user is encouraged to try to correct the interference by one or more of the following measures: Reorient or relocate the receiving antenna. Increase the separation between the equipment and receiver. Connect the equipment into an outlet on a circuit different from that to which the receiver is connected. Consult the dealer or an experienced radio/TV technician for help. CAUTION Changes or modifications not approved by JVC could void the user's authority to operate the equipment. For Canada/pour le Canada THIS DIGITAL APPARATUS DOES NOT EXCEED THE CLASS B LIMITS FOR RADIO NOISE EMISSIONS FROM DIGITAL APPARATUS AS SET OUT IN THE INTERFERENCE-CAUSING EQUIPMENT STANDARD ENTITLED "DIGITAL APPARATUS," ICES-003 OF THE DEPARTMENT OF COMMUNICATIONS. CET APPAREIL NUMERIQUE RESPECTE LES LIMITES DE BRUITS RADIOELECTRIQUES APPLICABLES AUX APPAREILS NUMIRIQUES DE CLASSE B PRESCRITES DANS LA NORME SUR LE MATERIEL BROUILLEUR; "APPAREILS NUMERIQUES", NMB-003 EDICTEE PAR LE MINISTRE DES COMMUNICATIONS. Precautions • Install in a place which is level, dry and neither too hot nor too cold-between 5°C and 35°C (41°F and 95°F). • Install the System in a location with adequate ventilation to prevent internal heat buildup inside the System. Rating label is placed on the exterior of the bottom. DO NOT install the System in a location near heat sources, or in a place subject to direct sunlight, excessive dust or vibration. • Leave sufficient distance between the System and the TV. • Keep the speakers away from the TV to avoid interference with TV. Caution: Proper Ventilation To avoid risk of electric shock and fire, and to prevent damage, locate the apparatus as follows: 1. Front: No obstructions and open spacing. 2. Sides/ Top/ Back: No obstructions should be placed in the areas shown by the dimensions below. 3. Bottom: Place on the level surface. Maintain an adequate air path for ventilation by placing on a stand with a height of 10 cm or more. Attention: Aération correcte Pour prévenir tout risque de décharge électrique ou d'incendie et éviter toute détérioration, installez l'appareil de la manière suivante: 1. Avant: Bien dégagé de tout objet. 2. Côtés/dessus/dessous: Assurez-vous que rien ne bloque les espaces indiqués sur le schéma ci-dessous. 3. Dessous: Posez l'appareil sur une surface plane et horizontale. Veillez à ce que sa ventilation correcte puisse se faire en le plaçant sur un support d'au moins dix centimètres de hauteur. Front Face 15cm 15cm Side Côté 15cm 15cm 15cm 10cm Getting Started Supplied Accessories After unpacking, check to be sure that you have all the following items. • Remote control • AC adapter • CR2025 (×2) lithium coin batteries One is loaded on the remote control at the factory. Prepare the Remote Control • When you use the remote control for the first time, pull out the insulation sheet. Replacing the Battery in the Remote Control • Insert the battery into the remote control by matching the polarity (+ and -) correctly. Insulation sheet (Front side) Lithium coin battery (CR2025) (Rear side) Warning • Store the battery in a place where children cannot reach. If a child accidentally swallows the battery, consult a doctor immediately. • Do not recharge, short, disassemble or heat the battery or dispose of it in a fire. Doing any of these things may cause the battery to give off heat, crack, or start a fire. • Do not leave the battery with other metallic materials. Doing this may cause the battery to give off heat, crack, or start a fire. • When throwing away or saving the battery, wrap it in tape and insulate; otherwise, the battery may start to give off heat, crack, or start a fire. • Do not poke the battery with tweezers or similar tools. Doing this may cause the battery to give off heat, crack, or start a fire. • Dispose of battery in the proper manner, according to federal, state, and local regulations. • The batteries (battery pack or batteries installed ) shall not be exposed to excessive heat source such as sunshine, fire or the like. CAUTION: Danger of explosion if battery is incorrectly replaced. Replace only with the same or equivalent type. Preparation of the Unit Loading batteries for the Unit (The battery power supply) Insert three batteries to each compartment (six batteries total). Be sure to match the poles (+/-) correctly. While the AC adapter is connected to the wall outlet, the unit works without batteries. R6 (SUM-3)/AA (15F) (not supplied) Open the battery compartment cover by pressing the small tab. Close the cover in the order shown by the numbers. Loading batteries for the Clock Be sure to match the poles (+/-) correctly. Lithium coin battery (CR2025) (supplied) Plus terminal FM wire antenna Side of the battery Plus terminal Press the tab to open Insert the battery with pushing the plus Close the cover in the order the cover. terminal up to be sure the terminal shown by the numbers. contacts the side of the battery. Time to change the battery As the battery is running out, the display indication dims or the alarm may beep at the time the alarm is not set at. Replace the battery in such cases. Connecting the AC adapter To a wall outlet Plug the AC adapter only after all connections are completed. AC adapter (supplied) RA-P31B: AA-R9031 / RA-P30W: AA-R9028 CAUTION: To avoid risk of fire, and to prevent damage. • Do not use AC adapters except for the supplied AC adapter. • Do not use the supplied AC adapter for other equipment. Basic and Common Operations Press Functions • Light the display screen for 5 seconds when the power is turned off. • Temporarily stop the alarm sound when the alarm is ringing (SNOOZE). (see "To stop the alarm sound") Turn on or off the power Adjust the volume Press Functions Turns on or off the power When the power is turned off at volume level "15" or higher, the unit automatically sets the volume level to "14" the next time it is turned on. Press Functions Adjust the volume level from 00 to a maximum of 20. -: Turn down the volume. +: Turn up the volume. Press Functions • Switch on/off the SURROUND. You can enjoy music with spatial and deep sound in this mode. (The mode is not effective when the monaural is selected.) • While the clock or the alarm time are set, return to the previous item. See "How to set the time and use the alarm" Connector plug See "How to set the Remote control time and use the alarm" sensor Press FM MODE/ ¢ 4 38 Functions • Switch on/off the backlight when the button is held down. • Switch FM stereo/monaural when FM is selected. (see "Playing back from iPod" and "Listening to FM Broadcasts") Select a source Press Functions Select a source iPod → FM → AUX Display Information Date Day of the week Current time/ alarm time Explanation of Icons Off: current time / On: alarm time Off: alarm off / On: alarm on / Blinking: alarm sounding (When "TIMER PLAY" is set) Blinks while snoozing (the alarm is paused) SLEEP Lighting when the sleep mode is selected. Sound source indicator iPod/FM/AUX (blinks while muted) When adjusting the volume 00 - 20 When FM radio is selected P01 - P20 (channel) / 87.5 - 108.0 MHz (frequency) When the source is set to iPod and the iPod (slow blinking) alarm is set to TIMER PLAY When the source is set to FM radio and 87.5 - 108.0 MHz ↔ P01-P20 the alarm is set to TIMER PLAY When battery power is low - - - When trying to set alarm to TIMER PLAY while selecting AUX SURROUND starts lighting when it is switched on. "STEREO" is displayed when an FM stereo broadcast is received. "MONO" is displayed when the monaural is selected. (see "Listening to FM Broadcasts ") Current time: Blinking / Other Clock Display: Lighting
-
 1
1 -
 2
2
 |
 |
