JVC TK-C215V4U Instructions - Page 17
Mounting, Adjusting Images, Turn the camera unit in the clockwise
 |
UPC - 046838023170
View all JVC TK-C215V4U manuals
Add to My Manuals
Save this manual to your list of manuals |
Page 17 highlights
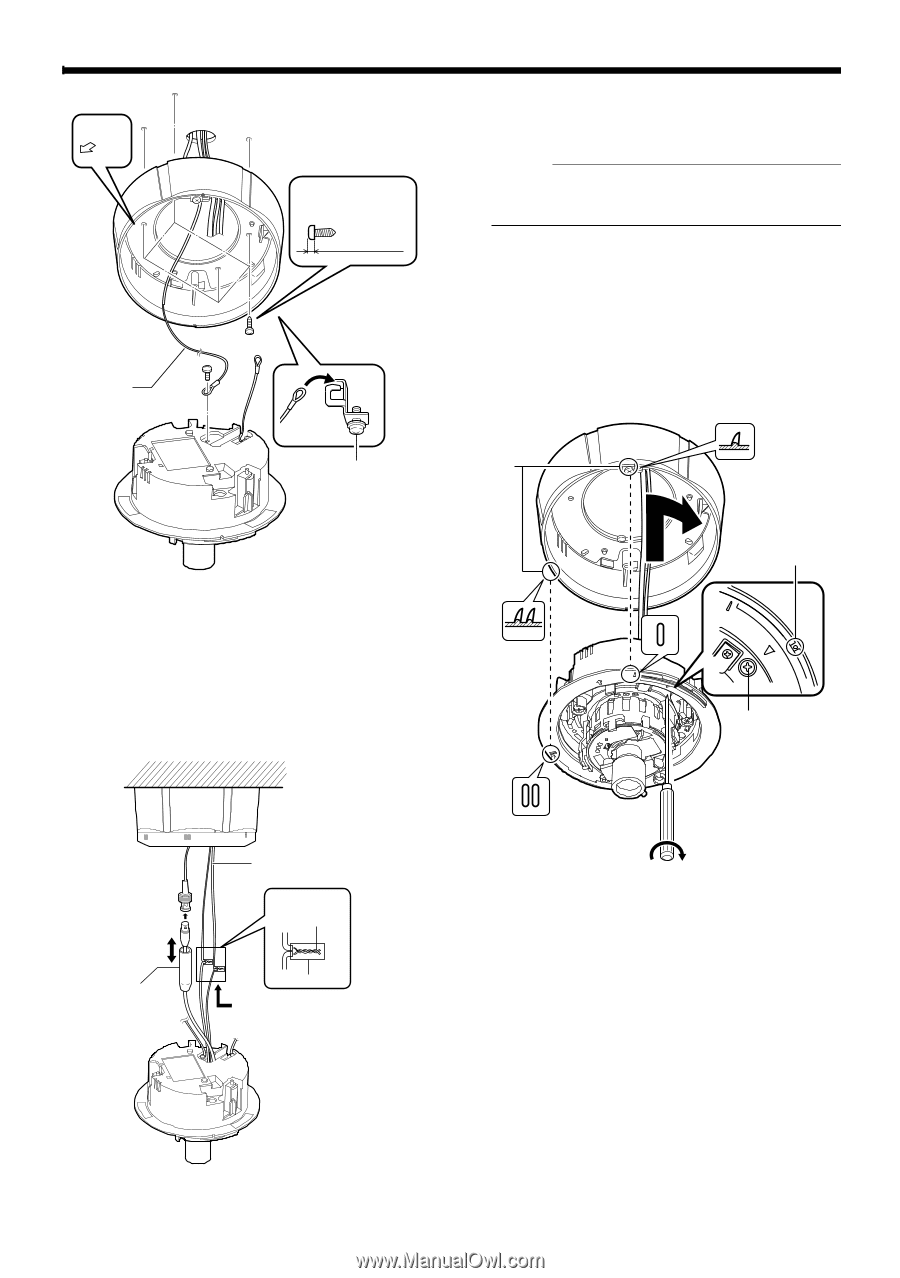
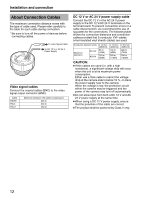
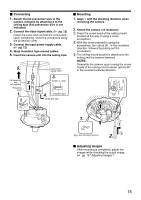
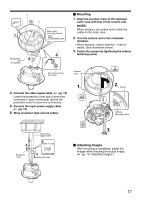
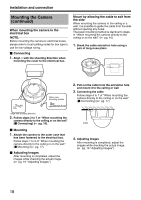
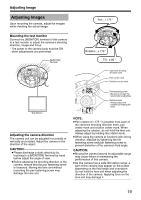
UPFRONT 1. Fall prevention wire (not supplied) Attach from the ceiling slab 3. Outer case mounting screws Less than 4 mm 2. Ⅵ Mounting 1. Align the position mark of the fastened outer case with that of the camera unit. NOTE: When doing so, be careful not to catch the cables in the outer case. 2. Turn the camera unit in the clockwise direction. T When doing so, ensure that the X mark is visible. (See illustration below) 3. Fasten the camera by tightening the camera fastening screw. Be sure to loosen the screw. Position mark 1. 4. Connect the video signal cable. (A pg. 12) Lower the protection cover and connect the connectors. Upon connecting, restore the protection cover to cover the connectors. 5. Connect the input power supply cable. (A pg. 12) 6. Wrap insulation tape around cables. 2. T Check Camera fastening screw 4. Protection cover Input power supply cable 5. Solder or crimp 6. Insulation tape Wrap with tape 3. Ⅵ Adjusting Images After mounting is completed, adjust the images while checking the actual image. (A pg. 19 AAdjusting ImagesB) 17
-
 1
1 -
2
-
3
-
4
-
5
-
6
-
7
-
8
-
9
-
10
-
11
-
 12
12 -
 13
13 -
 14
14 -
 15
15 -
 16
16 -
 17
17 -
 18
18 -
 19
19 -
 20
20 -
 21
21 -
 22
22 -
23
-
24
 |
 |