Jenn-Air JDSP536HM Marketing Insert - Page 1
Jenn-Air JDSP536HM Manual
 |
View all Jenn-Air JDSP536HM manuals
Add to My Manuals
Save this manual to your list of manuals |
Page 1 highlights
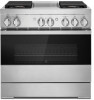
Temperature Probe Guide Using the Temperature Probe 1. Connect your appliance. The temperature probe will only work when the appliance is registered in the mobile app listed on your Quick Reference Guide and linked to your Wi-Fi. 2. Insert the temperature probe into the food. See "Temperature Probe Tips" for more information. 3. Insert the temperature probe into the jack, you will hear a tone when it is installed correctly. See picture below for jack locations. 4. Open the mobile app and select a cooking cycle designed to work with the temperature probe. This will vary by model. NOTE: The temperature probe must be inserted before opening the mobile app to select a cycle that utilizes the temperature probe. 5. Use the mobile app to set the desired Probe Temperature, Cooking Cycle, Oven Temperature, and Start the Cycle. ■ If the temperature probe is not connected, the mobile app will display an error message. ■ Only specific cycles can be used with the temperature probe. 2 Temperature Probe Tips ■ Remove any racks above the food that are not in use. ■ Insert the probe into the food item. For meats, the probe tip should be located in the center of the thickest part of the meat and not into the fat or touching a bone. ■ Do not use the temperature probe on frozen food. ■ For the most accurate temperature readings, insert as much of the probe shaft as possible into the food. ■ Place the probe into the food and then connect the probe to the jack. ■ Keep probe as far away from the heat source as possible. ■ Always unplug and remove the temperature probe from oven when the cycle is complete. Troubleshooting ■ Ensure the temperature probe is fully seated into the jack, the range will make a tone when the probe is inserted. See picture below for reference. 1 1 Temperature Probe Jack (30", 36", and main cavity on 48" models 5 2 Temperature probe partially inserted Temperature probe fully inserted ■ The temperature probe can only be used from the mobile app. ■ Avoid removing the temperature probe once a probe cycle has been started until the cycle has completed. If removed, the cycle may need to be restarted to continue. ■ Ensure that the mobile app is using the latest version available. If problems persist, try reinstalling the mobile app. Temperature Probe Jack (Left cavity on 48" models only)
-
 1
1 -
 2
2
 |
 |
