Jenn-Air JGCP430HL Installation Instructions - Page 10
Installation Instructions
 |
View all Jenn-Air JGCP430HL manuals
Add to My Manuals
Save this manual to your list of manuals |
Page 10 highlights
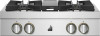
Gas Supply Line ■■ Provide a gas supply line of 3/4" (1.9 cm) rigid pipe to the cooktop location. A smaller size pipe on longer runs may result in insufficient gas supply. With Propane gas, piping or tubing size can be 1/2" (1.3 cm) minimum. Usually, Propane gas suppliers determine the size and materials used in the system. NOTE: Pipe-joint compounds that resist the action of Propane gas must be used. Do not use TEFLON®† tape. ■■ Flexible metal appliance connector: ■■ If local codes permit, a new CSA design-certified, 4-5 ft (122-152 cm) long, 5/8" (1.6 cm) or 3/4" (1.9 cm) I.D., flexible metal appliance connector may be used for connecting the cooktop to the gas supply line. ■■ A 1/2" (1.3 cm) male pipe thread is needed for connection to the female pipe threads of the inlet to the appliance pressure regulator. ■■ Do not kink or damage the flexible metal tubing when moving the cooktop. ■■ Must include a shut-off valve: Install a manual gas line shut-off valve in an easily accessible location. Do not block access to shut-off valve. The valve is for turning on or shutting off gas to the cooktop. B A C A. Gas supply line B. Shut-off valve "open" position C. To cooktop Gas Pressure Regulator The gas pressure regulator supplied with this cooktop must be used. The inlet pressure to the regulator should be as follows for proper operation: Natural Gas: Minimum pressure: 5" (12.7 cm) WCP Maximum pressure: 14" (35.6 cm) WCP Propane Gas: Minimum pressure: 10" (25.4 cm) WCP Maximum pressure: 14" (35.6 cm) WCP Contact local gas supplier if you are not sure about the inlet pressure. Burner Input Rating - Altitude Input ratings shown on the model/serial/rating plate are for elevations up to 2,000 ft (609.6 m). For elevations above 2,000 ft (609.6 m), ratings need to be reduced at a rate of 4% for each 1,000 ft (304.8 m) above sea level (not applicable for Canada). Gas Supply Pressure Testing Gas supply pressure for testing regulator must be at least 1" (2.5 cm) water column pressure above the manifold pressure shown on the model/serial/rating plate. Line pressure testing above 1/2 psi (3.5 kPa) gauge (14" [35.6 cm] WCP) The cooktop and its individual shut-off valve must be disconnected from the gas supply piping system during any pressure testing of that system at test pressures in excess of 1/2 psi (3.5 kPa). Line pressure testing at 1/2 psi (3.5 kPa) gauge (14" [35.6 cm] WCP) or lower The cooktop must be isolated from the gas supply piping system by closing its individual manual shut-off valve during any pressure testing of the gas supply piping system at test pressures equal to or less than 1/2 psi (3.5 kPa). INSTALLATION INSTRUCTIONS Install Cooktop WARNING Excessive Weight Hazard Use two or more people to move and install cooktop. Failure to do so can result in back or other injury. Write down the model and serial numbers before installing the cooktop. Both numbers are located on the left front underside of the burner base. Unpack the parts supplied with your cooktop. The parts shipped with the cooktop depend on your model ordered. See the "Tools and Parts" section for a complete list of parts supplied with your cooktop. The pressure regulator and flexible stainless steel gas supply line connector can be assembled to the cooktop now or after the cooktop is installed in the cutout. See the "Make Gas Connection" section. 1. Decide on the final location for the cooktop. 2. Using two or more people, place the cooktop upside down on a covered surface. †®TEFLON is a registered trademark of Chemours. 10 3. Remove foam strip from packing containg literature. Remove backing from foam strip. Apply foam strip adhesive-side down along the left and right sides of the cooktop trim. NOTE: The foam strip helps the cooktop sit flat on uneven counters and avoids damage to the countertop surface. A B C A. Cooktop base B. Foam strip C. Cooktop 4. Using two or more people, turn cooktop right side up.
-
 1
1 -
2
-
3
-
4
-
 5
5 -
 6
6 -
 7
7 -
 8
8 -
 9
9 -
 10
10 -
 11
11 -
 12
12 -
 13
13 -
 14
14 -
 15
15 -
16
-
17
-
18
-
19
-
20
-
21
-
22
-
23
-
24
-
25
-
26
-
27
-
28
-
29
-
30
-
31
-
32
-
33
-
34
-
35
-
36
 |
 |
