Jenn-Air JGCP536WP Installation Instruction - Page 11
Gas Conversions
 |
View all Jenn-Air JGCP536WP manuals
Add to My Manuals
Save this manual to your list of manuals |
Page 11 highlights
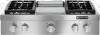
18. Set the control console back into place on the cooktop. For a proper fit, the flange of the control console must hook over the lip on the front of the cooktop. 19. Check that the control console is flush with the top edge of the cooktop. A B A. Control console flange B. Front lip of range cooktop A A. Flush with top of cooktop 20. Replace the 2 screws on each side of the control console. 21. Push the cooktop back into place in the cutout. 22. Replace the control knobs. 23. Replace burner grates. 24. Plug in cooktop or reconnect power. 25. Test the flame by turning the control from LO to HI, checking the flame at each setting. GAS CONVERSIONS IMPORTANT: Gas conversions from Natural gas to LP gas must be done by a qualified installer. WARNING LP Gas Conversion 1. Turn the manual shutoff valve to the closed position. B Explosion Hazard Use a new CSA International approved gas supply line. Install a shut-off valve. Securely tighten all gas connections. If connected to LP, have a qualified person make sure gas pressure does not exceed 14" (36 cm) water column. Examples of a qualified person include: licensed heating personnel, authorized gas company personnel, and authorized service personnel. Failure to do so can result in death, explosion, or fire. A C A. To cooktop B. Shutoff valve (closed position) C. Gas supply line 2. Unplug cooktop or disconnect power. To Convert Gas Pressure Regulator 1. Remove the access cap by using a wrench, turning the access cap counterclockwise. 2. Remove spring retainer from the cap by pushing against the flat side of the spring retainer. Look at the spring retainer to locate the "NAT" or "LP" position. Turn over the spring retainer so the "LP" is showing on the bottom. Snap the spring retainer back into the cap. Reinstall the cap onto the regulator. A B E D A. Access cap B. Gasket C. Gas pressure regulator C D. LP position E. NAT position 11
-
 1
1 -
2
-
3
-
4
-
5
-
 6
6 -
 7
7 -
 8
8 -
 9
9 -
 10
10 -
 11
11 -
 12
12 -
 13
13 -
 14
14 -
 15
15 -
 16
16 -
17
-
18
-
19
-
20
-
21
-
22
-
23
-
24
-
25
-
26
-
27
-
28
-
29
-
30
-
31
-
32
 |
 |
