Jenn-Air JJW3830WS Use and Care - Page 11
Meat Thermometer, Oven Vents, Cooking Functions
 |
View all Jenn-Air JJW3830WS manuals
Add to My Manuals
Save this manual to your list of manuals |
Page 11 highlights
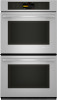
5. Pull the rack assembly slightly forward until the front edge drops and the sliding rails are on the rack guide. B A A. "V" cutout B. Rack guide B A Meat Thermometer On models without a temperature probe, use a meat thermometer to determine whether meat, poultry and fish are cooked to the desired degree of doneness. The internal temperature, not appearance, should be used to determine doneness. A meat thermometer is not supplied with this appliance. Follow manufacturer's directions for using a meat thermometer. Oven Vent(s) A B C D E F A. "V" cutout B. Rack guide To Remove Roll-out Rack 1. Push the sliding shelf in completely so that it is closed and engaged with the slide rails. A B C A. Sliding shelf B. Slide rails C. Rack 2. Using 2 hands, lift up on the front edge of the rack assembly. Slowly push the rack assembly to the back wall of the oven so the front edge of the sliding shelf sits on the rack guides on the side of the oven cavity. The front edge of the rack should be higher than the back edge. 3. Using 2 hands, lift up the back of the rack assembly so that the front and back are level on the rack guides. 4. Pull the rack assembly out. To avoid damage to the sliding shelves, do not place more than 25 lbs (11.4 kg) on the rack. Do not clean the roll-out rack in a dishwasher. It may remove the rack's lubricant and affect its ability to slide. See the "General Cleaning" section for more information. G Single and Double Oven A. Control panel B. Oven vent C. Single oven or upper double oven G. Bottom vent Double Oven D. Upper oven E. Oven vent F. Lower oven G. Bottom vent The oven vent(s) should not be blocked or covered since they allow the inlet of fresh air into the cooling system. Also, the bottom vent should not be blocked or covered since it allows the inlet of fresh air into the cooling system and the outlet of hot air from the cooling system. Blocking or covering vents will cause poor air circulation, affecting cooking, cleaning and cooling results. Cooking Functions The Home Tab allows for easy access to the Most Used Modes, Gourmet Guides, Probe, and My Creations. 1. Touch the MODES tab to move to the Modes menu. 2. From the Modes menu, select one of the following options: Bake, No Preheat 1-rack Cooking, Broil, Keep Warm, Convect Bake, Convect Bake Rapid Preheat, Convect Broil, Convect Pastry, Convect Roast, Convect Slow Roast, True Convect, and Proof. 3. After touching the desired mode, you will move to the temperature screen or touch the Temperature tab to move to the Temperature screen. 4. The default temperature and its range is shown in the following table. To change the temperature, move the slider to enter a desired cooking temperature or touch the -5ºF (-1ºC) or +5ºF (+1ºC) buttons. 11
-
 1
1 -
2
-
3
-
4
-
5
-
 6
6 -
 7
7 -
 8
8 -
 9
9 -
 10
10 -
 11
11 -
 12
12 -
 13
13 -
 14
14 -
 15
15 -
 16
16 -
17
-
18
-
19
-
20
-
21
-
22
-
23
-
24
-
25
-
26
-
27
-
28
-
29
-
30
-
31
-
32
-
33
-
34
-
35
-
36
-
37
-
38
-
39
-
40
-
41
-
42
-
43
-
44
-
45
-
46
-
47
-
48
-
49
-
50
-
51
-
52
-
53
-
54
-
55
-
56
-
57
-
58
-
59
-
60
-
61
-
62
-
63
-
64
-
65
-
66
-
67
-
68
-
69
-
70
-
71
-
72
 |
 |
