Jenn-Air JS42SEDUDW Installation Instruction - Page 14
Euro-Style and Pro-Style, Custom Side Panels
 |
View all Jenn-Air JS42SEDUDW manuals
Add to My Manuals
Save this manual to your list of manuals |
Page 14 highlights
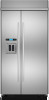
Backer Panels NOTES: ■ Dashed lines represent backer panel placement. ■ Illustration shows backer panels placed on decorative overlays. 6 15.7 cm) Top Offset 1⁵⁄₈" (4.13 cm) C Bottom Offset ¹⁄₂" (1.27 cm) Side Offset ¹⁄₂" (12.7 mm) Dispenser Frame (dispenser models only) The dispenser frame attaches to the panel with 4 screws. A B 22" (55.9 cm) Handle- Side Offset A ¹⁄₄" C (6.4 mm) 70¹⁄₂" (179.1 cm) 70¹⁄₂" (179.1 cm) 33¹⁄₄" (84.5 cm) A A A. Decorative panel B. Refrigerator door C. Dispenser frame The dispenser frame overlaps the dispenser cutout by 0.78 cm) on each side and ¹⁄₂" (1.27 cm) on the top and bottom. B Bottom Offset ¹⁄₈" (3.2 mm) Bottom Offset ¹⁄₈" (3.2 mm) Model A B 42 16³/₄" (42.55 cm) 22³/₄" (57.79 cm) 48 19¹/₄" (48.90 cm) 26¹/₄" (66.68 cm) C 39³/₄" (100.97 cm) 45³/₄" (116.21 cm) A A A 1.27 cm) Overlap Euro-Style and Pro-Style® Custom Side Panels Custom side panels may be needed when not enough space is available to have cabinets on both sides of the refrigerator or when the refrigerator is placed at the end of a cabinet run. You may choose an Inset, Flush, or Recessed Inset panel installation. Refrigerator and Side Trim Dimensions The width and height of a side panel are determined by the type of installation you are planning. NOTES: ■ The dimensions shown are actual product dimensions and may not reflect the needed panel installation dimensions. ■ The side panel should be a minimum of ½" (1.27 cm) thick to avoid warping. ■ If the opening depth is 25" (63.5 cm) or more, you may want to install a support board on rear wall. 14
-
 1
1 -
2
-
3
-
4
-
5
-
6
-
7
-
8
-
 9
9 -
 10
10 -
 11
11 -
 12
12 -
 13
13 -
 14
14 -
 15
15 -
 16
16 -
 17
17 -
 18
18 -
 19
19 -
20
-
21
-
22
-
23
-
24
-
25
-
26
-
27
-
28
-
29
-
30
-
31
-
32
-
33
-
34
-
35
-
36
-
37
-
38
-
39
-
40
-
41
-
42
-
43
-
44
-
45
-
46
-
47
-
48
-
49
-
50
-
51
-
52
-
53
-
54
-
55
-
56
-
57
-
58
-
59
-
60
-
61
-
62
-
63
-
64
-
65
-
66
-
67
-
68
 |
 |
