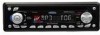
Jensen MP5720 Owners Manual
Jensen MP5720 - Radio / CD Manual
 |
UPC - 043258300317
View all Jensen MP5720 manuals
Add to My Manuals
Save this manual to your list of manuals |
Jensen MP5720 manual content summary:
- Jensen MP5720 | Owners Manual - Page 1
use all the features of your new Jensen receiver for maximum enjoyment. Preparation 1 Wiring 3 Installation 5 Basic Operation 6 Tuner Operation 8 CD Player Operation 11 MP3 Player Operation 12 Remote Control 14 Troubleshooting 15 Specifications 15 Warranty 15 Preparation Getting Started - Jensen MP5720 | Owners Manual - Page 2
de ambos lados del radio para quitar la media camisa. 2. Quite los tornillos transportadores - Quite los tornillos antes de insertar un CD. MP5720 Guide d'Utilisateur Merci! Merci d'avoir choisi un produit Jensen. Nous espérons que vous allez trouver les instructions dans ce guide de propriétaire - Jensen MP5720 | Owners Manual - Page 3
in the radio opening. 4. Install support strap to make unit more stable. Wiring Wiring with a Wiring Adapter (Purchased Separately) Connect Wires You can make all these connections without even being in the car. 1. Splice or crimp wires. 2. Attach wiring adapter to car wiring harness. Wiring Diagram - Jensen MP5720 | Owners Manual - Page 4
del radio. 4. Instale la abrazadera de soporte para que la unidad quede más estable. Fije el Interruptor Espaciador de Frecuencia La parte de el amperaje adecuado. Si utiliza un fusible incorrecto puede dañar la radio. El MP5720 utiliza un fusible de 15 amperios ubicado bajo el conector de cables - Jensen MP5720 | Owners Manual - Page 5
MP5720 Installation Final Installation 1. Connect wiring adapter to existing wiring harness. 2. Connect antenna lead. 3. Slide radio chassis into half-sleeve. 4. Secure radio to bracket using nut (if possible). 5. Replace LOC MUT PAU SCN CD RECEIVER RPT SHF SCN RX DIM BND/LOU AMS DSP MOD SW - Jensen MP5720 | Owners Manual - Page 6
CD Player Operation section). To turn the unit off, press and hold the POWER (2) button. 2. Sound AUX IN MP5720 3 4 MP3 MON LO/DX MUTE MOSFET 50 WATTS X 4 MP3 /CD RECEIVER / MP3 AS/PS DISP 0 7 MODE 19 18 17 16 67 15 MP5720 Presione la perilla de control de volumen para seguir sale - Jensen MP5720 | Owners Manual - Page 7
MP5720 Basic Operation (continued) 4. Loudness Press and hold the BAND (19) button > 3 seconds to activate the Loudness. When the Loudness is on, LOUD appears in the - Jensen MP5720 | Owners Manual - Page 8
audio source (MP3, cassette player, etc.). 9. Front Panel the radio and press into SCAN CD4720 AUX IN AADUJDUISOT AMS CD RECEIVER DISP Stereo Press MON button (21) to select mono or stereo mode. You can sometimes improve reception of distant stations by selecting mono operation. MP5720 - Jensen MP5720 | Owners Manual - Page 9
Fonctionnement de la Radio RELEASE AUX IN MP5720 MP3 MON LO/DX MUTE MOSFET 50 WATTS X 4 MP3 /CD RECEIVER / MP3 AS/PS DISP 0 7 MODE 19 18 17 21 6 8 9 10 11 12 13 14 Operación de la Radio (continuado) 13. Selección de Emisora Manual Pulse +>> (17) o - Jensen MP5720 | Owners Manual - Page 10
AS/PS (14) for > 3 seconds. The new stations replace stations already stored in that band. Preset Scan Scan stations stored in AUX IN MP5720 MOSFET 50 WATTS X 4 MP3 MON LO/DX MUTE MP3 /CD AS/PS (14) por menos de 3 segundos. La radio hará una pausa de 5 segundos en cada emisora que encuentre. - Jensen MP5720 | Owners Manual - Page 11
on the current disk. Press SCN again to stop the scan function. CD/MP3 Player Operation Operación del Reproductor de CD/MP3 Fonctionnement du Lecteur CD/MP3 1 RELEASE AUX IN MP5720 MP3 MON LO/DX MUTE 24 MOSFET 50 WATTS X 4 MP3 /CD RECEIVER / MP3 AS/PS DISP 0 7 MODE 25 18 17 16 8 9 10 - Jensen MP5720 | Owners Manual - Page 12
le bouton SHF pour annuler la fonction. Soin du CD Évitez d'exposer le lecteur de CD à des températures extrémes. Ne conduisez pas votre véhicule lorsqu'un CD se trouve à demi engagé dans la fente. MP5720 MP3 Player Operation Instructions for Insert/Eject, Play/Pause, Track Selection, Scan, Repeat - Jensen MP5720 | Owners Manual - Page 13
MP5720 MP3 Player Operation (continued) Operación del Equipo de MP3 (continuado) 23. los detalles dominantes de la asignación.) 3. Presione el botón de SEL (3) para confirmar la entrada de cada carácter. 6. Press BAND (19) to play the selected song/file. Searching from the Root Directory 1. - Jensen MP5720 | Owners Manual - Page 14
la BAND (19) pour jouer votre choix. MP5720 Remote Control The remote control will allow you to control the basic functions of the MP5720. The remote control sensor is at the top left of the BAND (19) button. Remote Control Prêt à être Télécommandé Control Remoto MOD = MODE BND = BAND DSP = DISP - Jensen MP5720 | Owners Manual - Page 15
(CD Player) Mechanism error Error-2 (CD Player) Servo error CD skips too much Receiver mount is not solid or backstrap is not secure Corrective Action Check connection with test light; check vehicle fuse with test light Replace fuse Check/replace fuse Connect speaker harness; check speaker wires - Jensen MP5720 | Owners Manual - Page 16
Error-1 (Reproductor de Error del mecanismo CD) Presione el botón RESET. Inserte el disco y vuelva a intentar Error-2 (Reproductor de Error de servo CD radio hacia fuera del tablero de instrumentos. MP5720 Especificationes Reproductor de CD o cualquiera de las partes del mismo, bajo circunstancias - Jensen MP5720 | Owners Manual - Page 17
MP5720 Error-1 (Lecteur CD) Erreur de mécanisme Appuyez sur RESET, insérez le disque et essayez Error-2 (Lecteur CD appuyer sur le bouton RESET (20). Retrait de la Radio du Tableau de Bord Retirez la plaque avant. Retirez Garantie ne s'applique pas aux produits ou aux parties consituantes qui, de
-
 1
1 -
 2
2 -
 3
3 -
 4
4 -
 5
5 -
 6
6 -
 7
7 -
8
-
9
-
10
-
11
-
12
-
13
-
14
-
15
-
16
-
17
 |
 |

RELEASE
/
MP3 /CD RECEIVER
AUX IN
MP5720
MOSFET 50
WATTS
X4
MP3
0
DISP
7
MP3
MODE
AS/PS
LO/DX
MON
MUTE
Remove transport screws
Quite los tornillos transportadores
Enlevez les vis de transport
Remove half sleeve
Quite la media camisa
Enlevez le demi-fourreau
2
1
MP5720
Owner’s Manual
Thank You!
Thank you for choosing a Jensen product. We hope you will find the instructions in this owner’s
manual clear and easy to follow. If you take a few minutes to look through it, you’ll learn how to
use all the features of your new Jensen receiver for maximum enjoyment.
Preparation. . . . . . . . . . . . . . . . . . . . . . . . . . . . . . . . . . . . . . . . . . . . . . . . . . . . . . . . . . . . . . . 1
Wiring. . . . . . . . . . . . . . . . . . . . . . . . . . . . . . . . . . . . . . . . . . . . . . . . . . . . . . . . . . . . . . . . . . . 3
Installation . . . . . . . . . . . . . . . . . . . . . . . . . . . . . . . . . . . . . . . . . . . . . . . . . . . . . . . . . . . . . . . 5
Basic Operation. . . . . . . . . . . . . . . . . . . . . . . . . . . . . . . . . . . . . . . . . . . . . . . . . . . . . . . . . . . 6
Tuner Operation. . . . . . . . . . . . . . . . . . . . . . . . . . . . . . . . . . . . . . . . . . . . . . . . . . . . . . . . . . . 8
CD Player Operation . . . . . . . . . . . . . . . . . . . . . . . . . . . . . . . . . . . . . . . . . . . . . . . . . . . . . . . 11
MP3 Player Operation . . . . . . . . . . . . . . . . . . . . . . . . . . . . . . . . . . . . . . . . . . . . . . . . . . . . . . 12
Remote Control . . . . . . . . . . . . . . . . . . . . . . . . . . . . . . . . . . . . . . . . . . . . . . . . . . . . . . . . . . .14
Troubleshooting . . . . . . . . . . . . . . . . . . . . . . . . . . . . . . . . . . . . . . . . . . . . . . . . . . . . . . . . . .15
Specifications . . . . . . . . . . . . . . . . . . . . . . . . . . . . . . . . . . . . . . . . . . . . . . . . . . . . . . . . . . . .15
Warranty . . . . . . . . . . . . . . . . . . . . . . . . . . . . . . . . . . . . . . . . . . . . . . . . . . . . . . . . . . . . . . . . . 15
Preparation
Getting Started
It’s a good idea to read all of the instructions before beginning the installation.
Tools and Supplies
The following tools and supplies are needed to install the radio.
•
Torx type, flat-head and Phillips screwdrivers
•
Wire cutters and strippers
•
Tools to remove existing radio (screwdriver, socket wrench set or other tools)
•
Electrical tape
•
Crimping tool
•
Volt meter/test light
•
Crimp connections
•
18 gauge wire for power connections
•
16 – 18 gauge speaker wire
Speaker Requirements: Only connect speakers rated in the load impedance of 4 ohms.
Speakers with a load impedance less than 4 ohms could damage the unit.
Disconnect Battery
Before you begin, always disconnect the battery negative terminal.
Prepare Radio
1.
Remove half sleeve
– Press the metal levers on both sides to remove the half-sleeve
from the radio.
2.
Remove transport screws
– Remove screws before inserting a CD.
Audiovox Electronics Corporation
150 Marcus Boulevard
Hauppauge, NY 11788
1-800-323-4815
www.jensen.com
© 2004 Audiovox
v.123103
Prepare Radio
Preparar la Radio
Préparer la Radio
®