Jensen PCD120U Owners Manual - Page 2
Preparation
 |
View all Jensen PCD120U manuals
Add to My Manuals
Save this manual to your list of manuals |
Page 2 highlights
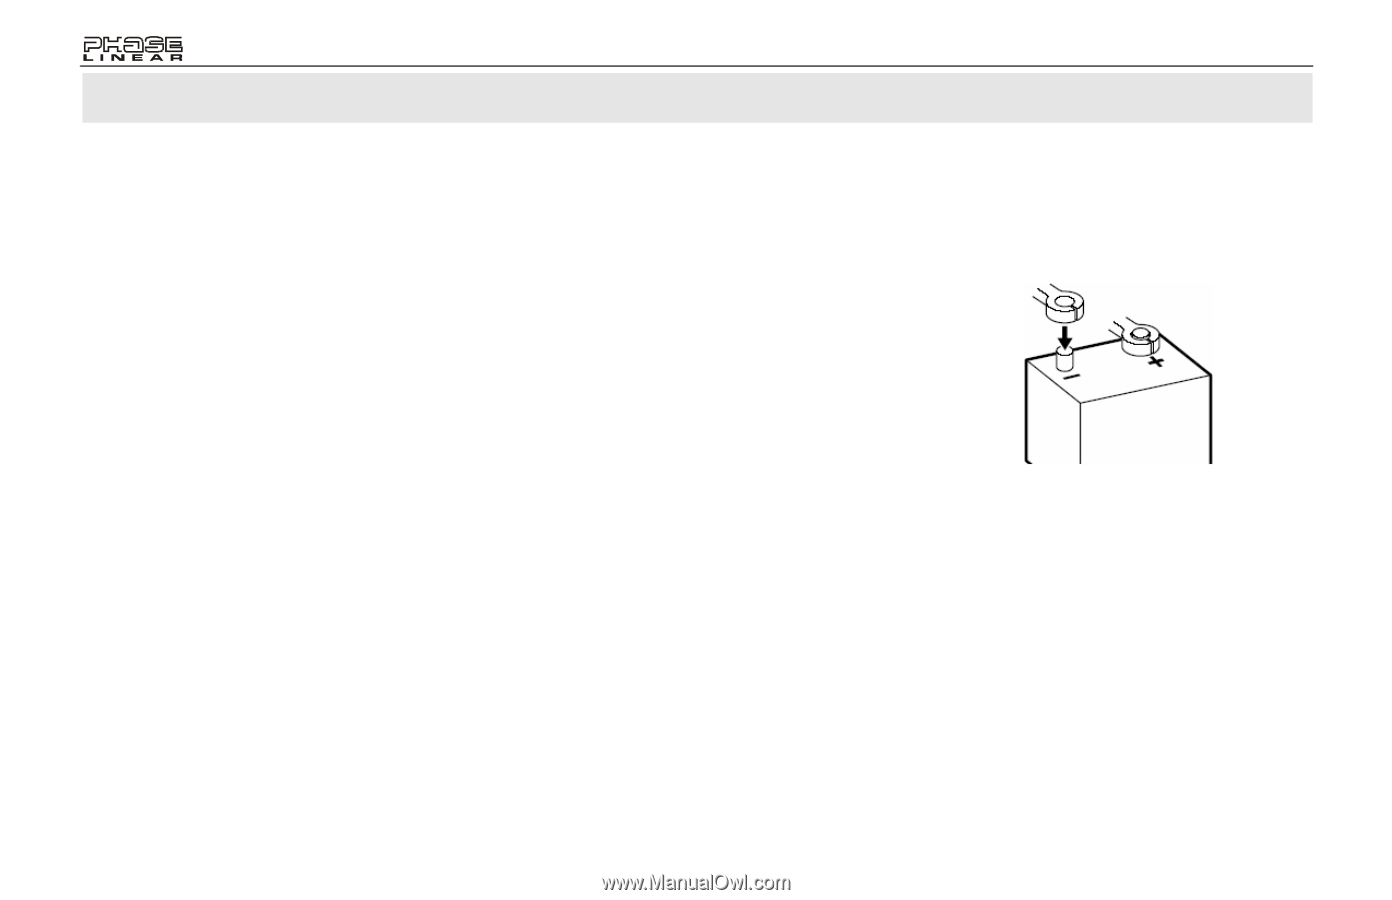
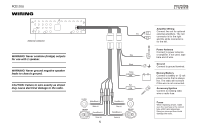
Para obtener instrucciones en Español, diríjase a la página 16. Pour des instructions en Francais, référez-vous à la page 30. PCD120U PREPARATION Getting Started It's a good idea to read all of the instructions before beginning the installation. Contents Installation Instructions 3 Wiring 5 Operating Instructions 6 CD Player Operating Instructions 9 Care and Maintenance 11 Specifications 12 90 Day Limited Warranty 13 Installation Requirements This unit is designed for installation in cars, trucks, and vans with an existing radio opening. In many cases, a special installation kit will be required to mount the radio to the dashboard. These kits are available at electronics supply stores and car stereo specialty shops. Always check the kit application before purchasing to make sure the kit works with your vehicle. If you need a kit but cannot locate one, call our customer support line at 1-800-323-4815. (U.S.A. and Canada only.) Tools and Supplies The following tools and supplies are needed to install the radio. • Torx type, flathead and Philips screwdrivers • Wire cutters and strippers • Tools to remove existing radio (screwdriver, socket wrench set or other tools) • Electrical tape • Crimping tool • Volt meter/test light • Crimp connections • 18 gauge wire for power connections • 16-18 gauge speaker wire Speaker Requirements Only connect speakers rated with a load impedance of 4 ohms. Speakers with a load impedance of less than 4 ohms could damage the unit. Disconnect Battery Before you begin, disconnect the battery negative terminal. Toll-Free Installation Assistance If you require assistance, contact Technical Support at 1-800-323-4815 from 8:30 a.m. to 7:00 p.m. EST Monday through Friday and from 9:00 a.m. to 5:00 p.m. EST on Saturday. (U.S.A. and Canada only.) 2
-
 1
1 -
 2
2 -
 3
3 -
 4
4 -
 5
5 -
 6
6 -
 7
7 -
 8
8 -
9
-
10
-
11
-
12
-
13
-
14
-
15
-
16
-
17
-
18
-
19
-
20
-
21
-
22
-
23
-
24
-
25
-
26
-
27
-
28
-
29
-
30
-
31
-
32
-
33
-
34
-
35
-
36
-
37
-
38
-
39
-
40
-
41
 |
 |