Karcher EB 30/1 Operating instructions - Page 8
Danger, Warning, Caution, Attention
 |
View all Karcher EB 30/1 manuals
Add to My Manuals
Save this manual to your list of manuals |
Page 8 highlights
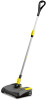
Intended use ● This electric broom is intended for cleaning dirty areas on hard and carpeted floors. ● This device is suitable for commercial use, e.g. in hotels, schools, hospitals, factories, shops, offices and rental businesses, using accessories and spare parts approved by KÄRCHER. ● The device is suitable to a limited extent for deeppile carpets. ● The device is not suitable for wet floor coverings. ● The device is not suitable for washed concrete, crushed stone or similar. Any other use is considered as improper use. The manufacturer is not responsible for any resultant damage; the risk for this is borne by the user alone. Hazard levels ƽ DANGER ● Indication of an imminent threat of danger that will lead to severe injuries or even death. ṇ WARNING ● Indication of a potentially dangerous situation that may lead to severe injuries or even death. ṇ CAUTION ● Indication of a potentially dangerous situation that may lead to minor injuries. ATTENTION ● Indication of a potentially dangerous situation that may lead to damage to property. Safety instructions In addition to the notes in the operating instructions, the general safety regulations and accident prevention guidelines applicable by law must be adhered to. ƽ DANGER ● Never reach into the rotating roller brush with your fingers or tools during operation. ● Do not charge the battery pack in an explosion-hazard environment. ● Danger of explosion. Do not charge any non-rechargeable battery. ● Do not throw battery packs into a fire or into the household rubbish. ● Avoid contact with fluid leaking from defective batteries. Immediately rinse off the fluid using water if contact is made, and also consult a doctor in the event of contact with the eyes. ṇ WARNING ● Only charge the battery pack us- ing the original charger enclosed or with a charger approved by KÄRCHER. ● Inspect the charger and battery pack for damage every time before use. Do not use any damaged devices. Only have damaged parts repaired by specialist personnel. ● Check that the mains voltage corresponds with the voltage stated on the type plate of the charger. ● Only use the charger for charging approved battery packs. ● Do not charge any damaged battery packs. Replace damaged battery packs with battery packs approved by KÄRCHER. ṇ CAUTION ● Remove the battery pack from the device before carrying out any service or care work. ● Do not use the battery pack when dirty or wet. ● Do not put the battery pack into the battery mount of the charger if it is dirty or wet. ATTENTION ● Short circuit hazard. Protect the contacts of the battery mount from metal parts. ● Short circuit hazard. Do not store the battery packs together with metal objects. Description of the device Illustration A 1 Universal joint with locking mechanism 2 On/off foot switch 3 Battery pack, removable 4 Unlocking button, battery pack 5 Dirt receptacle, removable 6 Dirt receptacle release mechanism 7 Casing 8 Interchangeable roller brush 9 Roller brush unlocking button 10 Telescopic handle, height adjustable 11 Twist grip, for height adjustment 12 Handle 13 Charger with charging status display and charging cable Symbols on the device Protect the charger from moisture and store in a dry place. The device is only suitable for use in rooms, do not expose the device to rain. Initial startup Mounting the telescopic handle and handle, and adjusting the height The telescopic handle consists of 3 parts. When assembling them, make sure that the parts snap into place. 1. Push the handle onto the longer handle with the twist grip. Illustration B 2. Put the longer and shorter handles into place by pressing the lock knob when putting them together. 3. Insert the entire handle with the lock knob towards the front into the joint on the device. 4. Loosen the twist grip and extend the handle to the desired working height, turn the handle into the correct position and tighten the twist grip. Charging the battery pack Note The battery pack is not charged on delivery. Charge before use and when necessary. Note The battery pack can only be charged when it is removed. Note If the charging time is exceeded, the charger switches to maintenance charging. Charging mode indicator lights up green. - Fault display: Charging mode indicator flashes red Contact the authorised Customer Service when in doubt. Description Quick charger BC 1/1.8 Charging time when the battery pack is empty (LiIon, 6.654-359.0) 110 min 8 English
-
 1
1 -
2
-
 3
3 -
 4
4 -
 5
5 -
 6
6 -
 7
7 -
 8
8 -
 9
9 -
 10
10 -
 11
11 -
 12
12 -
 13
13 -
14
-
15
-
16
-
17
-
18
-
19
-
20
-
21
-
22
-
23
-
24
-
25
-
26
-
27
-
28
-
29
-
30
-
31
-
32
-
33
-
34
-
35
-
36
-
37
-
38
-
39
-
40
-
41
-
42
-
43
-
44
-
45
-
46
-
47
-
48
-
49
-
50
-
51
-
52
-
53
-
54
-
55
-
56
-
57
-
58
-
59
-
60
-
61
-
62
-
63
-
64
-
65
-
66
-
67
-
68
-
69
-
70
-
71
-
72
-
73
-
74
-
75
-
76
-
77
-
78
-
79
-
80
-
81
-
82
-
83
-
84
-
85
-
86
-
87
-
88
-
89
-
90
-
91
-
92
-
93
-
94
-
95
-
96
-
97
-
98
-
99
-
100
-
101
-
102
-
103
-
104
 |
 |
