Kenmore 3241 Use and Care Guide - Page 8
Cooking, Setting, Surface, Controls
 |
View all Kenmore 3241 manuals
Add to My Manuals
Save this manual to your list of manuals |
Page 8 highlights
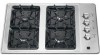
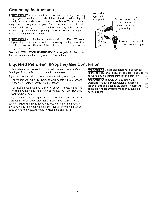
Surface Cooking Placement of Burner Bases and Caps (Models with sealed burner only) Your cooktop is equipped with three different sized burners: Power Burner (large), Standard Burner (medium) and Simmer Burner (small). Place the burner base over each gas opening, matching the burner base size with the gas opening size. Place the burner cap on each burner base, again matching the cap size to the burner base size. The cap for the each Burner has an inner locating ring which locates the burner cap in the center of the burner. Make sure each burner cap is properly aligned and level. Turn the burner on to determine if it will light. If the burner does not light, contact a Sears Service Center. Do not service the sealed burner yourself. Sealed Burner Setting Surface Controls The surface control knobs shown below may not look identical to the Surface Controls Knobs on your range; They are only representational. Open Burner Models To Adjust Low or "Simmer" Setting (some models) The burner flame, at low setting, can be adjusted if it is too high or too low; refer to the Installation Instructions for adjustment procedure. To operate the Surface Burner: 1. Place cooking utensil on burner. 2. Push in and turn the Surface Control knob to LITE. Note: All electronic ignitors will click at the same time. However, only the burner you are turning on will ignite. 3. Visually check that the burner has lit. 4. After the burner lights, turn the control knob to the desired flame size. The control knobs do not have to be set at a particular mark. Use the guides and adjust the flame as needed. DO NOT cook with the control knob in the LITE position. (The electronic ignitor will continue to click if left in the LITE position.) 8
-
 1
1 -
2
-
 3
3 -
 4
4 -
 5
5 -
 6
6 -
 7
7 -
 8
8 -
 9
9 -
 10
10 -
 11
11 -
 12
12 -
 13
13 -
14
-
15
-
16
 |
 |
