Kenmore 7973 Use and Care Guide - Page 21
Humidity, Controlled, Crisper, Removing, Glide'n'serve, Modular, Dairy
 |
UPC - 719192737976
View all Kenmore 7973 manuals
Add to My Manuals
Save this manual to your list of manuals |
Page 21 highlights
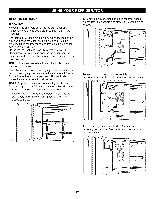
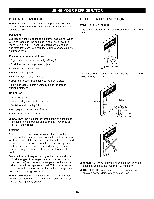
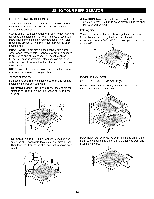
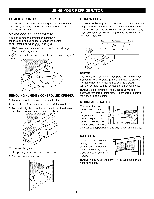
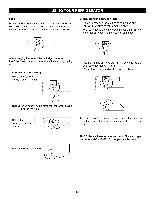
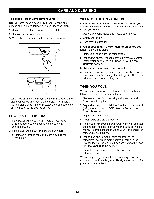
HUMIDITY CONTROLLED CRISPER The crispers provide fresher-tasting fruit and vegetables by letting you easily control humidity inside the drawer. The crispers include: A crisper drawer humidity control switch. You can control the amount of humidity in the moisture-sealed crispers. Adjust the control to any setting between _ and I •_ keeps moist air in the crisper for best storage of fresh, leafy vegetables. •_ lets moist air out of the crisper for best storage of fruits. GLIDE'N'SERVE The Glide'N'Serve provides storage space with a variable temperature control that keeps the compartment colder than refrigerator. This drawer can be used for large party trays, deli items, or beverages. (but this drawer can't be used for ve(letable.) COLD • ® ® TEMP CONTROL COLDER REMOVING HUMIDITY CONTROLLED CRISPER 1. To remove, pull the drawer out to full extension. 2. Lift the front of the crisper up, then pull it straight out. 3. To install, slightly tilt up the front and insert the drawer into the frame and 3ush it back into 31ace. To remove the glass 1. Lift up the glass under the crisper cover. 2. Pull the glass up and out. Controls The control regulates the air temperature in the drawer. Set control level to COLD (print on surface) to provide normal refrigerator temperature. Use the COLDER (print on surface) setting for meats or other deli items. NOTE: Cold air directed to the Glide'N'Serve can decrease refrigerator temperature. Refrigerator control may need to be adjusted. MODULAR DOOR BIN The door bins are removable for easy cleaning and adjusting. Simply lift the bin and pull it straight out to remove it. To replace the bin, slide it in above the desired support button and push down until it stops. DAIRY BIN To remove the dairy bin, simply lift it and pull straight out. To replace the dairy bin, slide it into place and push down until it stops. NOTE: The dairy bin will only fit in the top space on the right-hand door. 21
-
 1
1 -
2
-
3
-
4
-
5
-
6
-
7
-
8
-
9
-
10
-
11
-
12
-
13
-
14
-
15
-
 16
16 -
 17
17 -
 18
18 -
 19
19 -
 20
20 -
 21
21 -
 22
22 -
 23
23 -
 24
24 -
 25
25 -
 26
26 -
27
-
28
-
29
-
30
-
31
-
32
-
33
-
34
-
35
-
36
 |
 |
