Kenmore 8044 Use and Care Guide - Page 27
Cleaning, the Exterior, the Lint Filter, the Interior, Around, Under, the Dryer, Maintaining,
 |
UPC - 719192844087
View all Kenmore 8044 manuals
Add to My Manuals
Save this manual to your list of manuals |
Page 27 highlights
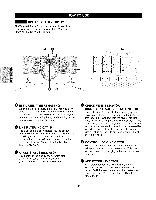
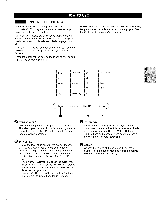
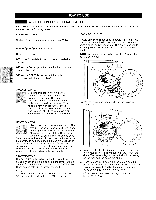
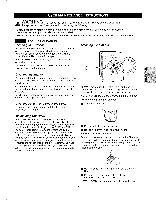
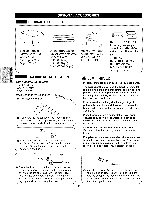
I I I^I^DM I M('_ A VV/-_nl_lll_lkJ" To reduce the risk of fire, electric shock, or injury to persons when using this appliance, follow basic precautions, including the following: • Unplug the dryer before cleaning to avoid the risk of electric shock. Failure to follow this warning can cause serious injury, fire, electrical shock, or death. • Never use harsh chemicals, abrasive cleaners, or solvents to clean the dryer. They will damage the finish. REGULAR CLEANING Cleaning the Exterior Proper care of your dryer can extend its life. The outside of the machine can be cleaned with warm water and a mild, nonabrasive household detergent. Immediately wipe off any spills with a soft, damp cloth. IMPORTANT: Do not use methylated spirits, solvents, or similar products. NEVER use steel wool or abrasive cleansers because they can damage the surface. Cleaning the Lint Filter Lint Filter Cleaning the Interior Wipe around the door opening and seal with a soft, damp cloth to prevent lint and dust buildup that could damage the door seal. Clean the window with a soft cloth dampened with warm water and a mild, nonabrasive household detergent; then wipe dry. NEVER use steel wool or abrasive cleansers; they can scratch or damage the surface. Cleaning Around and Under the Dryer Vacuum lint and dust from around the dryer and underneath it regularly. ALWAYS make sure the lint filter is clean before every cycle. The Check Lint Filter Light on the control panel will blink before every cycle to remind you. NOTE: NEVER operate the dryer without the lint filter. To remove lint between cycles: O Open the dryer door. Maintaining Ductwork Vent ductwork should be checked for lint buildup and cleaned at least once per year. If any noticeable reduction in drying performance occurs, check ductwork for obstructions and blockages. If the CHECK VENT indicator illuminates, the exhaust system should be checked immediately for damage or obstructions. The CHECK VENT indicator signals a serious reduction in exhaust airflow which will greatly reduce energy efficiency and increase drying times. Damaged or restricted exhaust systems are not covered by the dryer warranty. Damage to the dryer that is caused by damaged, restricted, or otherwise inadequate exhaust systems is not covered by the dryer warranty. Pull the lint filter straight up. Then: O Roll any lint off the filter with your fingers. Periodic thorough cleaning: Some fabric softeners can build up on the lint filter over time. This buildup can restrict the airflow through the filter reducing dryer efficiency and lengthening dry times. If the filter looks dark or dirty when held up to the light, follow these steps to clean: O Use hot soapy water and a stiff brush to clean the filter. Make sure the filter is completely dry before reinstalling and using the dryer. NOTE: NEVER operate the dryer with a wet lint filter. 27 I I
-
 1
1 -
2
-
3
-
4
-
5
-
6
-
7
-
8
-
9
-
10
-
11
-
12
-
13
-
14
-
15
-
16
-
17
-
18
-
19
-
20
-
21
-
 22
22 -
 23
23 -
 24
24 -
 25
25 -
 26
26 -
 27
27 -
 28
28 -
 29
29 -
 30
30 -
 31
31 -
 32
32 -
33
-
34
-
35
-
36
-
37
-
38
-
39
-
40
-
41
-
42
-
43
-
44
-
45
-
46
-
47
-
48
-
49
-
50
-
51
-
52
-
53
-
54
-
55
-
56
-
57
-
58
-
59
-
60
-
61
-
62
-
63
-
64
-
65
-
66
-
67
-
68
-
69
-
70
-
71
-
72
 |
 |
