Kenmore B06W03-4N Use and Care Guide - Page 22
Cleaning, Exterior, Surfaces, Cooking, Grates, cooking, cloth, Diffusers, Grease, Grill, Annual,
 |
View all Kenmore B06W03-4N manuals
Add to My Manuals
Save this manual to your list of manuals |
Page 22 highlights
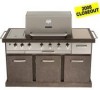
Proper care and maintenance will keep your grill in good operating condition and prolong its life. Follow these cleaning procedures on a timely basis and your grill will stay clean and operate with minimum effort. CAUTION: Be sure your grill is off and cool before cleaning, and always wear protective gloves when cleaning your grill Cleaning The Cooking Grates Wash your cooking grates in a mild soap and warm water solution. You can use a wash cloth, vegetable brush, or brass bristled brush. Never use any type of steel bristled brush. Dry them when finished. Cleaning the Heat Diffusers Wash the heat diffusers periodically in a soap and warm water solution. Use a vegetable brush to remove stubborn burnt-on cooking residue. Dry the heat diffusers thoroughly before you reinstall them into the firebox. Cleaning the Grease Tray and Pan To reduce the chance of fire, the grease tray and grease pan should be visually inspected before each grill use. Remove any grease and wash both with a mild soap and warm water solution. Cleaning the Znside of the Grill Lid Grease can have a tendency to build up on the inside of the grill lid and could drip onto the deck or patio when the lid is opened. Visually inspect the inside of the grill lid before each grill use. Remove any grease and wash with a mild soap and warm water solution. Annual Cleaning of the Grill Interior Burning-off excess food after every cookout will keep it ready for instant use. We recommend you periodically give the entire grill a thorough cleaning to minimize your risk of grease fire and keep the grill in good shape. Follow these steps: 1. Turn all burner valves to the "OFF" position. 2. Turn the LP gas tank valve to the "OFF" position. 3. Disconnect the regulator assembly from the gas tank. Inspect the hose for cracking, cuts or any other damage, and replace as necessary. Refer to the Parts List in this Operator's Manual. 4. Remove and clean the cooking grates, heat diffusers, warming rack, burners, and grease tray. 5. Cover each gas valve orifice with aluminum foil. 6. Brush the inside and bottom of the grill with a fiber pad or nylon brush and wash with a mild soap and warm water solution. Rinse thoroughly and let dry. 7. Remove aluminum foil from orifices and check each orifice for obstruction. 8. Replace the burners, ensuring the burners fit down over each valve orifice. 22 9. Check and clean each electrode tip. Adjust the spacing between the tips and the burner as necessary. The space between the electrode tip and burner should be approximately 3/16". 10. Replace the heat diffusers, grates, warming rack, and grease tray. 11. Reconnect the gas source and observe the burner flame for correct operation. Cleaning Exterior Surfaces: Cleaning Exterior Surfaces: Wash with a mild dish soap and warm water solution. A cloth, soft brush, or plastic cleaning pad can be used. Rinse thoroughly and wipe dry. Cleaning Exterior Stainless Steel Surfaces: Wash with a mild dish soap and warm water solution. Clean and polish with a stainless steel cleaner. There are many good quality stainless steel cleaners and polishes available. Follow the manufacturer's directions. Always polish in the direction of the lines. Do not allow dirt and grease to accumulate. Do not use steel wool as it will scratch the surface. Do not use abrasive cleaners and scrubbers. CAUTION: Heat, weathering, machine oils used in the manufacturing of stainless steel, and dirt can all cause exterior stainless steel surfaces to turn tan in color. In addition, the following products and naturally occurring substances in the outdoors will damage all stainless steel finishes. Use caution so they will not come in contact with your grill. Immediately wash them off and dry the stainless steel should they ever come in contact with your gas grill. They include, but are not limited to, pool chemicals (chlorine and bromine), lawn fertilizer, ice melting salts, sea or salt water, urine, bird droppings, and tree sap. Failure to comply with these instructions may result in a hazardous situation which, if not avoided, may result in injury. Keep grill area clear and free from combustible materials, gasoline and other flammable vapors and liquids. Do not obstruct the flow of air for combustion and ventilation. Keep the ventilation openings of the tank enclosure cabinet free and clear of debris.
-
 1
1 -
2
-
3
-
4
-
5
-
6
-
7
-
8
-
9
-
10
-
11
-
12
-
13
-
14
-
15
-
16
-
 17
17 -
 18
18 -
 19
19 -
 20
20 -
 21
21 -
 22
22 -
 23
23 -
 24
24 -
 25
25 -
 26
26 -
 27
27 -
28
-
29
-
30
 |
 |
