Kenwood KDC-C521FM Instruction Manual - Page 15
Installation, Angle adjustment switches, Installation of Display unit
 |
UPC - 019048152190
View all Kenwood KDC-C521FM manuals
Add to My Manuals
Save this manual to your list of manuals |
Page 15 highlights
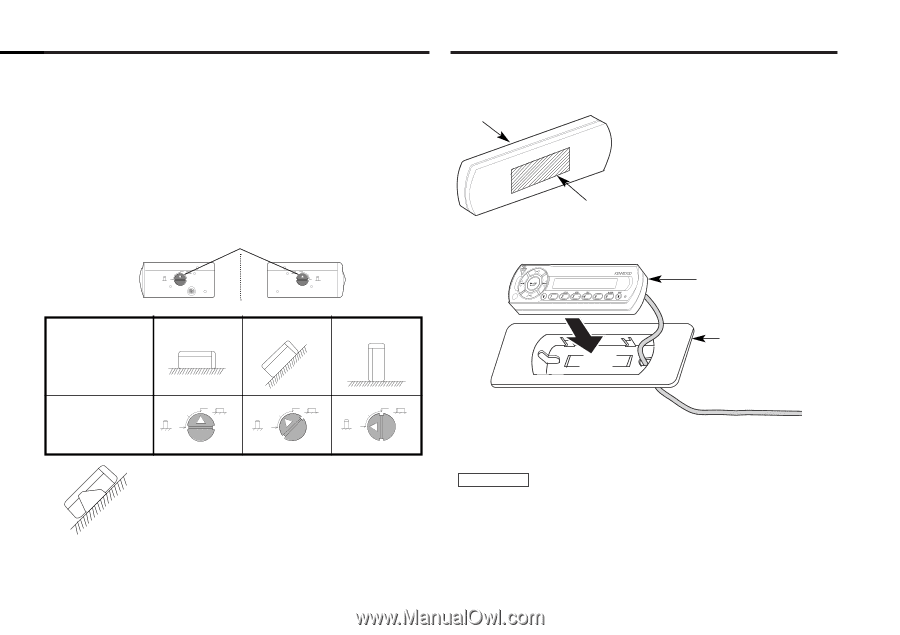
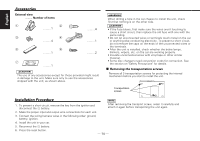
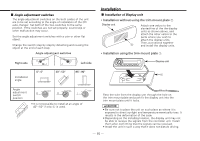
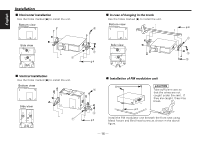
■ Angle adjustment switches The angle adjustment switches on the both saides of the unit are to be set according to the angle of installation of the CD auto changer. Set both of the two switches to the same position. If the switches are not set properly, sound skip or other malfunction may occur. Set the angle adjustment switches with a coin or other flat object. Change the switch step by step by detaching and reusing the object at the end of each step. Angle adjustment switches 0 45 90 Right side 0 45 90 Left side Installation angle 0°~5° 40°~50° 85°~90° Installation ■ Installation of Display unit • Installation without using the trim mount plate 7 Display unit Attach one velcro to the slanted-line of the the display units as shown above, and attach the other velcro to the parts where you wish to attach the display units. 5 Then, put velcros together and install the display units. • Installation using the trim mount plate 7 Display unit 7 Angle adjustment switch position 0 45 90 0 45 90 0 45 90 • It is not possible to install at an angle of 40°~50° if only 1 is used. Pass the wire from the display unit through the hole on the trim mount plate and push fit the display unit into the trim mount plate until it locks. 2CAUTION • Be sure not to place the unit on such place as where it is exposed to direct sunlight and temperature eventually rises. It results in the deformation of the case. • Depending on the installing location, the display unit may not be able to receive the signals from the controller unit. Install them after confirming that the signals can be received. • Install the unit in such a way that it does not disturb driving. - 15 -
-
 1
1 -
2
-
3
-
4
-
5
-
6
-
7
-
8
-
9
-
 10
10 -
 11
11 -
 12
12 -
 13
13 -
 14
14 -
 15
15 -
 16
16 -
 17
17 -
 18
18 -
 19
19 -
 20
20 -
21
-
22
 |
 |