Kenwood KNA-G610 Installation Manual - Page 2
What's Included, Installing the Main Unit, Installing the GPS Antenna, Installing Optional - receiver
 |
UPC - 019048188809
View all Kenwood KNA-G610 manuals
Add to My Manuals
Save this manual to your list of manuals |
Page 2 highlights
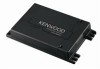
What's Included GPS antenna and metal plate main unit M3 x 12 machine screws (4) M3 nuts (4) M3 x 12 threadforming screws (4) wiring harness hook-and-loop fasteners (2) owner's manual installation manual warranty card caution card Installing the Main Unit Use the screws or the hook-and-loop fasteners provided to mount the main unit in the vehicle. Select a location that allows you to access the SD card slot on the unit. n CAUTION Do not install the unit where it will be exposed to direct sunlight, excessive heat or humidity, dust, spills, or liquids. Check for cables or other parts underneath the floor mat before cutting the floor mat. Installing the GPS Antenna n CAUTION Do not paint the antenna. This will impair or disable signal reception. Remove any object or accumulated snow, etc., from the top of the antenna. It will reduce reception strength. Do not pull the cord when removing the antenna or adjusting its position. This can cause a short or break the wires. The permanent adhesive on the back of the metal plate is extremely difficult to remove after it is installed. The GPS antenna can be installed either inside or outside the vehicle. It should be mounted horizontally for best GPS reception. The GPS antenna must have a clear view of the sky. If you install the antenna inside the vehicle, place it close to a window. GPS signals can pass through glass but not through metal. Refer to the image on the next page for recommended places to install the antenna. Place the GPS antenna on a metallic surface, such as the roof of your vehicle, for best reception. If a metallic surface is not available, mount the GPS antenna on the enclosed metal plate. See the next page for further instructions. Installing Optional Accessories For information on installing the optional FM traffic receiver, refer to the installation guide included with the traffic receiver. - 2 -
-
 1
1 -
 2
2 -
 3
3 -
 4
4 -
 5
5 -
 6
6 -
 7
7 -
 8
8 -
9
-
10
-
11
-
12
 |
 |
