Kenwood KRC-108S Instruction Manual - Page 14
Installation, Installing in Japanese-Made Cars - sleeve
 |
View all Kenwood KRC-108S manuals
Add to My Manuals
Save this manual to your list of manuals |
Page 14 highlights
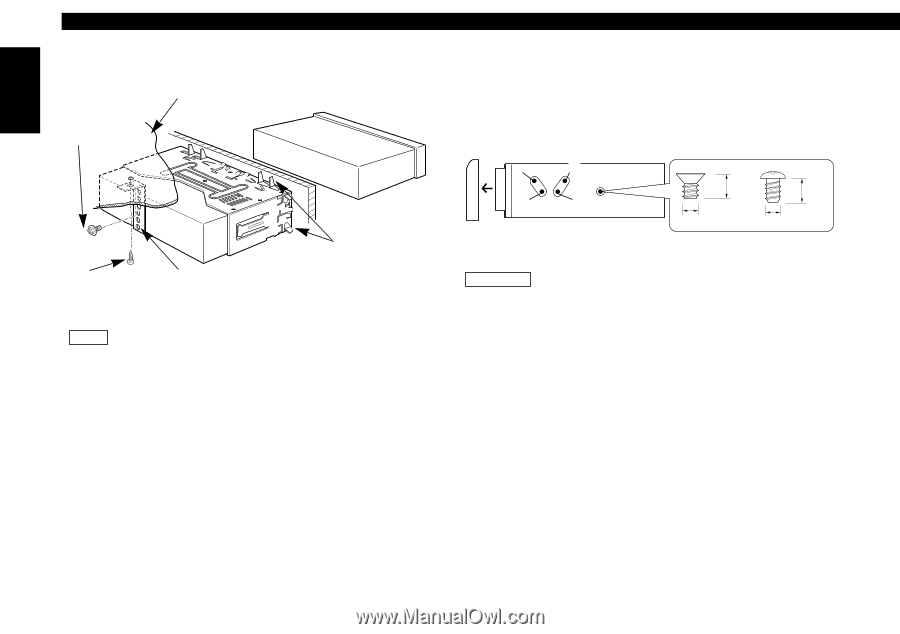
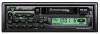
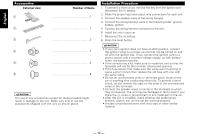
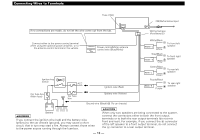
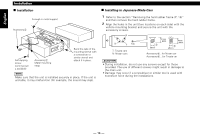
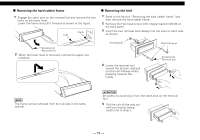
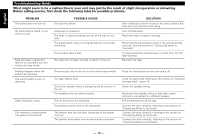
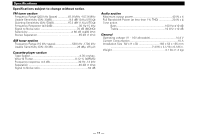
English Installation I Installation Firewall or metal support Accessory4 Self-tapping screw (commerciall y available) Accessory2 Metal mounting strap Bend the tabs of the mounting sleeve with a screwdriver or similar utensil and attach it in place. NOTE Make sure that the unit is installed securely in place. If the unit is unstable, it may malfunction (for example, the sound may skip). I Installing in Japanese-Made Cars 1 Refer to the section "Removing the hard rubber frame (P. 15)" and then remove the hard rubber frame. 2 Align the holes in the unit (two locations on each side) with the vehicle mounting bracket and secure the unit with the accessory screws. T N N T T/N T: Toyota cars N: Nissan cars 5 ø5mm 8 mm MAX. 6 ø5mm 8mm MAX. Accessory5...for Nissan car Accessory6 ...for Toyota car 2CAUTION • During installation, do not use any screws except for those provided. The use of different screws might result in damage to the main unit. • Damage may occur if a screwdriver or similar tool is used with excessive force during the installations. - 14 -
-
 1
1 -
2
-
3
-
4
-
5
-
6
-
7
-
8
-
 9
9 -
 10
10 -
 11
11 -
 12
12 -
 13
13 -
 14
14 -
 15
15 -
 16
16 -
 17
17
 |
 |